

I believe that games are still one of the most fun ways to get to know a new programming language. Since there is currently a shortage of beginner level game programming tutorials for Universal Apps, I thought I’d share with you how I did a simple shoot’em up for Windows and Windows Phone with shared code.
I’ve tried to include all the steps, so you can follow it like a hands on lab while doing your own version. You can find the finished tutorial from the Windows Store and Windows Phone Store to download and try it out. I also made the finished tutorial source available for you to play with.
Creating the project
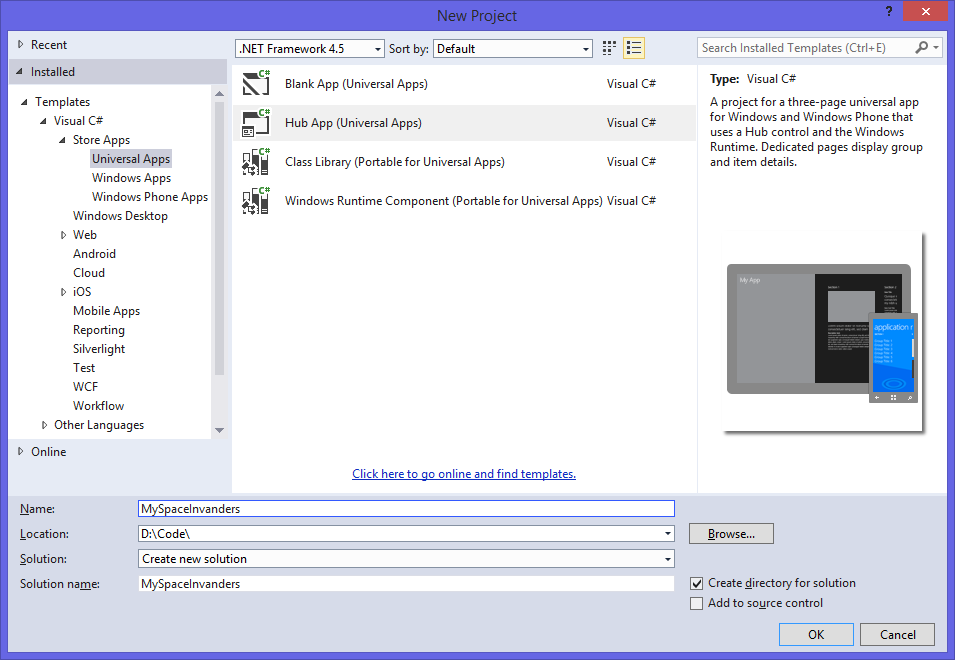
Creating the game project doesn’t differ from creating a normal app, so you would open the Visual Studio, go to File… New, Project, and select from under Visual C#, Store Apps and Universal Apps. As this is the most basic version of a game, we’re not doing MVVM but will keep it as simple as possible. For the same purpose, we select Hub App as a project type, and give it a name, for example “MySpaceInvanders.”
When you have the project set up, you have three projects in your solution tree on the right, “MySpaceInvanders.Windows,” “MySpaceInvanders.WindowsPhone” and “MySpaceInvanders.Shared.” We’ll do some housekeeping, and remove everything else from the solution by pressing the Delete key on top of the files, until left with a solution which looks like this:
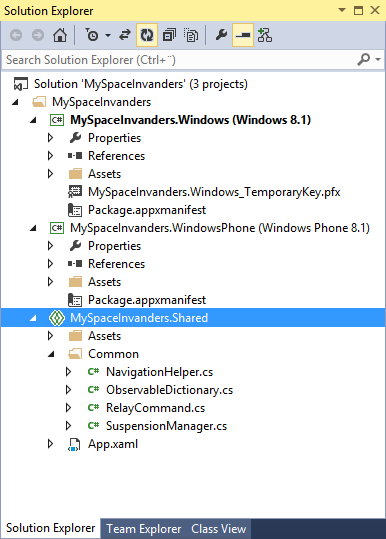
We’re going to put all the logic to the Shared project so it will be really easy to upkeep and keep adding features.
Next we’ll do some basic settings for the projects by going to the project settings. First open the Package.appxmanifest in MySpaceInvanders.WindowsPhone. On the Application –tab, select from Supported rotations “Landscape.” Now open the same file from MySpaceInvanders.Windows, and select also only “Landscape” and save your changes. Go to Visual Assets –tab in Package.appxmanifest and change Background color to #000000 for both projects as well.
Creating a start page
We’re forgetting the splash screens for now, and focusing on the first screen which will be where the game can be started, and high scores are visible. Right click on the solution explorer on the Shared –project, select Add, New Item, and Blank Page. Give the page name “StartPage.xaml” and click ok. Next we’ll set it as a start page by opening the App.xaml.cs file in the Shared –project, and going to the OnLaunched -method. There you will find a line of code like this:
if (!rootFrame.Navigate(typeof(MainPage), e.Arguments))Now we changed the MainPage text from that line to StartPage to launch our custom start up page when the app launches.
Open the StartPage.xaml, and copy the following on top of the <Grid> … </Grid> area of code:
<Grid>
    <Button x:Name="StartButton" Content="Start"
            Margin="0,12,0,0"
            HorizontalAlignment="Center"
            VerticalAlignment="Bottom"
            Height="105" Width="370"
            FontFamily="Georgia"
            FontSize="48"
            Click="OnStart"/>
    <TextBlock Text="UNIVERSAL "
               HorizontalAlignment="Center"
               VerticalAlignment="Top"
               Margin="0,53,0,0" TextWrapping="Wrap"
               FontFamily="Georgia" FontSize="48"/>
    <TextBlock Text="INVANDERS"
               HorizontalAlignment="Center"
               VerticalAlignment="Top"
               Margin="0,103,0,0"
               TextWrapping="Wrap"
               FontFamily="Georgia" FontSize="48"/>
    <Grid>
        <Grid.ColumnDefinitions>
            <ColumnDefinition/>
            <ColumnDefinition/>
        </Grid.ColumnDefinitions>
        <TextBlock Text="Highscore:"
                   Grid.Column="0"
                   HorizontalAlignment="Right"
                   VerticalAlignment="Top"
                   Margin="0,203,0,0"
                   TextWrapping="Wrap"
                   FontFamily="Georgia"
                   FontSize="32"/>
        <TextBlock x:Name="HighScoreBlock" Text="0"
                   Grid.Column="1"
                   HorizontalAlignment="Left"
                   VerticalAlignment="Top"
                   Margin="0,203,0,0"
                   TextWrapping="Wrap"
                   FontFamily="Georgia"
                   FontSize="32"/>
    </Grid>
    <Canvas x:Name="LayoutRoot">
        <Canvas.Resources>
            <Storyboard x:Name="Move"/>
        </Canvas.Resources>
    </Canvas>
</Grid>
Add the following to StartPage.xaml.xs:
private void OnStart(object sender, RoutedEventArgs e)
{

}
Adding some animation
Now that we have the start screen set up, it looks kind of dull. Let’s put an emitter there to shoot some stars to make it look more alive. If you look at the XAML we just added, you notice a Canvas element which has a Storyboard element inside it. That is our animation container, which will show the emitter.
First we need a particle for the emitter. We’ll create class called Dot by right clicking the MySpaceInvanders.Shared -project, and selecting Add, New Item, Class. Make sure the Name –field has Dot.cs written in it before clicking ok. Next we’ll open the Dot.cs and add some properties to the particle. Each particle will have two different properties: Shape and Velocity. Add the following member variables to class Dot:
public Ellipse Shape { get; set; }
public Point Velocity { get; set; }
Next we need to create the emitter itself, which will be shooting these particles we just created. Open the StartPage.xaml.cs, add on the top of the file:
using Windows.UI;
using Windows.UI.Xaml.Media;
using Windows.UI.Xaml.Shapes;
Then we need to add these member variables to StartPage class:
private const int StarCount = 200;
private List<Dot> stars = new List<Dot>(StarCount);
private Random randomizer = new Random();
After we have a list to keep the particles, and set the number of particles, we’ll create a new method:
private void CreateStar()
{
    var star = new Dot()
    {
        Shape = new Ellipse() { Height = 2, Width = 2},
        Velocity = new Point(randomizer.Next(-5, 5), randomizer.Next(-5, 5))
    };

    // Center the star
    Canvas.SetLeft(star.Shape, LayoutRoot.ActualWidth / 2 - star.Shape.Width / 2);
    Canvas.SetTop(star.Shape, (LayoutRoot.ActualHeight / 2 - star.Shape.Height / 2) + 20);

    // Prevent stars getting stuck
    if ((int)star.Velocity.X == 0 && (int)star.Velocity.Y == 0)
    {
        star.Velocity = new Point(randomizer.Next(1, 5), randomizer.Next(1,5));
    }

    // Set color

    stars.Add(star);
    LayoutRoot.Children.Add(star.Shape);
}
Now we have created a particle, but it’s sitting idle on the screen, as generic and dull as the next one. Let’s give it some personality by adding some color to it by adding the following code under //Add color –line:
var colors = new byte[4];
    randomizer.NextBytes(colors);
    star.Shape.Fill = new SolidColorBrush(
        Color.FromArgb(colors[0], colors[0], colors[0], colors[0]));
We’re using the Random class to get a new color value. If you prefer to have colorful particles, you can change the Color constructor like this:
Color.FromArgb(colors[0], colors[1], colors[2], colors[3]);
At this point we have a lot of particles staying static at one point. What we need is a method to move particles, reset those which have gone off the screen back to the center. Add the following code under the CreateStar method:
void MoveStars(object sender, object e)
{
    if (stars.Count < StarCount)
    {
        CreateStar();
    }

    foreach (var star in stars)
    {
        double left = Canvas.GetLeft(star.Shape) + star.Velocity.X;
        double top = Canvas.GetTop(star.Shape) + star.Velocity.Y;

        Canvas.SetLeft(star.Shape, left);
        Canvas.SetTop(star.Shape, top);

        // Star is off the screen
        if ((int)left < 0 ||
            (int)left > LayoutRoot.ActualWidth ||
            (int)top < 0 ||
            (int)top > LayoutRoot.ActualHeight)
        {
            Canvas.SetLeft(star.Shape, LayoutRoot.ActualWidth / 2 - star.Shape.Width / 2);
            Canvas.SetTop(star.Shape, (LayoutRoot.ActualHeight / 2 - star.Shape.Height / 2) + 20);
        }
    }
    Move.Begin();
}
As the effect of all the stars coming to screen at once is quite ugly, we’re adding them one by one each pass to the screen until we have max number of them visible. After that the method goes through all the particles and sets their new position according to their velocity. In the last part we’re checking if the particle has gone off the screen and center it back if it’s not visible anymore.
Now we need to just activate these methods and we’re set to try it out. Add the following code to constructor, just after InitializeComponent() –line:
Loaded += (sender, args) =>
{
    CreateStar();
    Move.Completed += MoveStars;
    Move.Begin();
};
Now you’re set to try it out! Just select the Windows project and run on local machine. I’ll show you how to keep building the game in Part 2.