

The “Internet of Stranger Things” Wall, Part 3 – Voice Recognition and Intelligence
Overview
I called this project the “Internet of Stranger Things,” but so far, there hasn’t been an internet piece. In addition, there really hasn’t been anything that couldn’t be easily accomplished on an Arduino or a Raspberry Pi. I wanted this demo to have more moving parts to improve the experience and also demonstrate some cool technology.
First is voice recognition. Proper voice recognition typically takes a pretty decent computer and a good OS. This isn’t something you’d generally do on an Arduino alone; it’s simply not designed for that kind of workload.
Next, I wanted to wire it up to the cloud, specifically to a bot. The interaction in the show is a conversation between two people, so this was a natural fit. Speaking of “natural,” I wanted the bot to understand many different forms of the questions, not just a few hard-coded questions. For that, I wanted to use the Language Understanding Intelligent Service (LUIS) to handle the parsing.
This third and final post covers:
- Adding Windows Voice Recognition to the UWP app
- Creating the natural language model in LUIS
- Building the Bot Framework Bot
- Tying it all together
You can find the other posts here:
- Part 1 – Introduction and Remote Wiring
- Part 2 – Constructing the wall and adding Music
- Part 3 – Adding voice recognition and intelligence (this post)
If you’re not familiar with the wall, please go back and read part one now. In that, I describe the inspiration for this project, as well as the electronics required.
Adding Voice Recognition
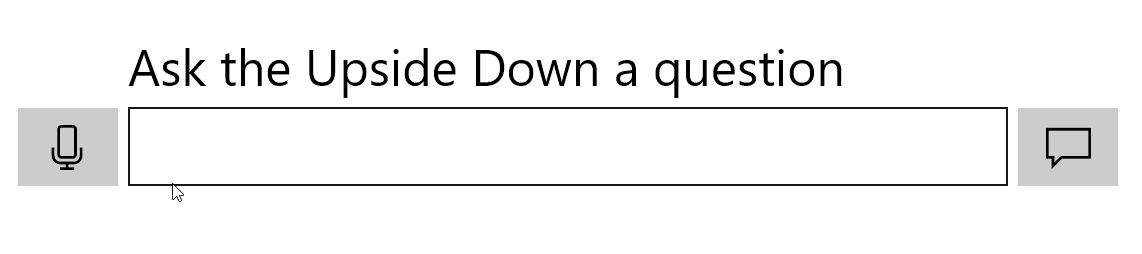
In the TV show, Joyce doesn’t type her queries into a 1980s era terminal to speak with her son; she speaks aloud in her living room. I wanted to have something similar for this app, and the built-in voice recognition was a natural fit.
Voice recognition in Windows 10 UWP apps is super-simple to use. You have the option of using the built-in UI, which is nice but may not fit your app style, or simply letting the recognition happen while you handle events.
There are good samples for this in the Windows 10 UWP Samples repo, so I won’t go into great detail here. But I do want to show you the code.
To keep the code simple, I used two recognizers. One is for basic local echo testing, especially useful if connectivity in a venue is unreliable. The second is for sending to the bot. You could use a single recognizer and then just check some sort of app state in the events to decide if you were doing something for local echo or for the bot.
First, I initialized the two recognizers and wired up the two events that I care about in this scenario.
[code lang=”csharp”]
SpeechRecognizer _echoSpeechRecognizer;
SpeechRecognizer _questionSpeechRecognizer;
private async void SetupSpeechRecognizer()
{
_echoSpeechRecognizer = new SpeechRecognizer();
_questionSpeechRecognizer = new SpeechRecognizer();
await _echoSpeechRecognizer.CompileConstraintsAsync();
await _questionSpeechRecognizer.CompileConstraintsAsync();
_echoSpeechRecognizer.HypothesisGenerated +=
OnEchoSpeechRecognizerHypothesisGenerated;
_echoSpeechRecognizer.StateChanged +=
OnEchoSpeechRecognizerStateChanged;
_questionSpeechRecognizer.HypothesisGenerated +=
OnQuestionSpeechRecognizerHypothesisGenerated;
_questionSpeechRecognizer.StateChanged +=
OnQuestionSpeechRecognizerStateChanged;
}
[/code]
The HypothesisGenerated event lets me show real-time recognition results, much like when you use Cortana voice recognition on your PC or phone. In that event handler, I just display the results. The only real purpose of this is to show that some recognition is happening in a way similar to how Cortana shows that she’s listening and parsing your words. Note that the hypothesis and the state events come back on a non-UI thread, so you’ll need to dispatch them like I did here.
[code lang=”csharp”]
private async void OnEchoSpeechRecognizerHypothesisGenerated(
SpeechRecognizer sender,
SpeechRecognitionHypothesisGeneratedEventArgs args)
{
await Dispatcher.RunAsync(CoreDispatcherPriority.Normal, () =>
{
EchoText.Text = args.Hypothesis.Text;
});
}
[/code]
The next is the StateChanged event. This lets me alter the UI based on what is happening. There are lots of good practices here, but I took an expedient route and simply changed the background color of the text box. You might consider running an animation on the microphone or something when recognition is happening.
[code lang=”csharp”]
private SolidColorBrush _micListeningBrush =
new SolidColorBrush(Colors.SkyBlue);
private SolidColorBrush _micIdleBrush =
new SolidColorBrush(Colors.White);
private async void OnEchoSpeechRecognizerStateChanged(
SpeechRecognizer sender,
SpeechRecognizerStateChangedEventArgs args)
{
await Dispatcher.RunAsync(CoreDispatcherPriority.Normal, () =>
{
switch (args.State)
{
case SpeechRecognizerState.Idle:
EchoText.Background = _micIdleBrush;
break;
default:
EchoText.Background = _micListeningBrush;
break;
}
});
}
[/code]
I have equivalent handlers for the two events for the “ask a question” speech recognizer as well.
Finally, some easy code in the button click handler kicks off recognition.
[code lang=”csharp”]
private async void DictateEcho_Click(object sender, RoutedEventArgs e)
{
var result = await _echoSpeechRecognizer.RecognizeAsync();
EchoText.Text = result.Text;
}
[/code]
The end result looks and behaves well. The voice recognition is really good.
So now we can talk to the board from the UWP PC app, and we can talk to the app using voice. Time to add just a little intelligence behind it all.
Creating the Natural Language Model in LUIS
The backing for the wall is a bot in the cloud. I wanted the bot to be able to answer questions, but I didn’t want to have the exact text of the question hard-coded in the bot. If I wanted to hard-code them, a simple web service or even local code would do.
What I really want is the ability to ask questions using natural language, and map those questions (or Utterances as called in LUIS) to specific master questions (or Intents in LUIS). In that way, I can ask the questions a few different ways, but still get back an answer that makes sense. My colleague, Ryan Volum, helped me figure out how LUIS worked. You should check out his Getting Started with Bots Microsoft Virtual Academy course.
So I started thinking about the types of questions I wanted answered, and the various ways I might ask them.
For example, when I want to know the location of where Will is, I could ask, “Where are you hiding?” or “Tell me where you are!” or “Where can I find you?” When checking to see if someone is listening, I might ask, “Are you there?” or “Can you hear me?” As you can imagine, hard-coding all these variations would be tedious, and would certainly miss out on ways someone else might ask the question.
I then created those in LUIS with each master question as an Intent, and each way I could think of asking that question then trained as an utterance mapped to that intent. Generally, the more utterances I add, the better the model becomes.

The above screen shot is not the entire list of Intents; I added a number of other Intents and continued to train the model.
For a scenario such as this, training LUIS is straight forward. My particular requirements didn’t include any entities or Regex, or any connections to a document database or Azure search. If you have a more complex dialog, there’s a ton of power in LUIS to be able to make the model as robust as you need, and to also train it with errors and utterances found in actual use. If you want to learn more about LUIS, I recommend watching Module 5 in the Getting Started with Bots MVA.
Once my LUIS model was set up and working, I needed to connect it to the bot.
Building the Bot Framework Bot
The bot itself was the last thing I added to the wall. In fact, in my first demo of the wall, I had to type the messages in to the app instead of sending it out to a bot. Interesting, but not exactly what I was looking for.
I used the generic Bot Framework template and instructions from the Bot Framework developer site. This creates a generic bot, a simple C# web service controller, which echoes back anything you send it.
Next, following the Bot Framework documentation, I integrated LUIS into the bot. First, I created the class which derived from LuisDialog, and added in code to handle the different intents. Note that this model is changing over time; there are other ways to handle the intents using recognizers. For my use, however, this approach worked just fine.
The answers from the bot are very short, and I keep no context. Responses from the Upside Down need to be short enough to light up on the wall without putting everyone to sleep reading a long dissertation letter by letter.
[code lang=”csharp”]
namespace TheUpsideDown
{
// Reference:
// https://docs.botframework.com/en-us/csharp/builder/sdkreference/dialogs.html
// Partial class is excluded from project. It contains keys:
//
// [Serializable]
// [LuisModel("model id", "subscription key")]
// public partial class UpsideDownDialog
// {
// }
//
public partial class UpsideDownDialog : LuisDialog<object>
{
// None
[LuisIntent("")]
public async Task None(IDialogContext context, LuisResult result)
{
string message = $"Eh";
await context.PostAsync(message);
context.Wait(MessageReceived);
}
[LuisIntent("CheckPresence")]
public async Task CheckPresence(IDialogContext context, LuisResult result)
{
string message = $"Yes";
await context.PostAsync(message);
context.Wait(MessageReceived);
}
[LuisIntent("AskName")]
public async Task AskName(IDialogContext context, LuisResult result)
{
string message = $"Will";
await context.PostAsync(message);
context.Wait(MessageReceived);
}
[LuisIntent("FavoriteColor")]
public async Task FavoriteColor(IDialogContext context, LuisResult result)
{
string message = $"Blue … no Gr..ahhhhh";
await context.PostAsync(message);
context.Wait(MessageReceived);
}
[LuisIntent("WhatIShouldDoNow")]
public async Task WhatIShouldDoNow(IDialogContext context, LuisResult result)
{
string message = $"Run";
await context.PostAsync(message);
context.Wait(MessageReceived);
}
…
}
}
[/code]
Once I had that in place, it was time to test. The easiest way to test before deployment is to use the Bot Framework Channel Emulator.
First, I started the bot in my browser from Visual Studio. Then, I opened the emulator and plugged in the URL from the project properties, and cleared out the credentials fields. Next, I started typing in questions that I figured the bot should be able to handle.

It worked great! I was pretty excited, because this was the first bot I had ever created, and not only did it work, but it also had natural language processing. Very cool stuff.
Now, if you notice in the picture, there are red circles on every reply. It took a while to figure out what was up. As it turns out, the template for the bot includes an older version of the NuGet bot builder library. Once I updated that to the latest version (3.3 at this time), the “Invalid Token” error local IIS was throwing went away.
Be sure to update the bot builder library NuGet package to the latest version.
Publishing and Registering the Bot
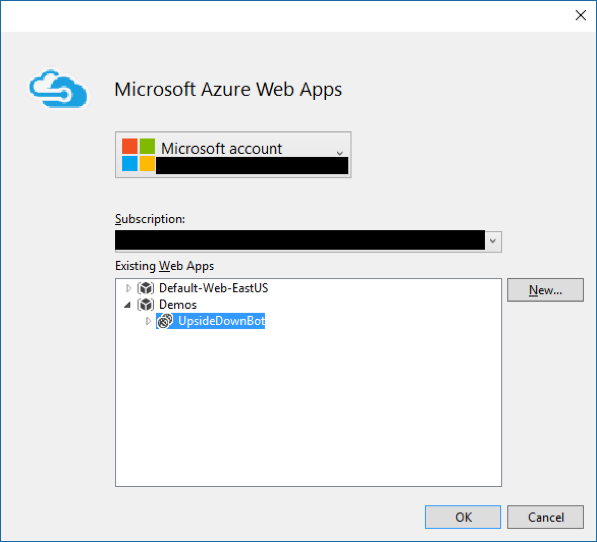
Next, it was time to publish it to my Azure account so I could use the Direct Line API from my client app, and also so I could make the bot available via other channels. I used the built-in Visual Studio publish (right click the project, click “Publish”) to put it up there. I had created the Azure Web App in advance.
Next, I registered the bot on the Bot Framework site. This step is necessary to be able to use the Direct Line API and make the bot visible to other channels. I had some issues getting it to work at first, because I didn’t realize I needed to update the credential information in the web.config of the bot service. The BotId field in the web.config can be most anything. Most tutorials skip telling you what to put in that field, and it doesn’t match up with anything on the portal.
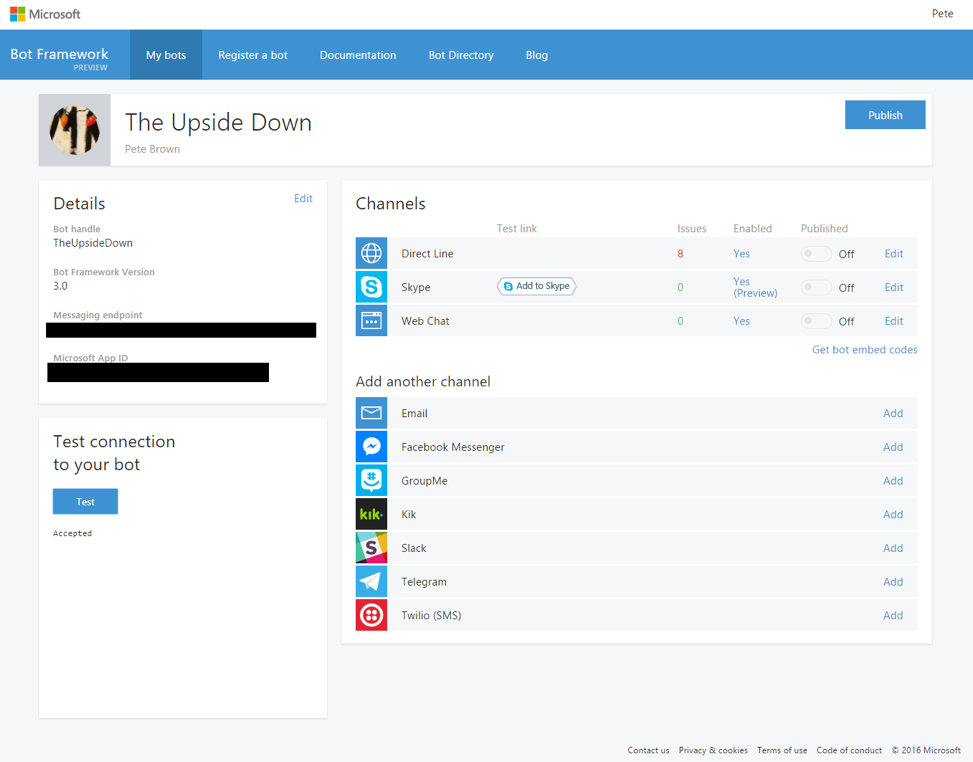
As you can see, there are a few steps involved in getting the bot published and registered. For the Azure piece, follow the same steps as you would for any Web App. For the bot registration, be sure to follow the instructions carefully, and keep track of your keys, app IDs, and passwords. Take your time the first time you go through the process.
You can see in the previous screen shot that I have a number of errors shown. Those errors were because of that NuGet package version issue mentioned previously. It wasn’t until I had the bot published that I realized there was an error, and went back and debugged it locally.
Testing the Published Bot in Skype
I published and registered the bot primarily to be able to use the Direct Line channel. But it’s a bot, so it makes sense to test it using a few different channels. Skype is a pretty obvious one, and is enabled by default, so I hit that first.

Through Skype, I was able to verify that it was published and worked as expected.
Using the Direct Line API
When you want to communicate to a bot from code, a good way to do it is using the Direct Line API. This REST API provides an additional layer of authentication and keeps everything within a structured bot framework. Without it, you might as well just make direct REST calls.
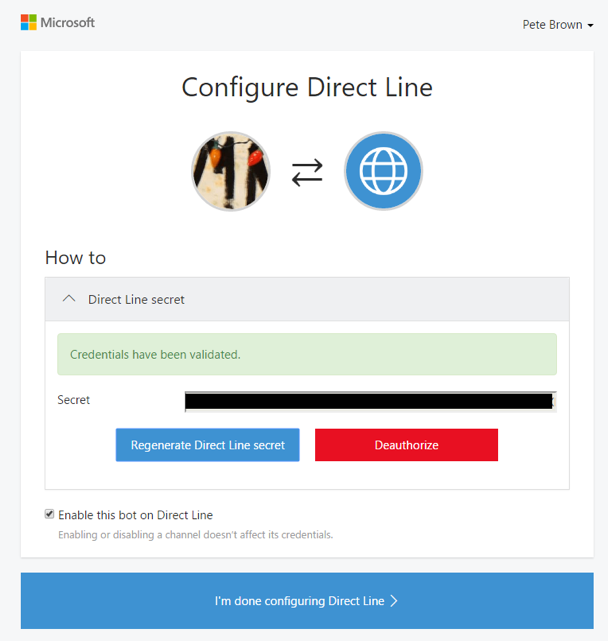
First, I needed to enable the Direct Line channel in the bot framework portal. Once I did that, I was able to configure it and get the super-secret key which enables me to connect to the bot. (The disabled field was a pain to try and copy/paste, so I just did a view source, and grabbed the key from the HTML.)
That’s all I needed to do in the portal. Next, I needed to set up the client to speak to the Direct Line API.
First, I added the Microsoft.Bot.Connector.DirectLine NuGet package to the UWP app. After that, I wrote a pretty small amount of code for the actual communication. Thanks to my colleague, Shen Chauhan (@shenchauhan on Twitter), for providing the boilerplate in his Hunt the Wumpus app.
[code lang=”csharp”]
private const string _botBaseUrl = "(the url to the bot /api/messages)";
private const string _directLineSecret = "(secret from direct line config)";
private DirectLineClient _directLine;
private string _conversationId;
public async Task ConnectAsync()
{
_directLine = new DirectLineClient(_directLineSecret);
var conversation = await _directLine.Conversations
.NewConversationWithHttpMessagesAsync();
_conversationId = conversation.Body.ConversationId;
System.Diagnostics.Debug.WriteLine("Bot connection set up.");
}
private async Task<string> GetResponse()
{
var httpMessages = await _directLine.Conversations
.GetMessagesWithHttpMessagesAsync(_conversationId);
var messages = httpMessages.Body.Messages;
// our bot only returns a single response, so we won’t loop through
// First message is the question, second message is the response
if (messages?.Count > 1)
{
// select latest message — the response
var text = messages[messages.Count-1].Text;
System.Diagnostics.Debug.WriteLine("Response from bot was: " + text);
return text;
}
else
{
System.Diagnostics.Debug.WriteLine("Response from bot was empty.");
return string.Empty;
}
}
public async Task<string> TalkToTheUpsideDownAsync(string message)
{
System.Diagnostics.Debug.WriteLine("Sending bot message");
var msg = new Message();
msg.Text = message;
await _directLine.Conversations.PostMessageAsync(_conversationId, msg);
return await GetResponse();
}
[/code]
The client code calls the TalkToTheUpsideDownAsync method, passing in the question. That method fires off the message to the bot, via the Direct Line connection, and then waits for a response.
Because the bot sends only a single message, and only in response to a question, the response comes back as two messages: the first is the message sent from the client, the second is the response from the service. This helps to provide context.
Finally, I wired it to the SendQuestion button on the UI. I also wrapped it in calls to start and stop the MIDI clock, giving us a bit of Stranger Things thinking music while the call is being made and the result displayed on the LEDs.
[code lang=”csharp”]
private async void SendQuestion_Click(object sender, RoutedEventArgs e)
{
// start music
StartMidiClock();
// send question to service
var response = await _botInterface.TalkToTheUpsideDownAsync(QuestionText.Text);
// display answer
await RenderTextAsync(response);
// stop music
StopMidiClock();
}
[/code]
With that, it is 100% complete and ready for demos!
What would I change?
If I were to start this project anew today and had a bit more time, there are a few things I might change.
I like the voice recognition, Bot Framework, and LUIS stuff. Although I could certainly make the conversation more interactive, there’s really nothing I would change there.
On the electronics, I would use a breadboard-friendly Arduino, not hot-glue an Arduino to the back. It pains me to have hot-glued the Arduino to the board, but I was in a hurry and had the glue gun at hand.
I would also use a separate power supply for LEDs. This is especially important if you wish to light more than one LED at a time, as eventually, the Arduino will not be able to support the current draw required by many LED lights.
If I had several weeks, I would have my friends at DF Robot spin a board that I design, rather than use a regular breadboard, or even a solder breadboard. I generally prefer to get boards spun for projects, as they are more robust, and DF Robot can do this for very little cost.
Finally, I would spend more time to find even uglier wallpaper <g>.
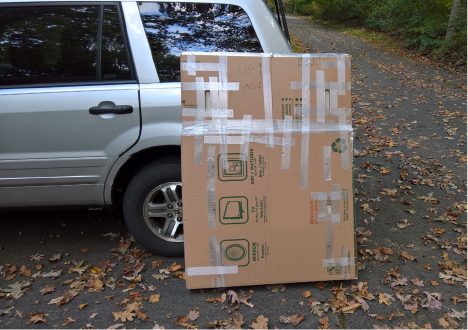
Here’s a photo of the wall, packaged up and ready for shipment to Las Vegas (at the time of this writing, it’s in transit), waiting in my driveway. The box was 55” tall, around 42” wide and 7” thick, but only about 25 lbs. It has ¼” plywood on both faces, as well as narrower pieces along the sides. In between the plywood is 2” thick rigid insulating foam. Finally, the corners are protected with the spongier corner form that came with that box.
It costs a stupid amount of money to ship something like that around, but it’s worth it for events. 🙂
After this, it’s going to Redmond where I’ll record a video walkthrough with Channel 9 during the second week of November.
What Next?
Windows Remote Wiring made this project quite simple to do. I was able to use the tools and languages I love to use (like Visual Studio and C#), but still get the IO of a device like the Arduino Uno. I was also able to use facilities available to a UWP app, and call into a simple bot of my own design. In addition to all that, I was able to use voice recognition and MIDI all in the same app, in a way that made sense.
The Bot Framework and LUIS stuff was all brand new to me, but was really fun to do. Now that I know how to connect app logic to a bot, there will certainly be more interactive projects in the future.
This was a fun project for me. It’s probably my last real maker project of the fall/winter, as I settle into the fall home renovation work and also gear up for the NAMM music event in January. But luckily, there have been many other posts here about Windows 10 IoT Core and our maker and IoT-focused technology. If this topic is interesting to you, I encourage you to take a spin through the archives and check them out.
Whatever gift-giving and receiving holiday you celebrate this winter, be sure to add a few Raspberry Pi 3 devices and some Arduino Uno boards on your list, because there are few things more enjoyable than cozying up to a microcontroller or some IoT code on a cold winter’s day. Oh, and if you steal a strand or two of lights from the tree, I won’t tell. 🙂
Resources
- My stranger things repo on GitHub
- Windows Remote Wiring
- Windows 10 IoT Core
- Get started with UWP and Windows 10
- Get started with the Bot Framework
- LUIS
- Netflix series: Stranger Things
- com synth sounds of Stranger Things
- Pete’s MIDI helper library
- Pete’s SoundCloud
Questions or comments? Have your own version of the wall, or used the technology described here to help rid the universe of evil? Post below and follow me on Twitter @pete_brown
Most of all, thanks for reading!