

Windows 10 Tip: How to set up multiple profiles with Windows Hello

To get started, launch the Windows Settings menu (or simply type Windows key + I):

Type in the search box ‘’Family’’ or “Other people,’’ or go to Accounts > Family & other people.
Add a family member or friend

Select “Add a family member” or “Add someone else to this PC based on your needs.” Type in their Microsoft account email address.
Have them login with their new account
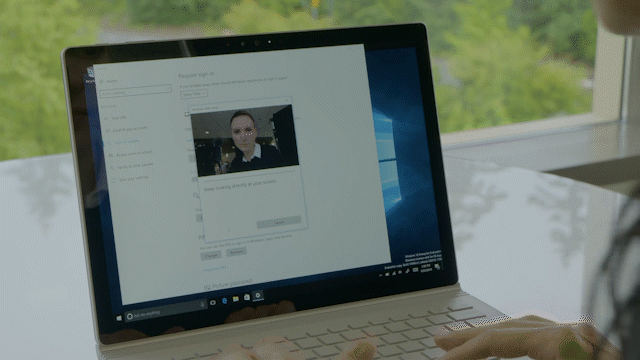
Sign out from your account and ask the other person to sign in back with their own account. They will be prompted to setup a new profile, including the setup of Windows Hello with their own face or fingerprint sign-in.
All set! Now every time each of you will show your face or touch/swipe your finger you will get uniquely recognized and you will get access to your own PC profile.
Have a great week!
* Windows Hello requires specialized hardware, including fingerprint reader, illuminated IR sensor or other biometric sensors and capable devices.