This blog post was authored by Austin Laugesen, a Program Manager on the Windows Phone team.
– Adam
These are the steps you can take to implement no-quota (unthrottled) push notifications for your Windows Phone app using Microsoft Push Notification Services (MPNS). Implementing no-quota push notifications means that your app won’t be restricted by a daily limit of push notifications.
- Obtain a certificate and private key pair from a root Certificate Authority (CA) that is a member of the Windows/Windows Phone root certificate program.
- Create a certificate signing request (CSR).
- The subject name or common name that you place in your request MUST match the serviceName parameter in the HttpNotificationChannel object that you eventually use in your Windows Phone app.
- The certificate and private key pair that you create must support mutual authentication. This is typically a property that you must set when creating the CSR.
- Here is an example of how to create a CSR for Windows. Note that each CA follows a different process to create a CSR.
- Caveat: users can use different software to create CSRs.
- Submit the CSR to a CA, so the CA can issue a certificate and private key pair.
- The CA will issue you a certificate and private key pair (such as a .pfx file).
- See IIS 8: Better certificate management and IIS 8.0 Centralized SSL Certificate Support: SSL Scalability and Manageability for info about how to store a certificate and private key pair in Windows using Internet Information Services (IIS).
- Create a certificate signing request (CSR).
- Use your certificate and private key pair to export a public certificate as a .cer file. You can use Microsoft Management Console (MMC) to export a public certificate (.cer file) if you used MMC to install the certificate and private key pair on your computer.
- Upload the public certificate (exported from the certificate and private key pair issued by a root CA).
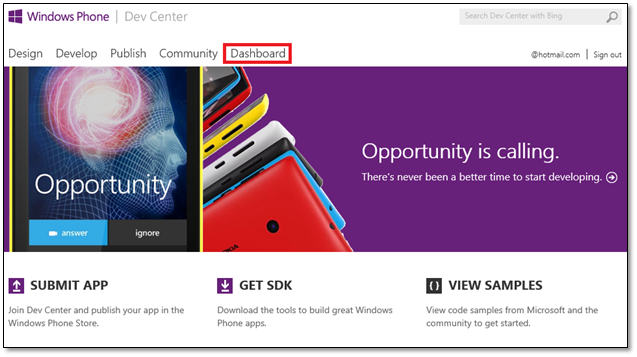
- Sign in to Windows Phone Dev Center.
- Click the Dashboard navigation link.

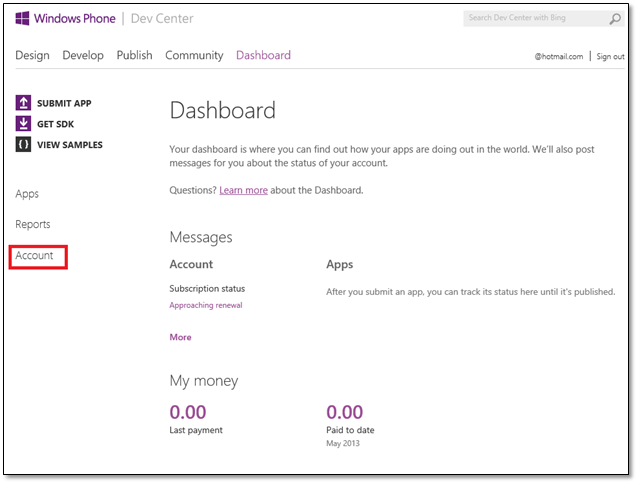
- On the left side of the page, click Account.

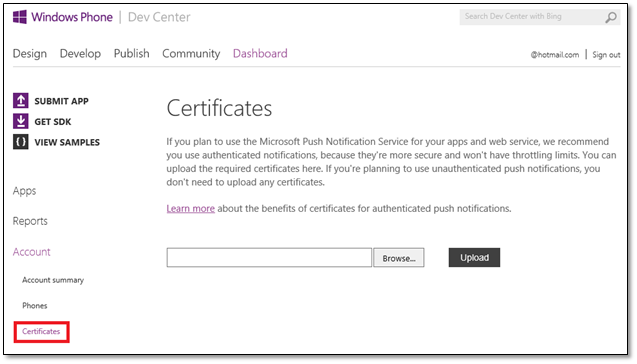
- Click Certificates.

- Click Browse to find the .cer file you’d like to upload.
- Click Upload to upload the certificate.
- Set up the computer(s) that will send secure POST requests to the Microsoft Push Notification Services (MPNS) in Windows Phone by doing the following:
- Install your root CA’s public certificate on these computers.
- Install the certificate and private key pair (issued by the CA) on these computers.
- SSL authentication uses these two certificates to perform mutual authentication.
- Root CA validation occurs on your computer.
MPNS will authenticate your service using the certificate provided against what you uploaded to the Dev Center.
For more info about push notifications, see Push notifications for Windows Phone.
