

- Part 1: you’ll learn how to get started with maps in UWP.
- Part 2: you will learn to use the map services and work with geolocation.
- Part 3: you’ll learn how to add pushpins and other cool external elements to customize your maps and make them look more interesting.
The code samples in this post either come directly from or are based on Microsoft’s Universal Samples on GitHub. These samples are an excellent way to become familiar with the various UWP APIs and controls and go beyond mapping.
First things first: getting an authentication key
Before you do anything else, you’ll need to register to get a Bing Maps Key from the Bing Maps Dev Center. Bing Maps provides all the mapping data used in UWP and requires registration so it can track how much of this data you are using. You create an account from the main page if you do not already have one or if you want to use a new one. Once you have a Bing Maps account, you will create a new key for each UWP app you work on. You’ll be asked for an application name, a key type (which defaults to “Basic”), and an application type.

A basic key will let you make up to 50,000 calls to Bing Maps a day, which is more than enough for development as well as many app scenarios. Later, when you are ready to deploy, check out the Licensing page to determine if you need to get a different sort of key. For now, though, just make sure that your application type is set to “Universal Windows App.” You can leave your application URL blank since you don’t have one at this point.
After clicking the Create button, you are provided with a Bing Map Key that you can use throughout your app. In UWP, this is referred to as your service token.
You can assign your authentication key declaratively in your app’s Xaml:
[code language=”csharp”]
<maps:MapControl x:Name="myMap" MapServiceToken="(Bing Maps Key)"/>
[/code]
With your basic key in hand, you can begin making calls to the maps services.
If you forget to assign a service token or type it in wrong, your map control will render a warning that your service token is missing.
Rendering maps with the XAML control
Adding a map to your UWP app can be as simple as dragging a MapControl class from the toolbox into your Page in Visual Studio, assigning your service token, and setting a location. To set the center of your map, you will first need to handle the loaded event for your MapControl in the page constructor:
[code language=”csharp”]
this.InitializeComponent();
myMap.Loaded += MyMap_Loaded;
[/code]
You set the location by assigning a latitude and longitude value as the map’s center. Then use the TrySetSceneAsync method to set both the center of the map as well as the radius in meters that you want to map to display.
[code language=”csharp”]
private async void MyMap_Loaded(object sender, RoutedEventArgs e)
{
// center on Notre Dame Cathedral
var center =
new Geopoint(new BasicGeoposition()
{
Latitude = 48.8530,
Longitude = 2.3498
});
// retrieve map
await myMap.TrySetSceneAsync(MapScene.CreateFromLocationAndRadius(center, 3000));
}
[/code]
The latitude and longitude values above actually describe the position of the Notre Dame Cathedral in Paris, France and will return the following 2D map:
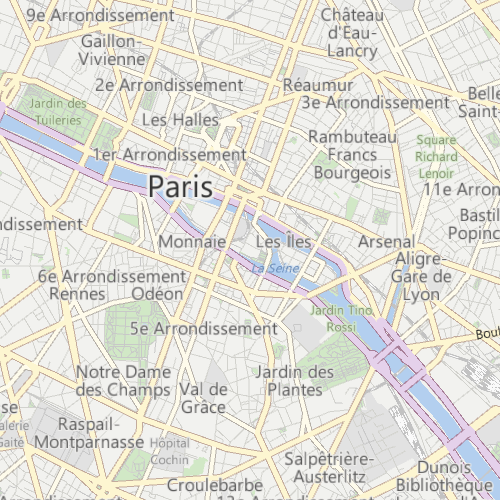
The Geopoint type is fairly straight-forward. In most cases, you just need to feed it a BasicGeoposition object, which is made up of a latitude and a longitude. It also takes an Altitude value which can be significant when you are retrieving an Aerial3D map.
Note: There is currently no converter from a String type to a Geopoint type, so you won’t be able to set the map center in XAML. It must be done either in code-behind or through data binding.
The MapControl’s ZoomLevel property has a range from 1 to 20 for a 2D map, with 1 being zoomed out all the way and 20 being zoomed in fully. If you don’t set the zoom level along with your map center, it will default to 2. This gives a continent level view of your map, which is probably much bigger than you actually want.
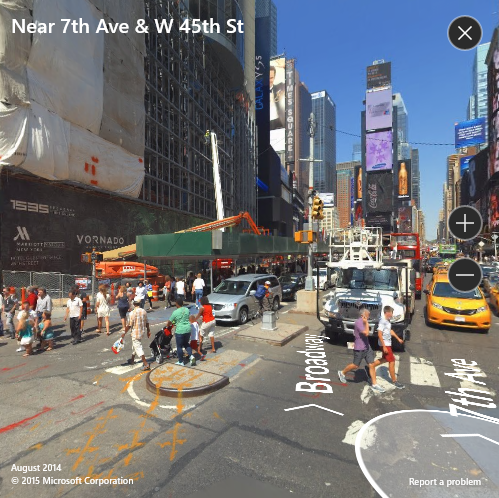
You can go into an even deeper zoom, however, by switching from a 2D View to a Streetside View if this is available for your map (that is, if someone actually went around with cameras and photographed the area).
To get a Streetside View, first check to see if the current device supports this by evaluating IsStreetsideSupportedyou can use the MapControl’s CustomExperience property to set up the Streetside View.
[code language=”csharp”]
private async void MyMap_Loaded(object sender, RoutedEventArgs e)
{
//set map to lat and long for Broadway and 7th, New York City
myMap.Center =
new Geopoint(new BasicGeoposition()
{
Latitude = 40.757969,
Longitude = -73.985535
});
//check for streetside support
if (myMap.IsStreetsideSupported)
{
//check that map is available for lat and long
var panorama = await StreetsidePanorama.FindNearbyAsync(myMap.Center);
if (panorama != null)
{
//create custom view
myMap.CustomExperience = new StreetsideExperience(panorama);
}
}
}
[/code]
By default, the Streetside View enables features like zoom buttons, the close button, the Streetside cursor, and address labels. You can turn any or all of these features off through properties on your StreetSideExperience object.
Besides the 2D and Streetside views, it is also easy to display a 3D view of your Geopoint location. As with the Streetside view, you need to check to see that 3D is supported on the current device. You can also use the TrySetSceneAsync method of the MapControl to make sure control fails gracefully in case a 3D scene is not available.
[code language=”csharp”]
private async void MyMap_Loaded(object sender, RoutedEventArgs e)
{
//set map to lat and long for the Coliseum in Rome, Italy
myMap.Center =
new Geopoint(new BasicGeoposition()
{
Latitude = 41.890170,
Longitude = 12.493094
});
myMap.ZoomLevel = 16;
//check for 3D support
if (myMap.Is3DSupported)
{
//set style to 3D
myMap.Style = MapStyle.Aerial3D;
//create a mapscene for lat and long
//facing East (90 deg) and pitched 45 deg
var mapScene = MapScene.CreateFromLocationAndRadius(myMap.Center, 500, 90, 45);
await myMap.TrySetSceneAsync(mapScene);
}
}
[/code]
To take advantage of 3D, you can determine what direction your camera is facing as well as what angle it is pointing down at the scene. For this sample, the camera faces east. The pitch angle can have a value from 0 to 90, with 0 being a straight-down camera view.
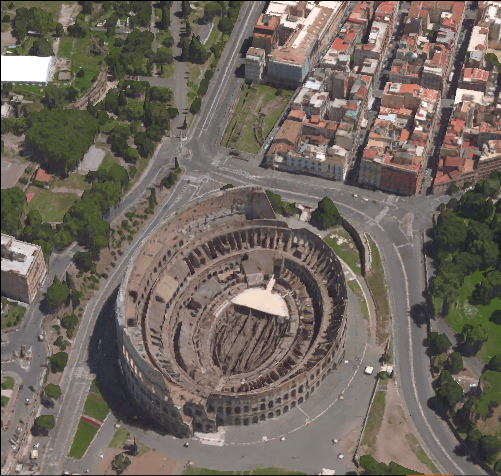
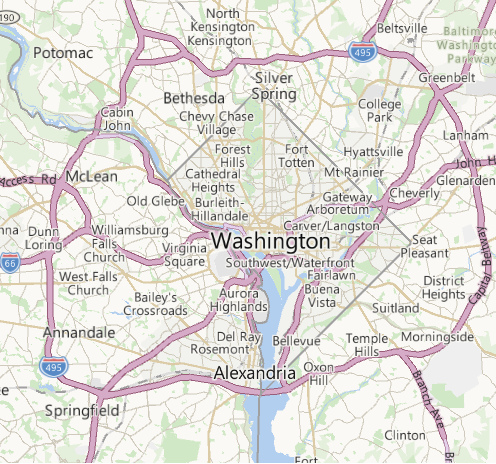
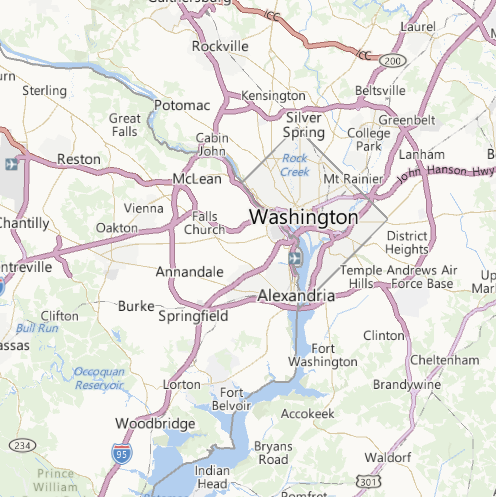
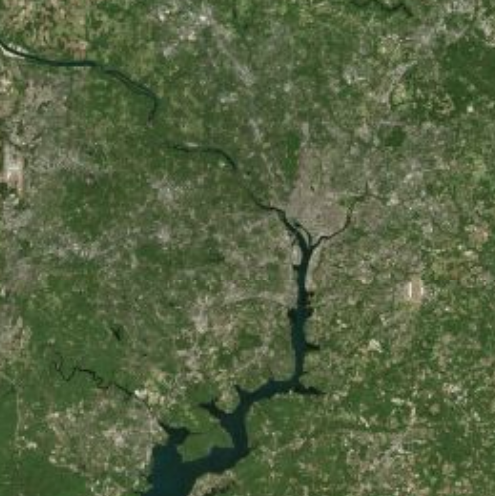
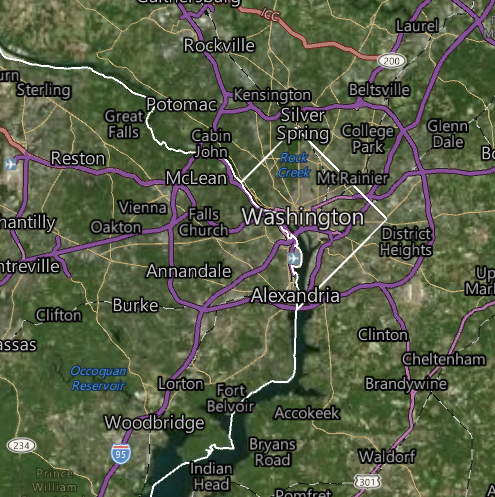
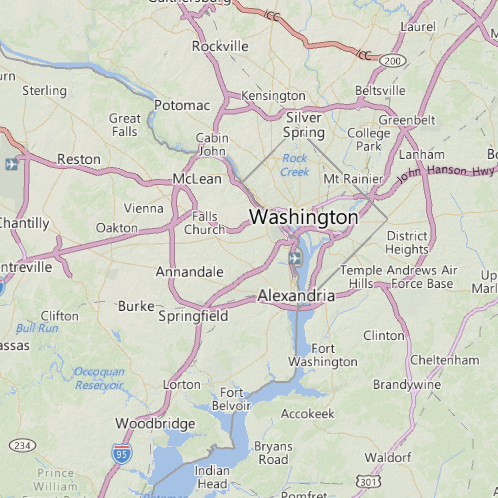
To get the 3D view above, you must set the MapControl’s Style property to Aerial3D. MapControl can be configured with several additional styles such as Road, Aerial (without 3D), and Terrain. The easiest way to grasp what these additional styles mean is to look at them side-by-side. The images below of Washington, D.C. are zoomed out to a zoom level of 10 so the differences are more apparent.
[code language=”csharp”]
myMap.Style = MapStyle.Road;
[/code]
[code language=”csharp”]
myMap.Style = MapStyle.Aerial;
[/code]
[code language=”csharp”]
myMap.Style = MapStyle.AerialWithRoads;
[/code]
[code language=”csharp”]
myMap.Style = MapStyle.Terrain;
[/code]
MapControl has flags like TrafficFlowVisible, PedestrainFeaturesVisible, and LandmarksVisible that provide additional content for your maps. You’ll get to explore those features in later posts. You can also learn more about the various map views on MSDN.
Interacting with maps
Rendered maps can be manipulated in three ways using the MapControl:
- RotateInteractionMode. Alter the rotation of the map (north doesn’t have to always be up, after all).
- ZoomInteractionMode. Change the zoom level of the map.
- TiltInteractionMode. Alter the desired tilt of the map so it looks like you are looking at the map at an angle rather than from straight overhead.
With modern devices, users typically prefer to interact with maps by using gestures. Fortunately, the MapControl implicitly supports gestures by defaulting each of the Interaction Modes to PointerOnly.
To rotate the map, users place two fingers on the map and spin them around each other. To zoom out, they simply pinch two fingers together. To zoom in, they separate two fingers on either side of the area they are zooming toward. To set the desired tilt of the map, users need to use two fingers pressed together and slide them upward on the map.
Users are also able to move the center of the map either by panning one finger on the map or by clicking and holding with the left mouse button and sliding it across the map. If you ever want to turn this off, you can set the PanInteractionMode to Disabled.
While many devices support direct manipulation and gestures, not all do. Fortunately, you can also set all the interaction modes except for PanInteractionMode to PointerOnly or PointerKeyboardAndControl. These two modes will enable the new canvas controls on your map. The canvas controls respond to mouse clicks and by default appear are overlaid on the right edge of the map view.
Finally, if you just want to display the map a specific way in your app and disable all user interactions, you can simply set all these interaction properties to Disabled.
Wrapping up
In this post, we learned how to get a Bing Maps key for your app, how to add a map using a variety of views, and finally, how to control how users interact with your maps. Without a doubt, MapControl is one of the easiest ways to integrate maps into your app and keep the user map experience vibrant and interesting.
We’ll be talking more about Maps at Build 2016 and can’t wait to show you! And don’t forget to stay tuned for the next two posts in this series, which will cover map services, geolocations, push pins, and more.