

Why bring an iOS app to Windows?
With the successful launch of Windows 10—already running on more than 200 million devices—this is a great time to jump into Windows app development. By publishing your app to the Windows Store, you can reach a whole new set of customers in markets around the world.
Universal Windows Platform (UWP) apps provide the opportunity to run your apps on various classes of devices from smartphones, phablets, and tablets to laptops and desktops, and soon even the Xbox! New Windows devices like Surface Book and Surface Pro with strong performance and different input capabilities open up more opportunity for your creativity.
About the app
Dong Yoon Park is currently leading the design effort for Windows Bridge for iOS, focusing on the translation of iOS controls and patterns into Windows to achieve the best Windows 10 experience. He also has a developer background and has developed a wide variety of apps on iOS.
We’re going to walk together through one of Park’s apps, Pori Fashion Show, in order to show how most of his iOS code was reused to make a UWP app with the Windows Bridge for iOS. In the process, we’ll look at some of the tricks and tips used to successfully translate this iOS app into a Windows app.
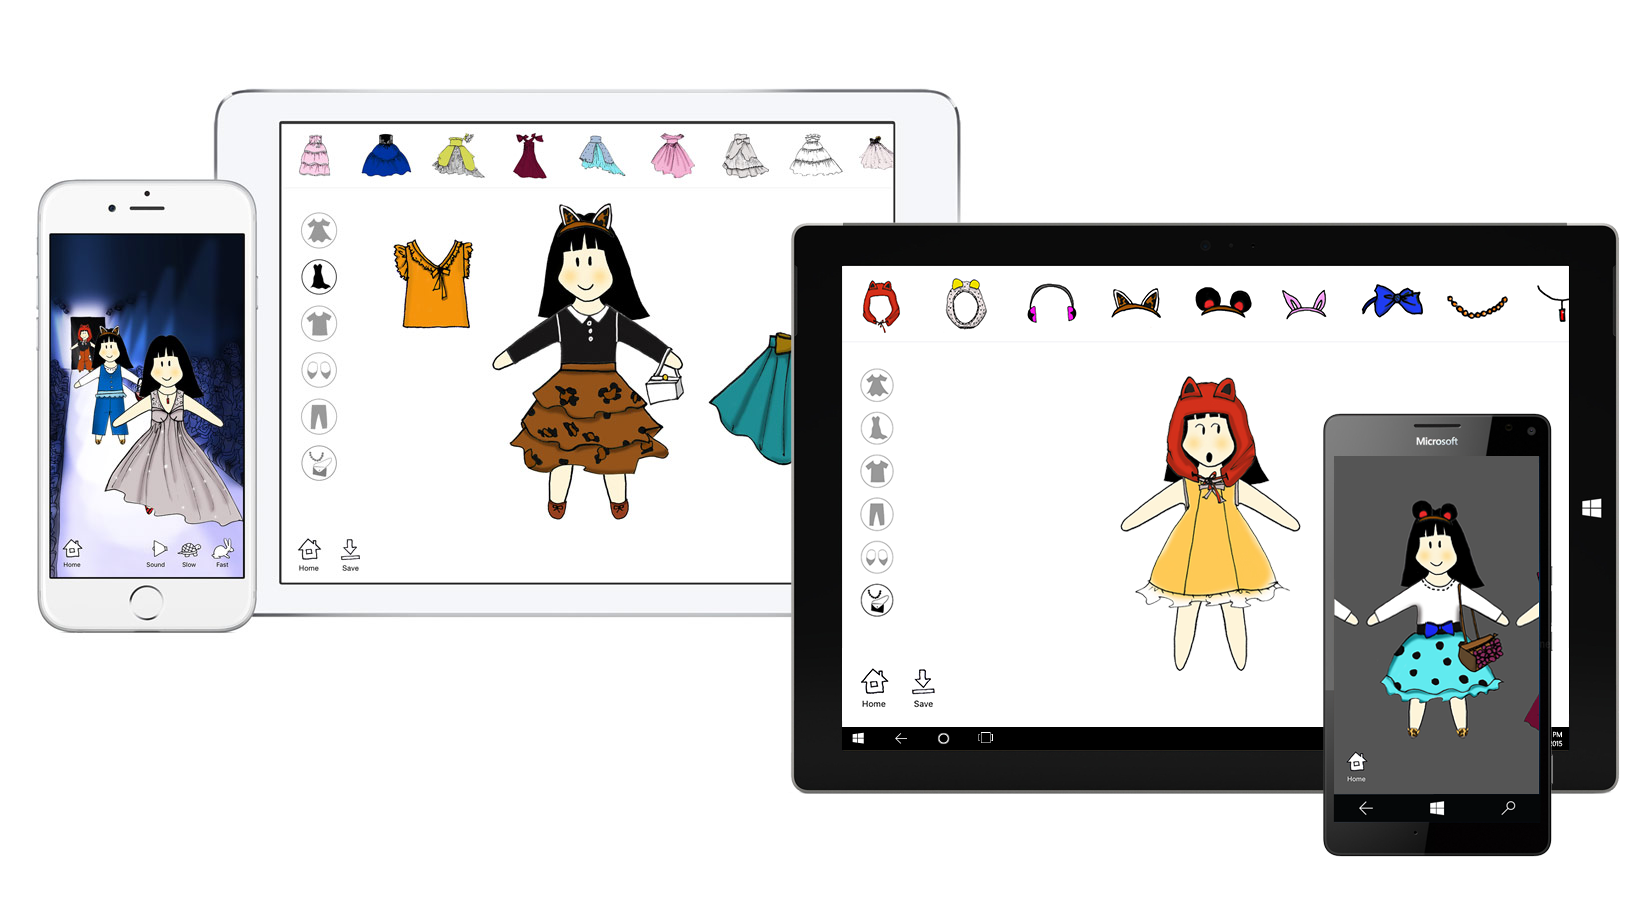
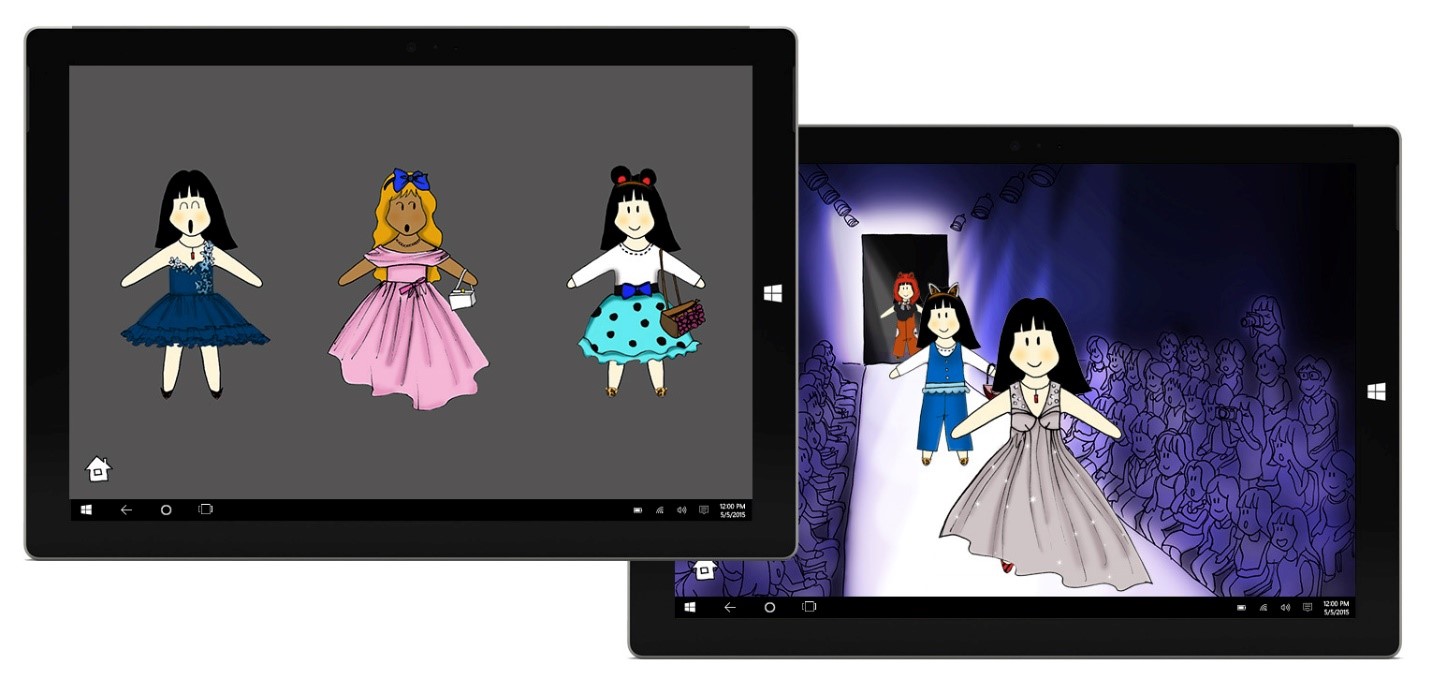
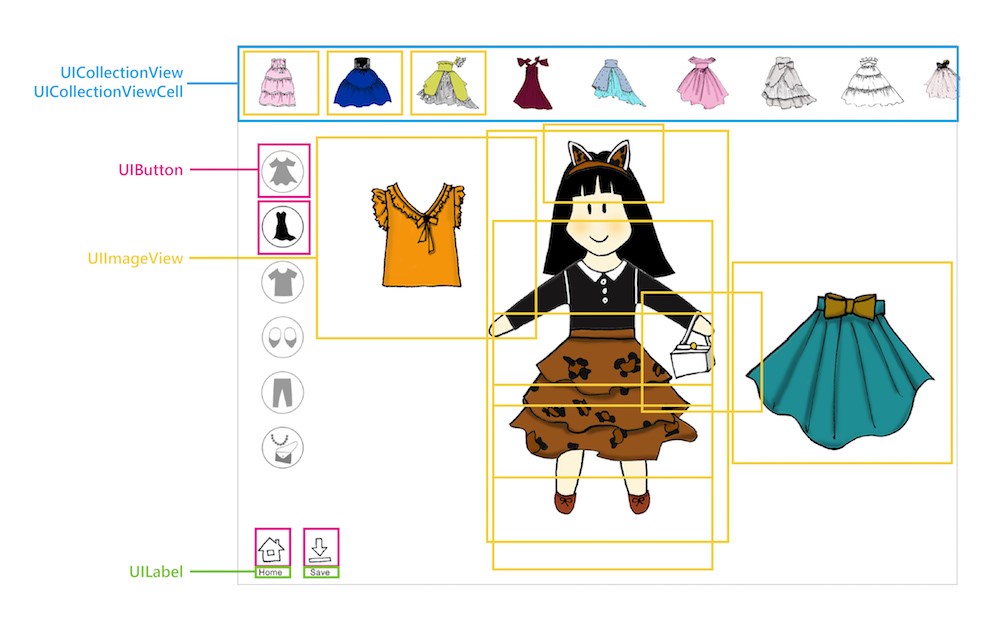
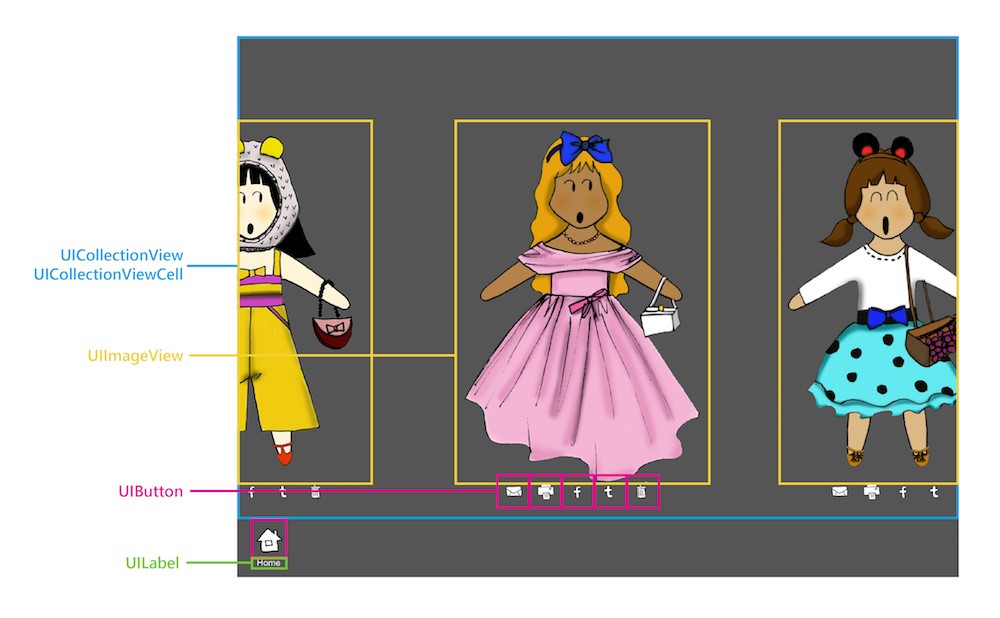
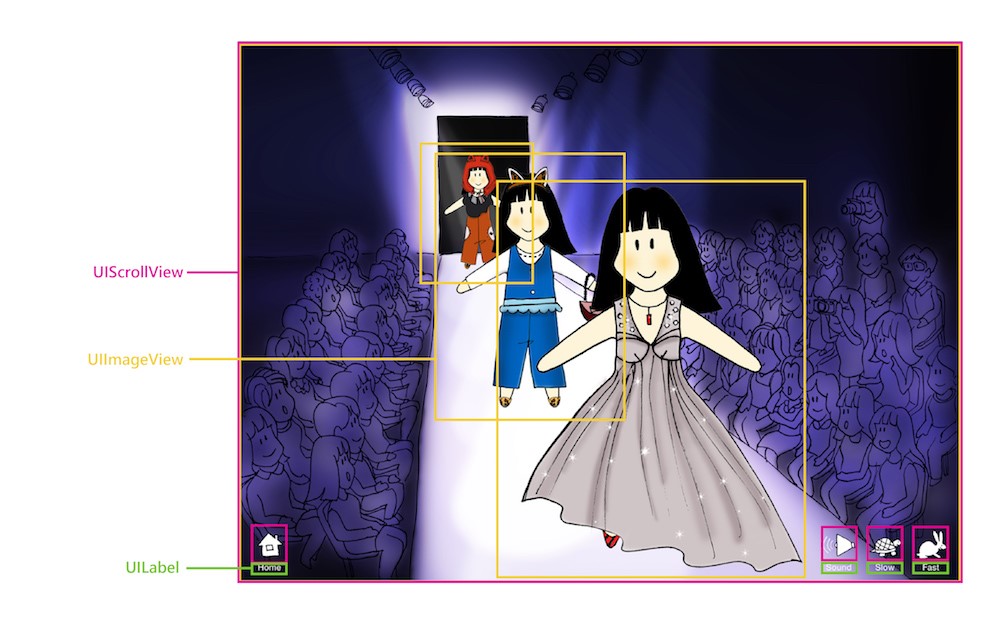
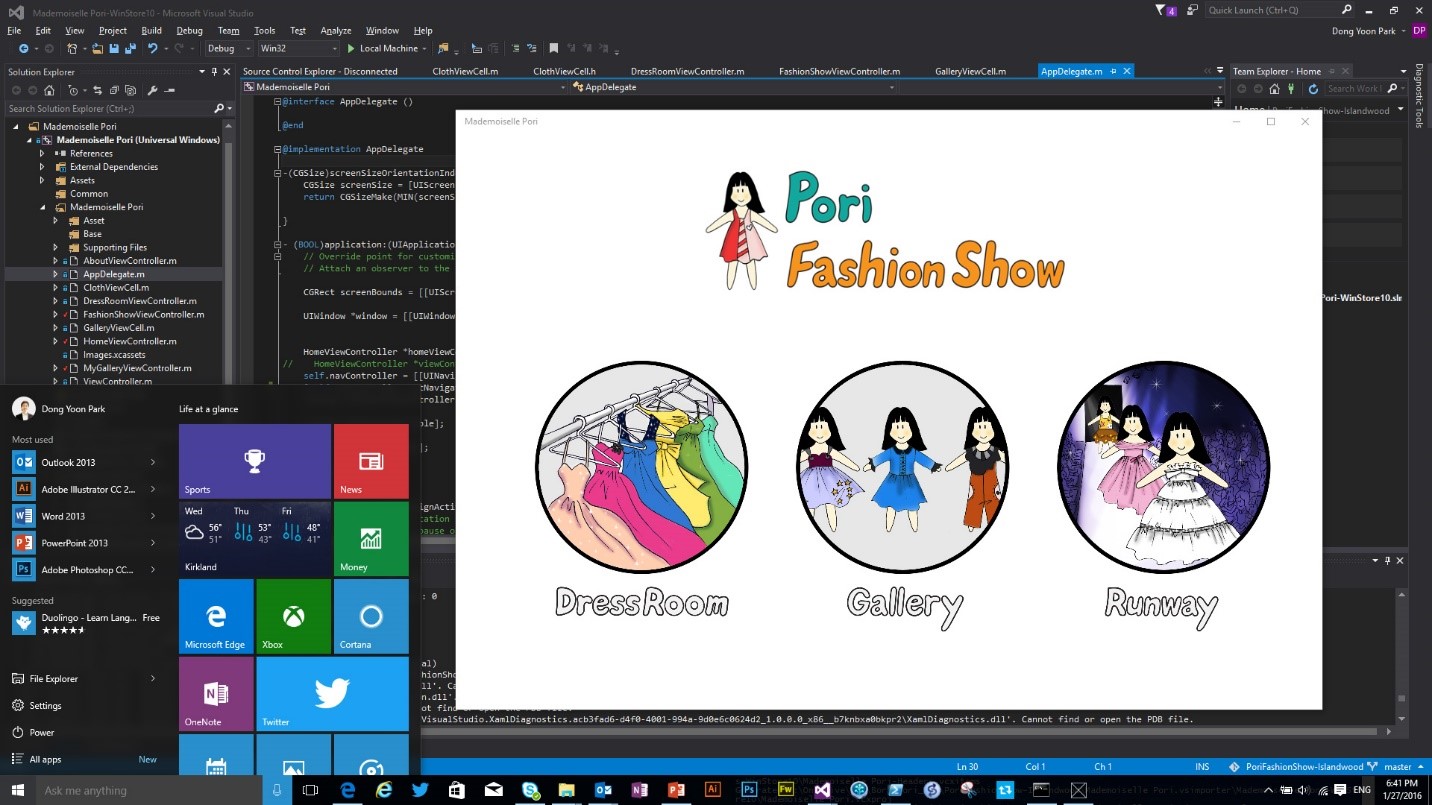
Pori Fashion Show is a paper doll style game for kids that lets you dress up cartoon characters using drag-and-drop mechanics. Once their dolls are dressed up, children can save them as images or walk them down an in-game fashion runway.
Pori Fashion Show uses standard UIKit controls like UICollectionView, UIImageView, and UIButton. For interaction, it uses gesture recognizers such as UILongPressGestureRecognizer and UIPanGestureRecognizer for the drag-and-drop functionality. You can watch a demo video of the app’s interaction and flow here.
Setting up the virtual machine, importing the project with vsimporter
The vast majority of iOS developers work on Macs running OS X. The easiest way to set up your Mac for Windows development is to install Windows 10 and Visual Studio on a virtual machine. Using a virtual machine lets you easily switch between Xcode and Visual Studio to speed up iterations and allows you to keep all your code in one place. Please refer to the Windows Bridge for iOS Wiki page for the detailed setup process. We also provide evaluation virtual machines that have Windows 10 with Visual Studio installed.
Once you’ve configured your development environment, it’s time to use the vsimporter tool to start the import process. The vsimporter tool enables you to import your Xcode project into a new Visual Studio Universal Windows Platform (UWP) app project with Objective-C support. Don’t worry, vsimporter won’t touch your existing project files or related folder/file structure, so you’ll still be able to open your project in Xcode without issue.
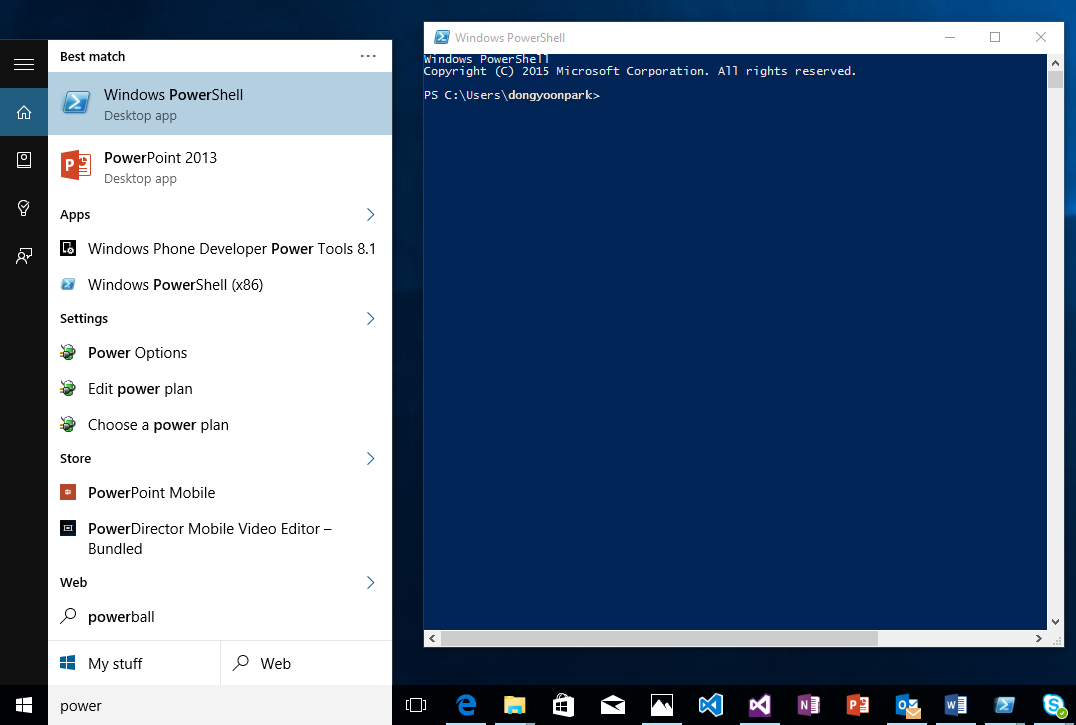
In the Cortana search box, type ‘powershell’ to open Windows PowerShell:
Run ‘C:\YOUR_WINOBJC_PATH\bin\vsimporter’:
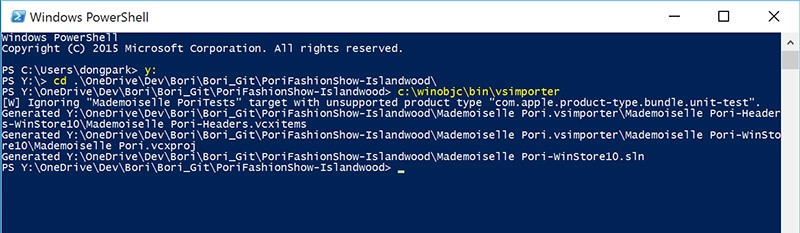
The screenshots below show the effect of running vsimporter. Notice that the Visual Studio solution file (.sln) and the .vsimporter folder have been generated:

Sharing the source code folder between OS X and Windows
Because virtual machines provide the shared folder feature, you can easily access the source code folder from Windows. However, Visual Studio will not register an app with the system if its files are on a network drive, and since folders shared with the Mac host machine in a virtual Windows 10 environment are treated as network drives, you must change a few settings to get Visual Studio to build and run.
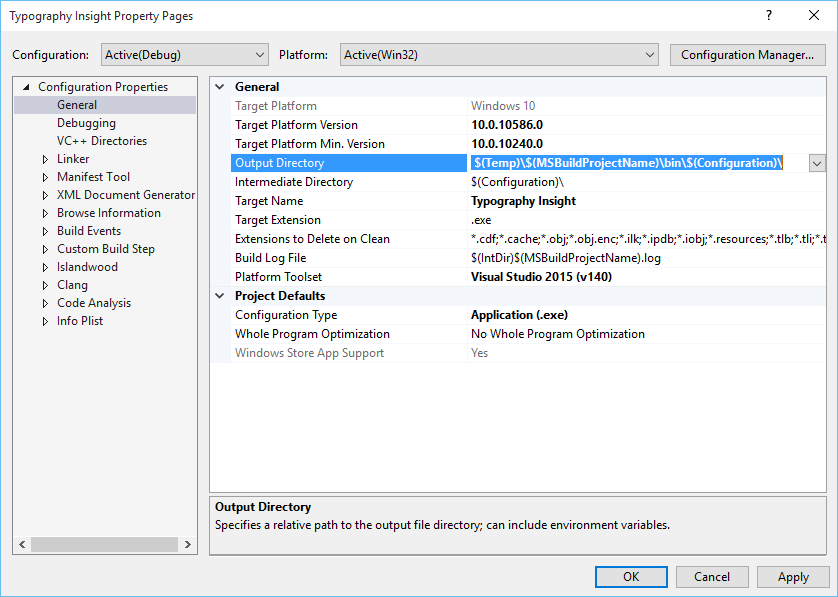
The easiest way to do this is to override the project’s output directory. Right-click the project, click the Properties menu and change the output directory under General menu to $(Temp)\$(MSBuildProjectName)\bin\$(Configuration)\, where Temp is an environment variable pointing to your Temp directory.
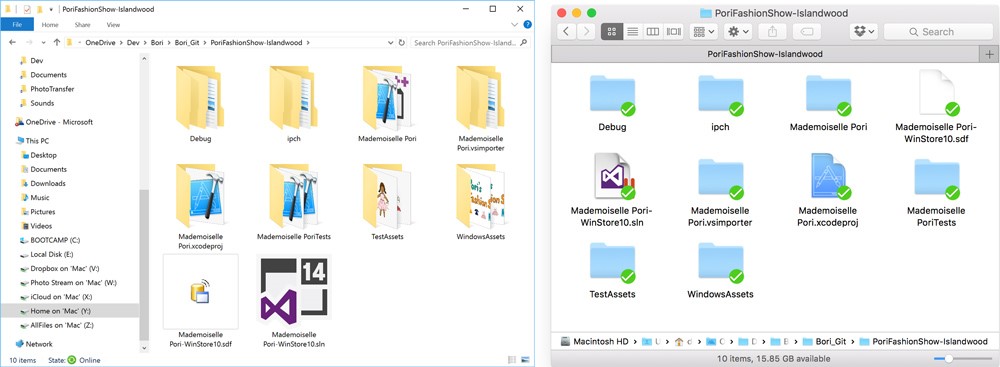
Having done this, it will now be easier to modify the same files while going back and forth between OS X and Windows 10. The image below shows two different views of the same directory.
Let’s build it!
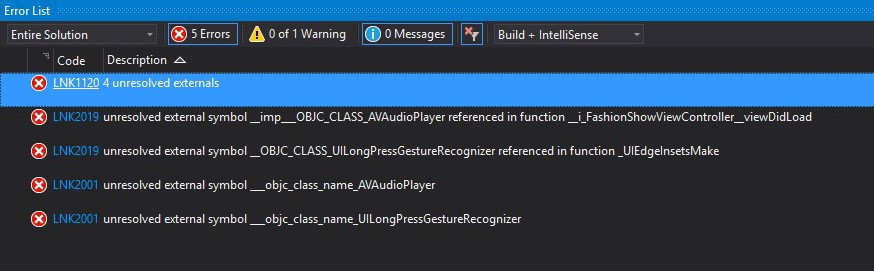
You might discover that clicking Build Solution at this point causes a number of errors. The most common mistake is forgetting to remove the iOS-specific frameworks and libraries. For example, the following frameworks needed to be excluded from the Pori Fashion Show Visual Studio solution before continuing:
- StoreKit (In-App Purchase)
- MessageUI (email composer)
- Social (Facebook, Twitter posting)
Storyboard errors
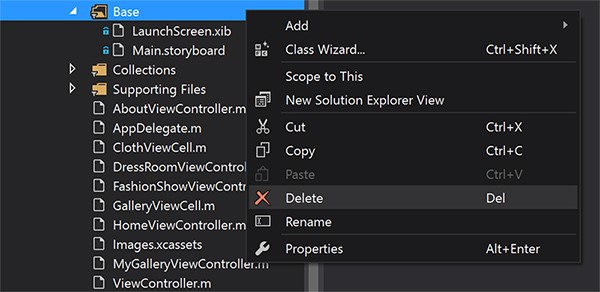
After removing these libraries and commenting out some of the unimplemented methods, Pori Fashion Show still showed storyboard-related issues. Since Storyboard support in Windows Bridge for iOS in active development and is not yet complete, Park decided to remove the Storyboard file and move the layout into the code. We’ll examine this workaround in more detail below.

Translation of UIKit elements by Windows Bridge for iOS
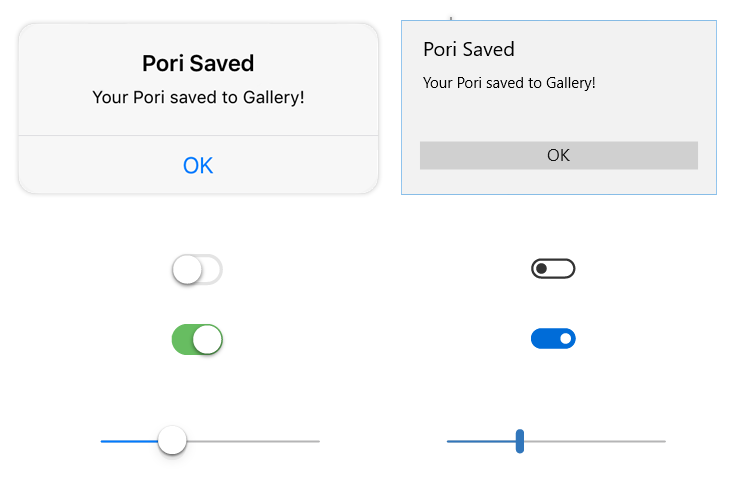
Pori Fashion Show uses standard UIKit controls with custom images. The screens below show UI elements in the app. As you can see, most of them are either container type controls that don’t have OS-specific visual style (UICollectionView, UIScrollView, UILabel) or UI controls with custom images. For the container type controls and controls with custom images, Windows Bridge for iOS will maintain them as is. However, for the standard UIKit controls without customization, Windows Bridge for iOS will try translating them into corresponding UI controls in Windows to provide the best experience for Windows customers. In Pori Fashion Show, you can find this example from the UIAlertView which has been translated into the Dialog UI control in Windows.

Moving layouts from Storyboard to code
To get around Storyboard issues, you may need to remove the Storyboard file Main.storyboard from your Visual Studio project. This will involve rewriting your iOS layout in code, starting with the landing page.
If you have any trouble adding Auto-Layout Constraints programmatically, there are several resources available to help you. First, you’ll want to reference the Programmatically Creating Constraints webpage to help you understand the process. In addition, you can consult the UI catalog sample app in WinObjc repo for an example specific to the iOS Bridge. After adding UI elements and Auto-Layout Constraints in the code, Park was able to see the landing page running on Windows 10.
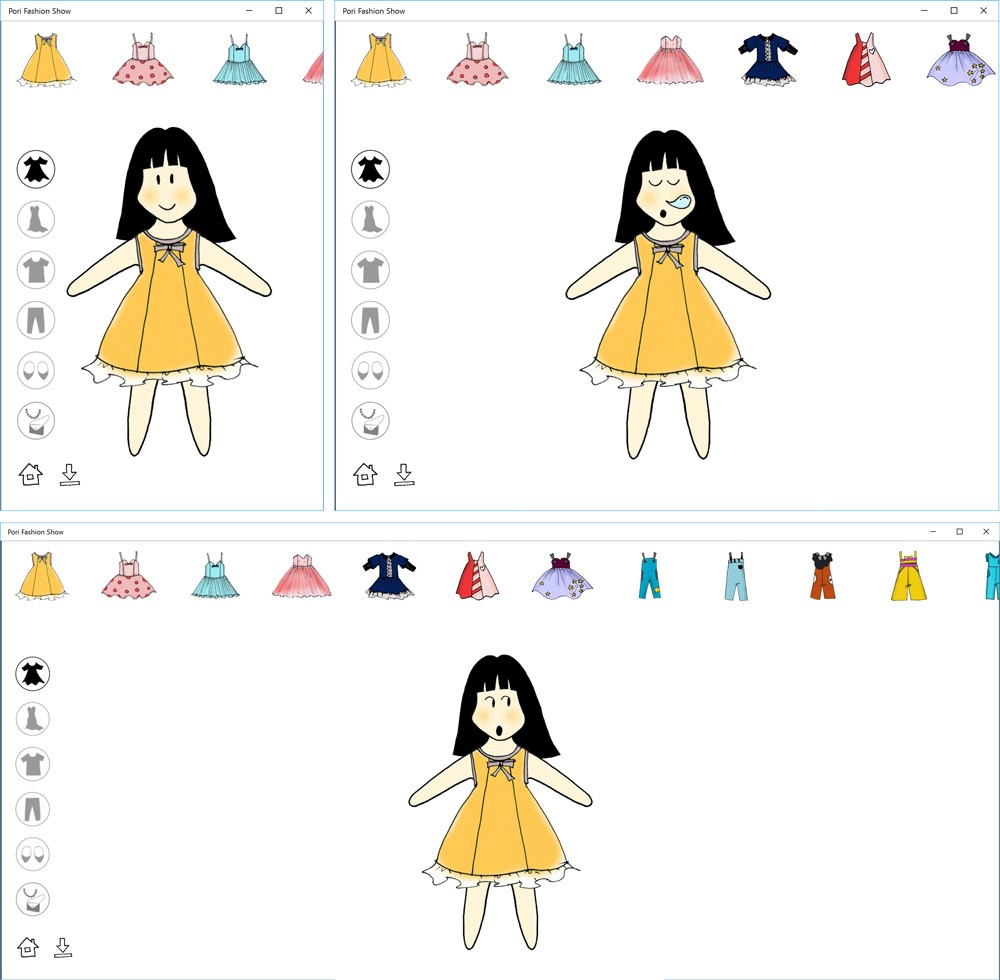
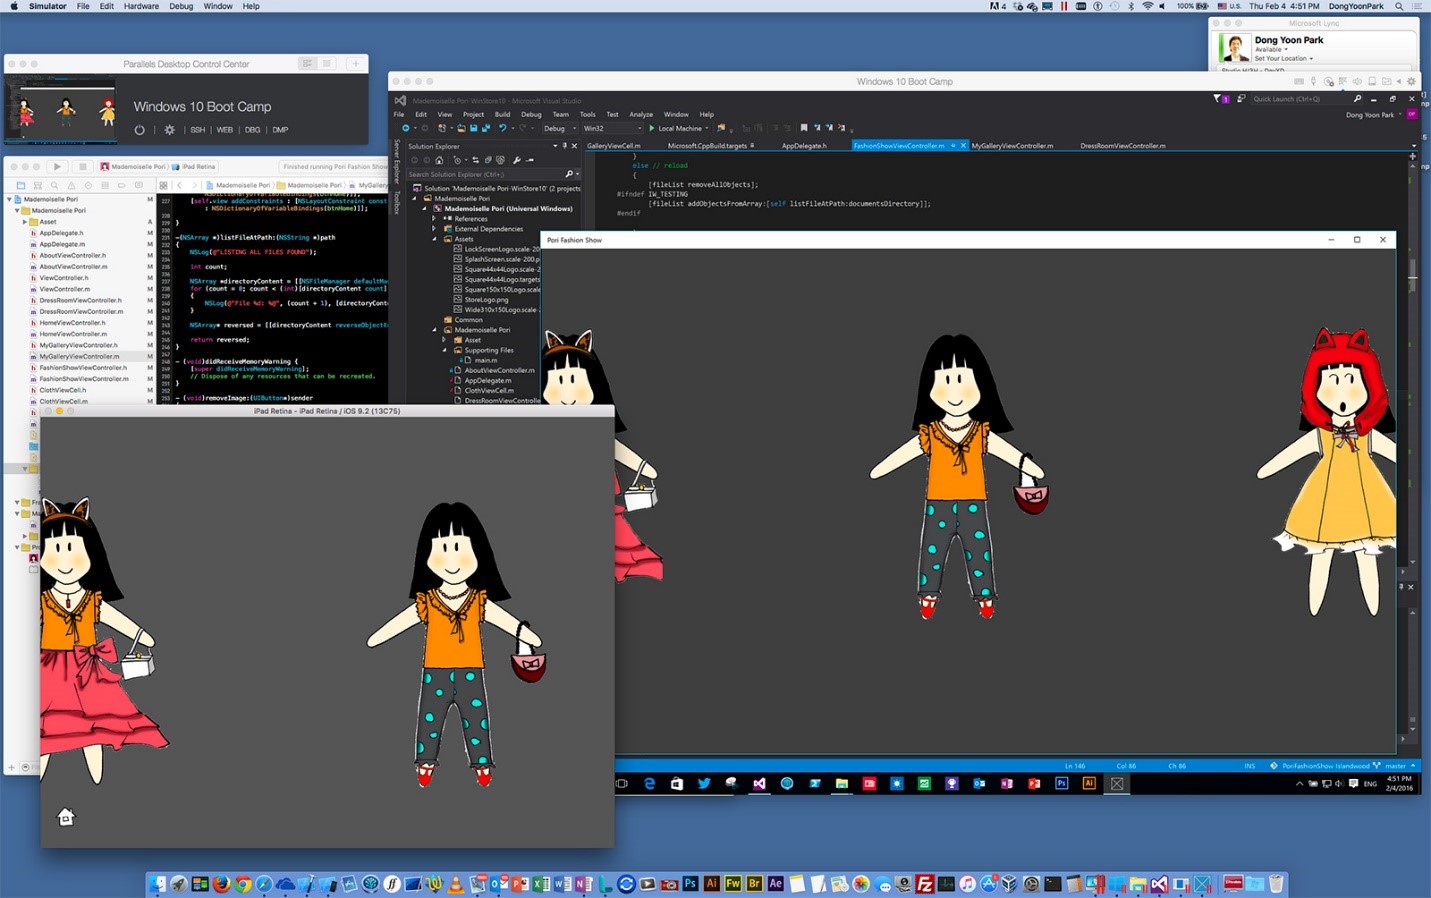
In Pori Fashion Show, it turns out that Auto-Layout Constraints work perfectly with a large display on a desktop device. As you can see below, the app scales very well from a phone-size window to large desktop window.
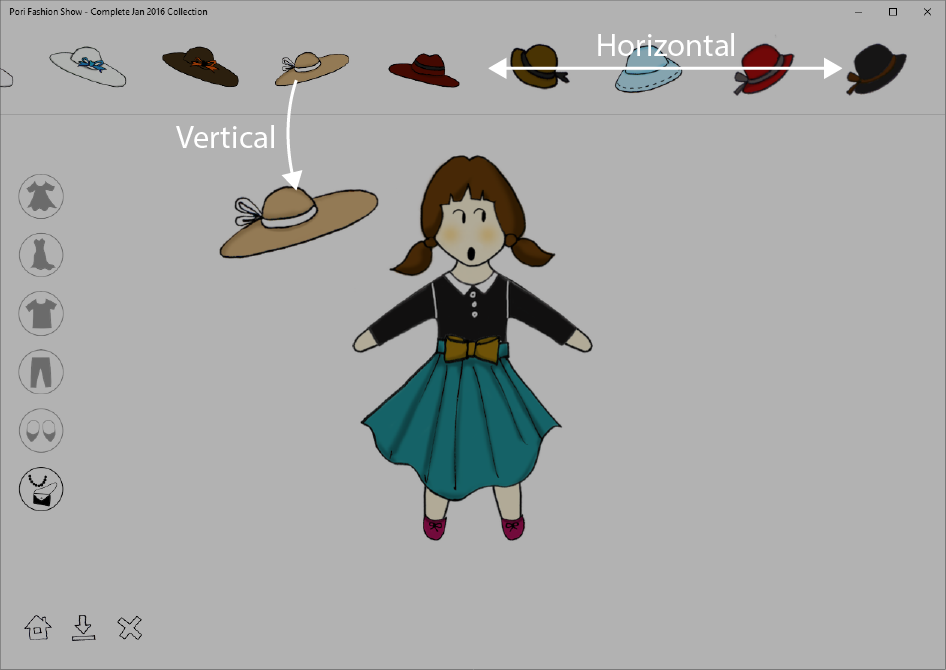
Finding workarounds for unimplemented APIs
You may see the message “[Stubbed function called!]” or “(E_NOTIMPL)” in the output console when your app is accessing unimplemented APIs. Pori Fashion Show uses two gesture recognizers: UILongPressGestureRecognizer and UIPanGestureRecognizer. In the iOS version of the app, UILongPressGestureRecognizer is used to distinguish between normal horizontal scrolling of the collection view and dragging out a cloth from the collection view. On Windows, however, UILongPressGestureRecognizer ended up throwing one of the not implemented messages in the output console.
When you encounter non-implemented APIs like this, you’ll often have to think outside of the box to come up with other solutions. In the case of Pori Fashion Show, it was necessary to find an alternative to using the unimplemented long press gesture API that wouldn’t disturb normal scrolling of the UICollectionView.
The trick for working around this is to use the velocity of UIPanGestureRecognizer to detect the scrolling direction. This way, UIPanGestureRecognizer can be used for dragging instead of UILongPressGestureRecognizer.
Screen capture, file writing, and loading
In the Pori Fashion Show UWP app, the screen capture code mysteriously didn’t work at first. After a lot of investigation, it turned out that the problem was fairly simple to fix.
While iOS allows the use of colons (:) in filenames, Windows does not. In moving apps from one platform to the other, many problems may simply come down to failing to use cross-platform naming conventions.
In the app code, the problem involved using colons as part of the screen capture file names. While colons are a normal convention for recording time, it will break your app if you try to use it to save files.
The code below shows how the screen capture code was updated in order to save files with a cross-platform naming convention.
[code language=”csharp”]
// Get current date and time
NSDate *now = [NSDate date];
NSDateFormatter *dateFormatter = [[NSDateFormatter alloc] init];
dateFormatter.dateFormat = @"yyyy-MM-dd HH:mm:ss";
[dateFormatter setTimeZone:[NSTimeZone systemTimeZone]];
// Save image
NSArray *paths = NSSearchPathForDirectoriesInDomains(NSDocumentDirectory, NSUserDomainMask, YES);
NSString *documentsDirectory = [paths objectAtIndex:0];
NSString *strPath = [documentsDirectory stringByAppendingPathComponent:[NSString stringWithFormat:@"Pori %@.png",now]];
[imageData writeToFile:strPath atomically:YES];
[/code]
After discovering the cross-platform naming issue, an additional problem came up in the Pori Fashion Show UWP app with the way images were saved. Images were getting color shifted. In this case, the workaround was simply to open an issue on WinObjC GitHub (https://github.com/Microsoft/WinObjC/issues/349).

Sometimes the best thing to do when you are having problems with your bridge app is to go back to the source. Windows Bridge for iOS is constantly under development and being improved. If you encounter an issue, do the team a favor and let them know about it.
The Windows Bridge for iOS development team responded quickly to the color shift problem and, in less than a week, they found and fixed the issue. After updating the SDK release from the git repository, Pori Fashion Show saved images with correct colors.
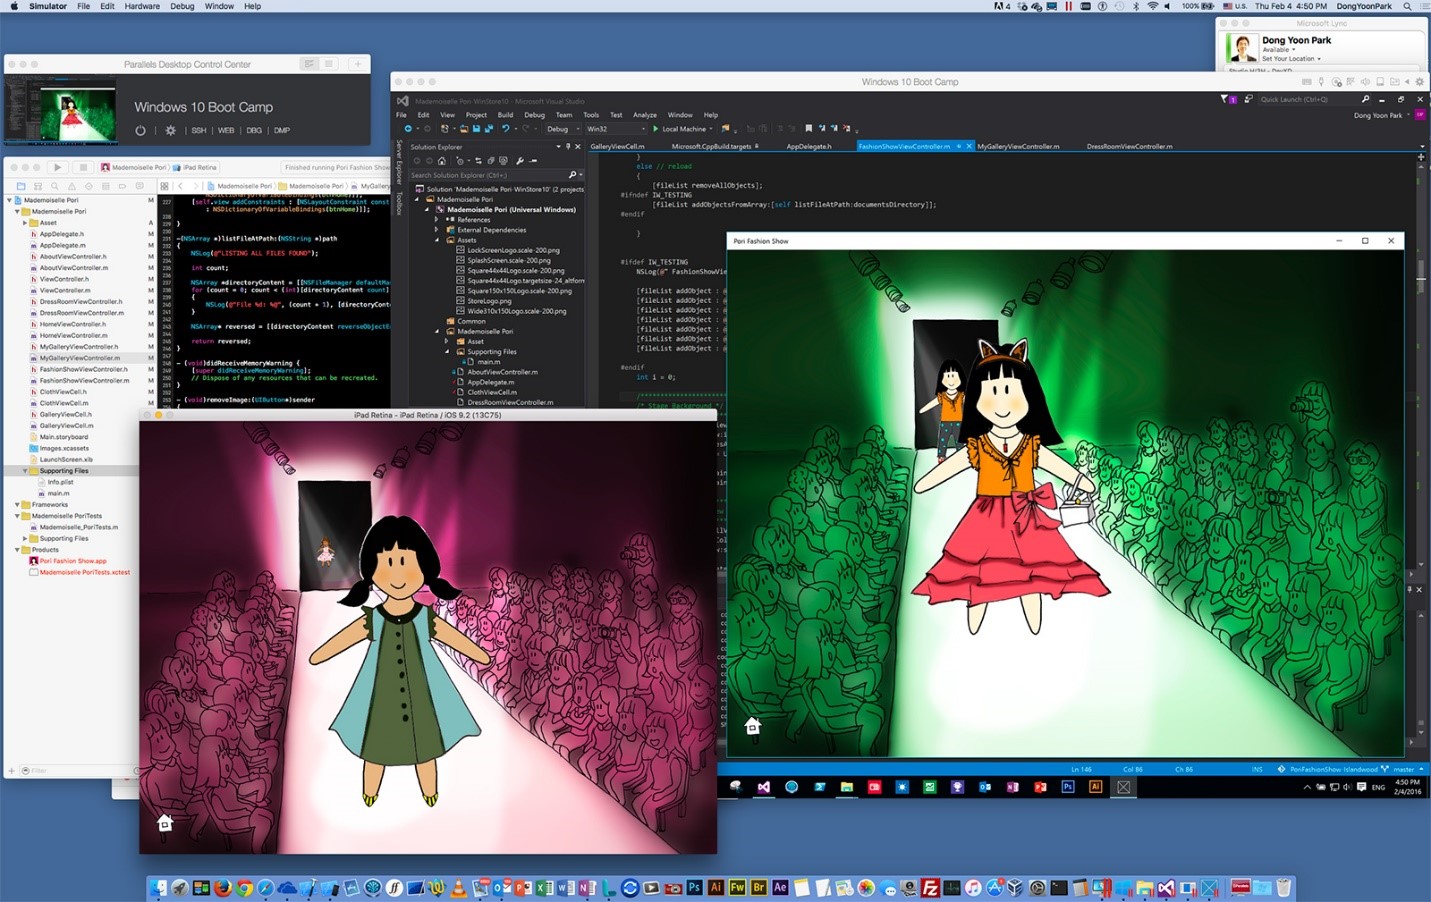
Verify in Visual Studio and Xcode
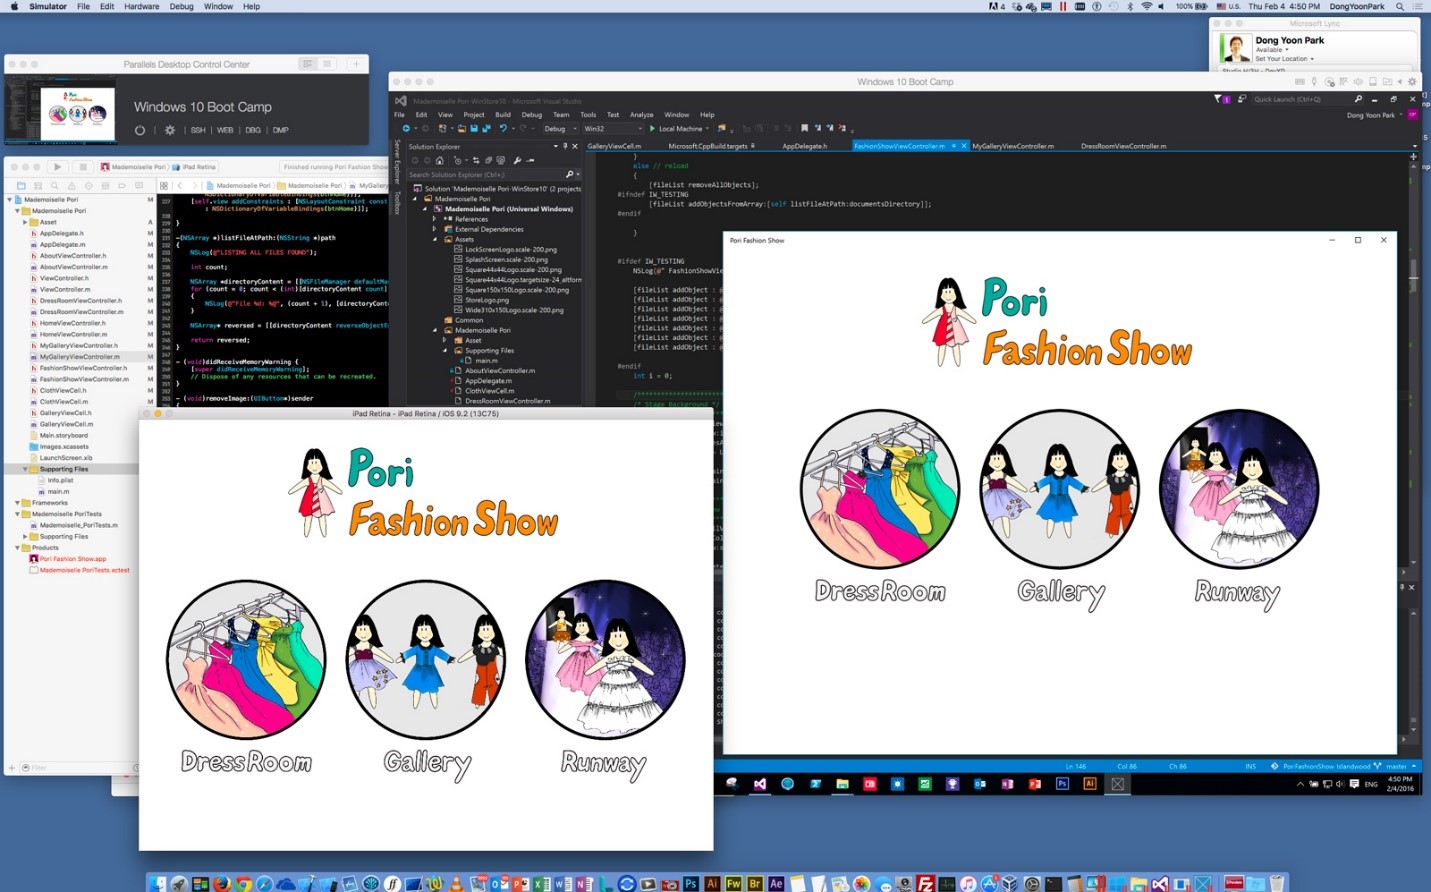
With the shared source code folder, you can run your app in Visual Studio as well as in Xcode to confirm that the code runs well on both Windows and iOS. Here are some screen captures of the app running on iOS Simulator and on Windows as an UWP app.

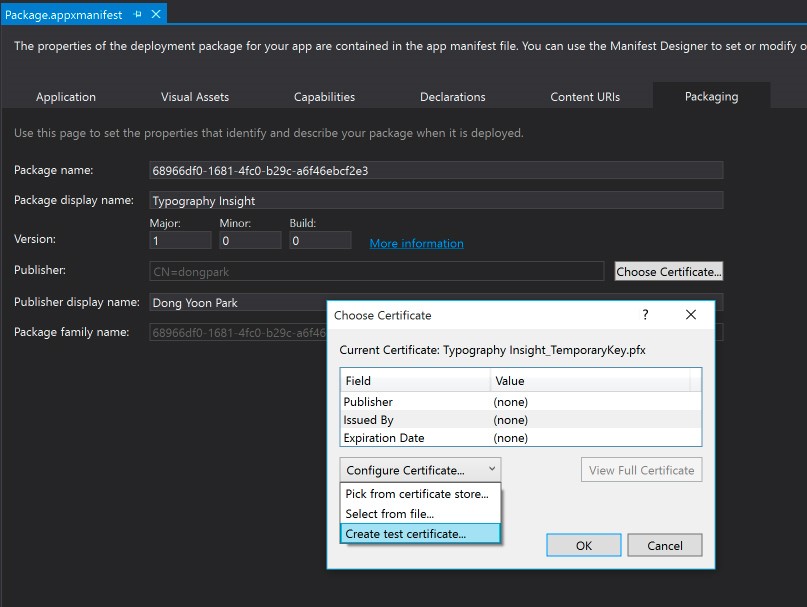
Packaging .appx, running app on Surface Pro and Surface Book
You might be curious to see how touch gestures and interactions in your app will look like on Surface Pro devices. To test your app on other devices without installing Visual Studio, you can generate an app binary package just like ad-hoc binary export in Xcode. To do this, you first have to create a test certificate. In Solution Explorer, open the Package.appxmanifest file and select the Packaging tab. Click the Choose Certificate… button to display a window, and then from the Configure Certificate drop-down list, select Create test certificate.
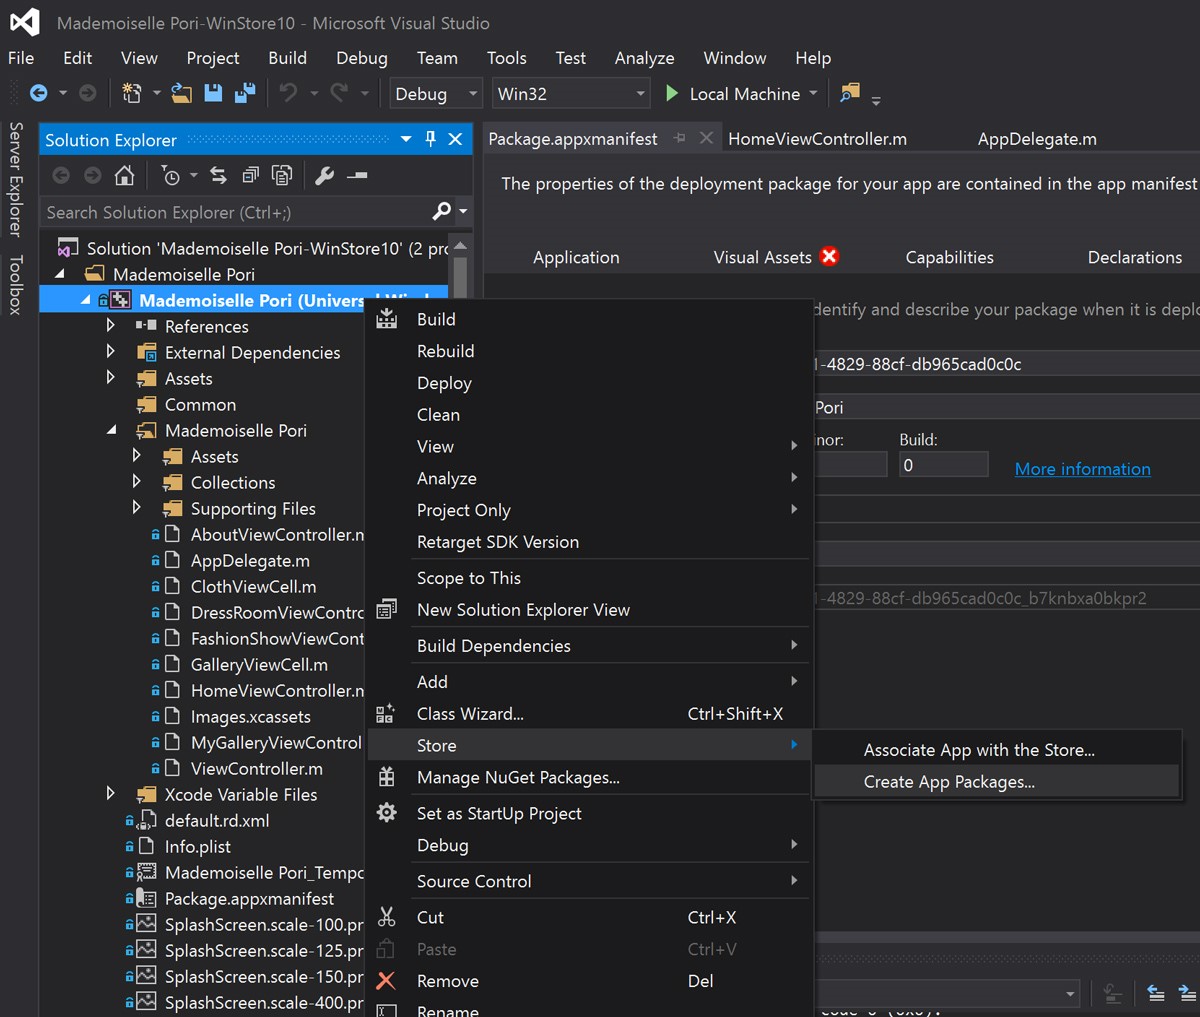
Once the certificate is created, you can generate an app binary. Right-click the project name in Solution Explorer, then select “Create App Packages” from the Store menu.
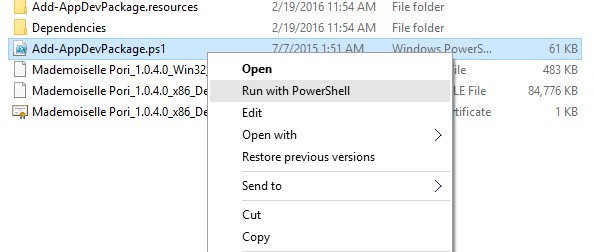
You will see the APP_NAME_1.0.0.0_Debug_Test folder. You can copy this folder to any device you want. From the new device, right-click the file Add-AppDevPackage.ps1 and select Run with PowerShell.
In most cases, you’ll find that gesture recognizers work perfectly on touch display devices, including Surface Pro. In the case of Pori Fashion Show, the UICollectionView’s scrolling is very smooth and natural on a Surface, as well as other touch screens. Drag and drop, in turn, just works.

Summary
In this post, we were able to see how to get a real-world app running beautifully on Windows. In the majority of cases, the Windows Bridge for iOS provides a translation of customized UIKit elements. We also identified useful workarounds to help you through some of the most common challenges you’ll encounter as you expose your iOS app to a greater number of devices. The next post will cover the process of submitting an iOS Bridge app to the Windows Store and details such as getting a Microsoft developer account and preparing required assets. You’ll also see how to run the app on phone devices with the ARM compiler using Windows Bridge for iOS.