

Microsoft Cognitive Services provides a set of cloud-based APIs with functionality that brings more of a human element to your app’s interaction through vision, language, knowledge, and search.
One of the advantages of these cloud-based APIs is that they can be used regardless of the client platform and so can be applicable both to you, as a UWP app developer, but also to a website developer and to a developer who’s wanting to build cross-platform native apps using technologies, such as Xamarin.
In terms of speech technologies, Microsoft Cognitive Services today offers four main areas of functionality in preview:
- Speech Recognition (try it out in the browser)
- Text to Speech (try it out in the browser)
- Custom Recognition Intelligent Service (CRIS) (private preview, check out the site)
- Speaker Recognition (try it out in the browser)
There is some overlap between the ‘Speech Recognition’ and ‘Text to Speech’ areas here and some of the UWP functionality that we have explored in previous articles and so we will not focus on them here but I encourage you to investigate them and the CRIS service.
For this article, we will dig into the last of the four areas – Speaker Recognition.
Speaker Recognition
Cognitive Services offers two related services that we can use to add a little bit of what used to be ‘science fiction’ into our UWP apps—speaker verification and identification services.
Both of these services involve some training of the cloud in order to achieve one of two things:
- Verification. Confirm that spoken audio comes from a specific, identified user.
- Identification. Determine which of a set of users has spoken based purely on the captured audio.
As an example, you might present an access card to a locked door to identify yourself as ‘Mike,’ and then you could verify this by speaking some text as a second form factor for the authentication. Alternatively, you might hope to walk up to the door and have it open simply by identifying yourself with your voice.
Before we get into the APIs that make verification and identification possible, let’s take a moment to get clear on one important piece of Microsoft Cognitive Services terminology:
- Enrollment. A process in which the service is trained to recognize a user’s voice. In order for a user to undergo enrollment, the service must first create a profile and add various samples of speech to that profile until the service has been suitably trained. The user will then be ‘enrolled.’
With that terminology in mind, let’s dig in to the two services that we want to explore.
Speaker Verification
The speaker verification API isn’t too broad in terms of the number of separate API calls that you need to get an understanding of but, clearly, it’s offering a complex and powerful service through those APIs.
The API documentation details the REST APIs that enable speaker verification and a typical flow through those APIs would involve the enrollment phase:
- Creating a verification profile. This is a simple call to the API that returns a GUID through which the new profile is identified. At the time of writing, a single subscription can create up to a maximum of 1,000 profiles.
- Choosing one of the available verification phrases for your user to speak. A simple call to the API will return a list of phrases, including the classic “my voice is my passport, verify me” taken from the film “Sneakers.”
- Prompting your user to speak the verification phrase while recording their speech. There are requirements for this audio recording, namely 1 – 15 seconds of speech recorded in PCM and stored in a WAV container at 16K in 16-bit mono.
- Calling the create enrollment API with the recorded speech stream and the profile GUID to attempt to enroll the user. A successful call to this API will return a status that indicates either that the user is enrolled or the service needs a number of additional enrollments before the user can be identified. At the time of writing, the service needs at least 3 enrollments.
- Repeating steps 4 and 5 above until step 4 returns that the user is enrolled.
Once the enrollment phase is complete, the service is ready to verify the user. The API flow here is much simpler:
- Prompting your user to speak the same verification phrase with which they enrolled while recording their speech. The requirements for the audio are the same as for the enrollment phase.
- Calling the verification API with the recorded speech and the user’s profile GUID and checking the return status for the following:
- The result, which might be an accept/reject value.
- The confidence with which the result has been generated. Note that the service can return low, normal, or high values to indicate its confidence in having correctly verified the user.
As with any pure RESTful service, these APIs can be invoked from any platform that can record audio in the required format and then submit it over HTTP. For the UWP developer, this typically involves doing some work with HttpClient in order to wrap up the lower-level calls and serialize types and so on. In terms of the audio work, that can be done programmatically via the AudioGraph APIs.
For the purposes of simplifying the code in this article, I have written a simple, prototype wrapper for the verification APIs (available from GitHub). The wrapper is available for use but keep in mind that it was written for the purposes of this article, may not be complete, and has undergone little testing.
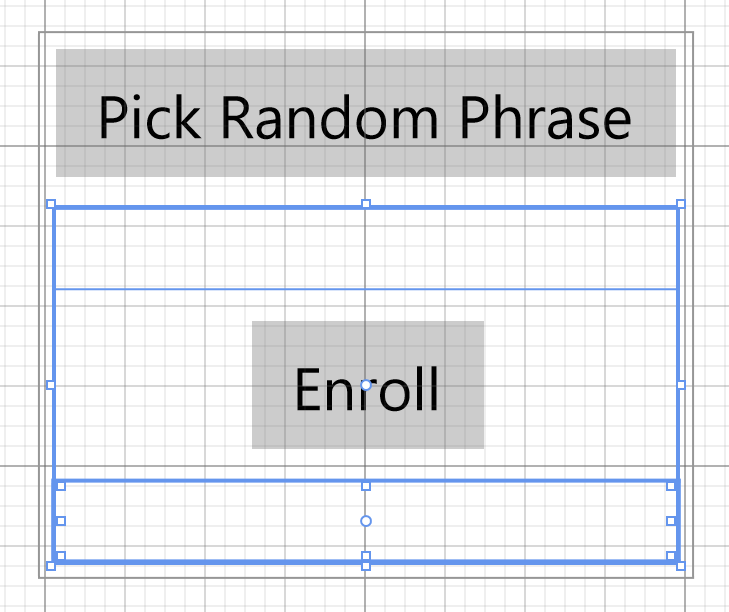
We begin with a simple XAML UI defined by the fragment below.
[code language=”csharp”]
<StackPanel HorizontalAlignment="Center" VerticalAlignment="Center">
<Button
Margin="4"
HorizontalAlignment="Center"
Content="Pick Random Phrase"
Click="OnGetPhraseAsync" />
<TextBlock
Margin="4"
x:Name="txtPhrase" />
<Button
Margin="4"
HorizontalAlignment="Center"
Content="Enroll"
Click="OnEnrollAsync" />
<TextBlock
Margin="4"
x:Name="txtProfileId" />
</StackPanel>
[/code]
The XAML designer displays as below:
We can easily implement the functionality behind the ‘Pick Random Phrase’ button above using code that calls into our wrapper of the verification REST API, as below:
[code language=”csharp”]
async void OnGetPhraseAsync(object sender, RoutedEventArgs e)
{
// VerificationClient is my wrapper for the verification REST API.
// It needs my Cognitive speaker recognition API key in order to work.
VerificationClient verificationClient = new VerificationClient(cognitiveApiKey);
// This calls the ‘list all supported verification phrases’ REST API
// and then simply chooses one of the return phrases at random
string randomlySelectedVerificationPhrase =
await verificationClient.GetRandomVerificationPhraseAsync();
// Display that phrase back in the UI.
this.txtPhrase.Text = randomlySelectedVerificationPhrase;
}
[/code]
Note that in the code fragments, the necessary exception handling has been omitted to shorten code sequences, but it is expected that speech processing will often return failure codes that need to be handled.
Once we have determined the phrase with which we’re going to ask the user to enroll, we can enable the functionality behind the ‘Enroll’ button.
[code language=”csharp”]
async void OnEnrollAsync(object sender, RoutedEventArgs e)
{
// VerificationClient is my wrapper for the verification REST API.
// It needs my Cognitive speaker recognition API key in order to work.
VerificationClient verificationClient = new VerificationClient(cognitiveApiKey);
// This calls the ‘create profile’ REST API and returns the GUID of the
// new profile.
Guid profileId = await verificationClient.AddVerificationProfileAsync();
// Display the profile ID in the UI.
this.txtProfileId.Text = profileId.ToString();
bool enrolled = false;
do
{
await ConfirmMessageAsync("Dismiss this dialog then say your phrase");
// Wrapper class which uses AudioGraph to record audio to a file over a specified
// period of time.
StorageFile recordedAudioFile =
await CognitiveAudioGraphRecorder.RecordToTemporaryFileAsync(TimeSpan.FromSeconds(10));
// This calls the ‘create enrollment’ API with the speech stream and
// decodes the returned JSON.
VerificationEnrollmentResult result =
await verificationClient.EnrollRecordedSpeechForProfileIdAsync(
profileId, recordedAudioFile);
// Get rid of the recorded speech.
await recordedAudioFile.DeleteAsync();
// Do we need to do more enrollments? Note – this check is probably
// over-simplistic.
enrolled = (result.RemainingEnrollments == 0);
} while (!enrolled);
}
[/code]
It will use this simple method to prompt the user:
[code language=”csharp”]
static async Task ConfirmMessageAsync(string text)
{
MessageDialog dialog = new MessageDialog(text);
await dialog.ShowAsync();
}
[/code]
The previous OnEnrollAsync button handler will create a new verification profile with the service. It will then loop three times, prompting the user with a simple dialog before recording 10 seconds of their speech and using that as the basis for enrollment.
Note that the code checks the RemainingEnrollments value returned from the service in order to decide whether the user is fully enrolled or needs to record their passphrase more times.
Once enrollment is complete, we could add an additional button to our UI to allow the user to attempt verification.
[code language=”csharp”]
<Button
Content="Verify"
Click="OnVerifyAsync"
HorizontalAlignment="Center"
Margin="4" />
[/code]
Clicking this button would prompt the user to repeat their passphrase again to see if the service can recognise their voice as being associated with that profile ID. That code would look like this:
[code language=”csharp”]
async void OnVerifyAsync(object sender, RoutedEventArgs e)
{
// Take the user’s profile ID back from the UI as we haven’t stored
// it anywhere.
Guid profileId = Guid.Parse(this.txtProfileId.Text);
// Prompt the user to speak.
await ConfirmMessageAsync("Dismiss the dialog then speak your phrase");
// Wrapper class which uses AudioGraph to record audio to a file over a specified
// period of time.
StorageFile recordedFile =
await CognitiveAudioGraphRecorder.RecordToTemporaryFileAsync(
TimeSpan.FromSeconds(10));
// VerificationClient is my wrapper for the verification REST API.
// It needs my Cognitive speaker recognition API key in order to work.
VerificationClient verificationClient = new VerificationClient(
cognitiveApiKey);
VerificationResult result =
await verificationClient.VerifyRecordedSpeechForProfileIdAsync(
profileId, recordedFile);
// Get rid of the recorded audio file.
await recordedFile.DeleteAsync();
await ConfirmMessageAsync(
$"Your speech was {result.Result}ed with {result.Confidence} confidence");
}
[/code]
With our REST wrapper and these ~20 lines of code, we are now in a position to verify whether a particular passphrase is being spoken by the user who claims to be speaking it.
It’s worth noting that, in a real application, you would likely want to deal with a user’s name and have your application map between that name and their verification profile ID and passphrase.
Speaker Identification
The pattern for working with speaker identification is very similar to that for verification, but there are some key differences:
- There is no list of passphrases associated with identification. The user speaks his or her own choice of words.
- A full 60 seconds of speech is needed to build a user’s profile and also to identify a user. This gives the user a lot more speaking to do than in the verification case.
- An identification request does not generate a response containing the processing results. Instead, the service returns a response containing a URL that is unique to the request and which can later be polled to gather the operation results when processing is complete.
Additionally, at the point where our app wants to identify a user via the identification API, the service cannot do this against all of the potential 1,000 profiles with a single REST call. Instead, the client needs to guide the service by submitting up to 10 candidate profile IDs at a time for the service to check against. Clearly, this could make for many round-trips against a fully populated service. That perhaps makes the service more suitable today for a smaller set of users.
As we did for verification, we will use the same wrapper library to invoke the REST APIs from our UWP code and we will create the simplest of UIs to exercise our identification code.
[code language=”csharp”]
<StackPanel
HorizontalAlignment="Center"
VerticalAlignment="Center">
<Button
Margin="4"
HorizontalAlignment="Center"
Content="Enrol"
Click="OnEnrollAsync" />
<Button
Margin="4"
HorizontalAlignment="Center"
Content="Identify"
Click="OnIdentifyAsync" />
</StackPanel>
[/code]
We can put the following code behind the ‘Enroll’ button so as to create a new identification profile for the user and to enroll 60 seconds of their speech with the service:
[code language=”csharp”]
async void OnEnrollAsync(object sender, RoutedEventArgs e)
{
// IdentificationClient is my wrapper for the identification REST API.
// It needs my Cognitive speaker recognition API key in order to work.
IdentificationClient idClient = new IdentificationClient(cognitiveApiKey);
// Make a call to the ‘Create Profile’ REST API and get back a new profile ID.
Guid profileId = await idClient.AddIdentificationProfileAsync();
float remainingTalkTime = 60.0f;
// Loop until we have fully enrolled – this check is perhaps simplistic as
// we may get errors etc.
while (remainingTalkTime > 0)
{
// The service wants a minimum of 20 seconds of recorded file.
remainingTalkTime = Math.Max(remainingTalkTime, 20.0f);
// Ask the user to begin speaking.
await ConfirmMessageAsync(
$"dismiss the dialog then speak for {remainingTalkTime} seconds");
// Wrapper class which uses AudioGraph to record audio to a file over a specified
// period of time.
StorageFile recordedFile = await CognitiveAudioGraphRecorder.RecordToTemporaryFileAsync(
TimeSpan.FromSeconds(remainingTalkTime));
// Make a call to the ‘Create Enrollment’ API to process the speech for the
// profile.
PendingOperationResult serviceOperationResult = await
idClient.EnrollRecordedSpeechForProfileIdAsync(profileId, recordedFile);
// Make polling calls to the ‘Get Operation Status’ REST API waiting for the
// service side operation to complete
IdentificationOperationResult result =
await serviceOperationResult.PollForProcessingResultAsync(TimeSpan.FromSeconds(5));
// Get rid of the speech file.
await recordedFile.DeleteAsync();
// How much more speech does the service need to hear from the user?
remainingTalkTime = result.ProcessingResult.RemainingEnrollmentSpeechTime;
}
}
[/code]
Clearly, a real-world scenario would need more in terms of user experience, but hopefully, you can see the basic pattern from the code sample above in terms of how the code loops to record the user’s speech until the service tells us that it has heard enough speech to fully enroll the user.
Once we have a number of users enrolled with the service, we can write the code behind the ‘Identify’ button:
[code language=”csharp”]
async void OnIdentifyAsync(object sender, RoutedEventArgs e)
{
// IdentificationClient is my wrapper for the identification REST API.
// It needs my Cognitive speaker recognition API key in order to work.
IdentificationClient idClient = new IdentificationClient(cognitiveApiKey);
// In this example, we are only going to use the first 10 profile IDs that the
// service knows in order to keep the code shorter.
IdentificationProfile[] profiles = await idClient.GetIdentificationProfilesAsync();
Guid[] profileIds = profiles.Take(10).Select(p => p.IdentificationProfileId).ToArray();
// Ask the user to begin speaking.
await ConfirmMessageAsync(
$"dismiss the dialog then speak for 60 seconds");
// Wrapper class which uses AudioGraph to record audio to a file over a specified
// period of time.
StorageFile recordingFile = await CognitiveAudioGraphRecorder.RecordToTemporaryFileAsync(
TimeSpan.FromSeconds(60));
// Make a call to the ‘Create Enrollment’ API to process the speech for the
// profile.
PendingOperationResult serviceOperationResult = await
idClient.IdentifyRecordedSpeechForProfileIdsAsync(recordingFile, profileIds);
// Make polling calls to the ‘Get Operation Status’ REST API waiting for the
// service side operation to complete
IdentificationOperationResult result =
await serviceOperationResult.PollForProcessingResultAsync(TimeSpan.FromSeconds(5));
// Get rid of the speech file.
await recordingFile.DeleteAsync();
// Assume that things failed.
string message = "not recognised";
// But if they worked…
if (result?.ProcessingResult.IdentifiedProfileId != default(Guid))
{
// Build up a message containing the recognised profile ID and the confidence applied.
message = $"recognised profile {result.ProcessingResult.IdentifiedProfileId.ToString()}" +
$" with {result.ProcessingResult.Confidence} confidence";
}
await ConfirmMessageAsync(message);
}
[/code]
Note that the code above is simplified. It attempts to recognize the speech only against the first 10 profile identifiers that the service has registered. It could be extended to more generally perform the identification process across larger groups of profile identifiers.
Wrapping up
We’ve covered quite a lot of ground in this and the previous articles about speech using the APIs provided by UWP and extending them to include some of the new and exciting APIs available for preview under Microsoft Cognitive Services.
Are you inspired to think about what you might do to make use of speech within your own apps? If nothing else, we hope you are left with the impression that speech is available to you as a developer today, and even better, it doesn’t require a Rocket Scientist badge for you to utilize it.
Additional Resources
Don’t forget to check out these resources below:
- Microsoft Cognitive Services Speaker Recognition API
- Speech Interactions
- Speech Design Guidelines
- Speech Sample
And you can also dig into natural interaction topics, such as speech, at Channel 9:
Written by Mike Taulty (@mtaulty), Developer Evangelist, Microsoft DX (UK)