

This is the third of three blog posts that describe the features, design and technical challenges we faced as we developed the app.
Our first post, FamilyNotes: Introducing a Windows UWP sample using ink speech and face recognition, introduced the app and described the overall design and architecture.
The second post, FamilyNotes: Using the camera to detect a user, covered the impressive facial recognition features provided by Microsoft Cognitive Services.
In this post, we will cover Cortana voice commands, speech recognition and inking.
The Visual Studio project for FamilyNotes can be downloaded from GitHub at https://github.com/Microsoft/Windows-appsample-familynotes.
Cortana
We tried to make FamilyNotes a good example how to use speech in a UWP app, and there are two parts to this. The first is to make the app respond to commands, and the second is to allow the user to dictate content into the app. For the first part, we used Cortana.
Cortana is the Windows digital assistant with functionality and expertise that can be extended through integration with your app. This can ensure you and your app are the experts that Cortana turns to when users require info or services that Cortana can’t provide natively.
Windows 10 enabled Cortana to help users across various Windows devices including mobile, desktop and team SKUs. Because of this uniquely broad device support, we felt that the FamilyNotes app, with its shared and collaborative experiences across devices, was a prime candidate for integration with Cortana.
Even though FamilyNotes is intended as a full-screen, exclusive mode kiosk app on a tablet device, we expected there to be times when the app wasn’t running as a user approached. For these instances, we wanted to be able start the app via a deep link using either the Cortana user interface or, when enabled by a user, the system’s ability to be in constant listening mode and to take action when it hears the phrase “Hey Cortana.”
Voice commands
Extending Cortana with your app requires you to implement voice commands.
Note: Even though “voice” commands implies support for speech recognition only, they also support text commands through keyboard input. In fact, any voice commands you define are supported equally by speech and text. This is an important point when discussing “more personal computing” and “natural UI,” as every device and input type must be considered equally when designing and building an app. You never know what kind of devices, abilities or preferences that users will bring to the table.
But seriously, speech rules, text drools.
Voice commands are defined in a Voice Command Definition (VCD) file, which is a XML file described by the Voice Command Definition (VCD) elements and attributes v1.2 schema. This file is added to your project and is included in the app package when your app is installed.
Here’s the VCD file for FamilyNotes. We’ll cover some specifics later.
[code lang=”csharp”]
<?xml version="1.0" encoding="utf-8" ?>
<VoiceCommands xmlns="http://schemas.microsoft.com/voicecommands/1.2">
<CommandSet xml:lang="en-us" Name="FamilyNotesCommandSet_en-us">
<AppName> FamilyNotes </AppName>
<Example> Add note to FamilyNotes </Example>
<Command Name="addNewNote">
<Example> Add note to FamilyNotes </Example>
<ListenFor RequireAppName="BeforeOrAfterPhrase"> add [new] note [to] </ListenFor>
<ListenFor RequireAppName="ExplicitlySpecified"> add [new] {builtin:AppName} note</ListenFor>
<Feedback> Opening FamilyNotes to add note </Feedback>
<Navigate/>
</Command>
<Command Name="addNewNoteForPerson">
<Example> Add note for Brian to FamilyNotes </Example>
<ListenFor RequireAppName="BeforeOrAfterPhrase"> add [new] note for {person} [to] </ListenFor>
<ListenFor RequireAppName="BeforeOrAfterPhrase"> add [new] note to {person} [to] </ListenFor>
<ListenFor RequireAppName="ExplicitlySpecified"> add [new] {builtin:AppName} note for {person}</ListenFor>
<ListenFor RequireAppName="ExplicitlySpecified"> add [new] {builtin:AppName} note to {person}</ListenFor>
<Feedback> Opening FamilyNotes to add note for {person} </Feedback>
<Navigate/>
</Command>
<Command Name="showMyNotes">
<Example> Show my FamilyNotes notes </Example>
<ListenFor RequireAppName="BeforeOrAfterPhrase"> show [my] notes [from] </ListenFor>
<ListenFor RequireAppName="ExplicitlySpecified"> show [my] {builtin:AppName} notes </ListenFor>
<Feedback> Here are your FamilyNotes notes </Feedback>
<VoiceCommandService Target="FamilyNotesVoiceCommandService"/>
</Command>
<!– Everyone is app default. Dynamically build this list on first launch and for in-app updates. –>
<PhraseList Label="person">
<Item>Everyone</Item>
</PhraseList>
</CommandSet>
</VoiceCommands>
[/code]
Cortana and your app: Love at first sight
Once an app is installed, the app name is registered with Cortana and a user can immediately issue a basic command to Cortana and start your app without any further work by you. For example, “Hey Cortana, start FamilyNotes” or “Hey Cortana, run FamilyNotes.” You don’t need to provide your own voice command file for this to just work. Easy, right?
Unfortunately, installing your app does not install the custom voice commands you’ve spent so much time creating, usability testing and culturally sensitizing! Your app must be manually launched at least once by the user to register your voice commands with the system.
When your voice commands are registered, your app can be activated using the custom voice commands defined in your VCD file.
To launch or to activate
When an app is started in a “normal” fashion, typically by selecting an app tile or double-clicking a file in Windows Explorer, the OnLaunched event is fired. You must override the handler for this event in the app.xaml.cs file to retrieve the VCD file from your app package and register it with the system.
Here’s the VCD installation code from the OnLaunched event handler of the FamilyNotes app:
[code lang=”csharp”]
// Cortana voice commands.
// Install Voice Command Definition (VCD) file.
try
{
// Install the main VCD on launch to ensure
// most recent version is installed.
StorageFile vcdStorageFile =
await Package.Current.InstalledLocation.GetFileAsync(
@"VoiceCommandObjects\VoiceCommands.xml");
await Windows.ApplicationModel.
VoiceCommands.VoiceCommandDefinitionManager.
InstallCommandDefinitionsFromStorageFileAsync(
vcdStorageFile);
}
catch (Exception ex)
{
System.Diagnostics.Debug.WriteLine(
"Installing Voice Commands Failed: " + ex.ToString());
}
[/code]
Once the app has been manually started at least once and the voice commands registered with the system, the app can be started through Cortana using the voice commands defined in your VCD file.
Starting an app through a voice command does not fire the OnLaunched event, instead the OnActivated event is fired. You must override the OnActivated event in app.xaml.cs to process the voice command.
Because there are a few ways to activate an app (including through a URI or share target), you need to determine exactly how it was activated and handle each appropriately.
Here’s the OnActivated handler from FamilyNotes (we only care about voice command activation):
[code lang=”csharp”]
/// <summary>
/// Entry point for an application activated by some means other than normal launching.
/// This includes voice commands, URI, share target from another app, and so on.
///
/// NOTE:
/// A previous version of the VCD file might remain in place
/// if you modify it and update the app through the store.
/// Activations might include commands from older versions of your VCD.
/// Try to handle these commands gracefully.
/// </summary>
/// <param name="args">Details about the activation method.</param>
protected override async void OnActivated(IActivatedEventArgs args)
{
base.OnActivated(args);
Type navigationToPageType;
VoiceCommandObjects.VoiceCommand navCommand = null;
// Voice command activation.
if (args.Kind == Windows.ApplicationModel.Activation.ActivationKind.VoiceCommand)
{
// Event args can represent many different activation types.
// Cast it so we can get the parameters we care about out.
var commandArgs = args as VoiceCommandActivatedEventArgs;
Windows.Media.SpeechRecognition.SpeechRecognitionResult
speechRecognitionResult = commandArgs.Result;
// Get the name of the voice command and the text spoken.
// See VoiceCommands.xml for supported voice commands.
string voiceCommand = speechRecognitionResult.RulePath[0];
string textSpoken = speechRecognitionResult.Text;
// commandMode indicates whether the command was entered using speech or text.
// Apps should respect text mode by providing silent (text) feedback.
string commandMode = this.SemanticInterpretation("commandMode", speechRecognitionResult);
switch (voiceCommand)
{
case "addNewNote":
// Create a navigation command object to pass to the page.
navCommand = new VoiceCommandObjects.VoiceCommand();
navCommand.CommandMode = commandMode;
navCommand.VoiceCommandName = voiceCommand;
navCommand.TextSpoken = textSpoken;
// Set the page to navigate to for this voice command.
// App is a single page app at this time.
navigationToPageType = typeof(MainPage);
break;
case "addNewNoteForPerson":
// Create a navigation command object to pass to the page.
// Access the value of the {person} phrase in the voice command
string noteOwner = this.SemanticInterpretation("person", speechRecognitionResult);
navCommand = new VoiceCommandObjects.VoiceCommand();
navCommand.CommandMode = commandMode;
navCommand.VoiceCommandName = voiceCommand;
navCommand.TextSpoken = textSpoken;
navCommand.NoteOwner = noteOwner;
// Set the page to navigate to for this voice command.
// App is a single page app at this time.
navigationToPageType = typeof(MainPage);
break;
default:
// If we can’t determine what page to launch, go to the default entry point.
navigationToPageType = typeof(MainPage);
break;
}
}
// Protocol activation occurs when a card is clicked within Cortana (using a background task).
else if (args.Kind == ActivationKind.Protocol)
{
// No background service at this time.
navigationToPageType = typeof(MainPage);
}
else
{
// If we were launched via any other mechanism, fall back to the main page view.
// Otherwise, we’ll hang at a splash screen.
navigationToPageType = typeof(MainPage);
}
[/code]
Natural language
As mentioned earlier, you don’t have to employ voice commands to get basic Cortana integration. That comes free when your app is installed.
However, basic is pretty basic.
In the FamilyNotes app, we’ve defined a VCD file that lets Cortana recognize more varied and natural sounding sentences that a user might actually speak (without requiring them to go through the whole “What can I say” exercise – although they can still do that, if necessary). The VCD file also specifies custom feedback through Cortana’s built-in, text-to-speech engine and through text on the Cortana canvas.
Each command is made up of <Command>, <ListenFor> and <Feedback> elements that define what the Cortana speech recognition engine (the same one used by Windows FWIW) can understand and convey.
Here are a couple of examples of <ListenFor> elements from a <Command> that broadens the basic activation command supported by default when you install an app:
[code lang=”csharp”]
<ListenFor RequireAppName="BeforeOrAfterPhrase"> add [new] note [to] </ListenFor>
<ListenFor RequireAppName="ExplicitlySpecified"> add [new] {builtin:AppName} note</ListenFor>
[/code]
These add support for users to say a variety of commands that will activate the FamilyNotes app and start a new note. Examples include, “Hey Cortana, add new note to FamilyNotes” or “Hey Cortana, add new FamilyNotes note.”
Here are additional examples of <ListenFor> elements from more complex <Command> definitions:
[code lang=”csharp”]
<ListenFor RequireAppName="BeforeOrAfterPhrase"> add [new] note to {person} [to] </ListenFor>
<ListenFor RequireAppName="BeforeOrAfterPhrase"> add [new] note for {person} [to] </ListenFor>
<ListenFor RequireAppName="ExplicitlySpecified"> add [new] {builtin:AppName} note for {person}
[/code]
These support adding a new FamilyNotes note addressed to a specific person. The <PhraseList> element specifies the names supported by default. The recognized name is passed to your app automatically through the deep link. FamilyNotes supports a person called “Everyone” for notes directed at the group.
[code lang=”csharp”]
<PhraseList Label="person">
<Item>Everyone</Item>
</PhraseList>
[/code]
Family dynamic
FamilyNotes supports adding new users to the group. When a new user is added, you need to add them to the <PhraseList> of your app’s voice commands. If not, Cortana will fall out of sync with your app.
Here’s the code from Model.cs that dynamically updates the voice commands whenever a new family member is added:
[code lang=”csharp”]
/// <summary>
/// Adds a person to the family collection and updates speech
/// to be aware of their name.
/// </summary>
/// <param name="name">The name of the new family member</param>
/// <param name="pathToImage">Path to an image that represents them</param>
public async void AddPersonAsync(string name, string pathToImage)
{
_family.Add(new Person(name, pathToImage));
await UpdateVCDPhraseList();
}
/// <summary>
/// Adds a person to the family collection and updates speech
/// to be aware of their name.
/// </summary>
/// <param name="newPerson"></param>
public async Task AddPersonAsync(Person newPerson)
{
_family.Add(newPerson);
await UpdateVCDPhraseList();
}
/// <summary>
/// Update the content of the "person" PhraseList element in the VCD
/// when the app is launched or a person is added.
/// </summary>
public async Task UpdateVCDPhraseList()
{
try
{
VoiceCommandDefinition commandDefinitions;
// We only support one locale (en-US) in the VCD.
// Use System.Globalization.CultureInfo to support additional locales.
string countryCode = CultureInfo.CurrentCulture.Name.ToLower();
if (countryCode.Length == 0)
{
countryCode = "en-us";
}
if (VoiceCommandDefinitionManager.InstalledCommandDefinitions.TryGetValue(
"FamilyNotesCommandSet_" + countryCode, out commandDefinitions))
{
System.Collections.Generic.List<string> _friendlyName = new List<string>();
foreach (Person _person in Family)
{
_friendlyName.Add(_person.FriendlyName);
}
await commandDefinitions.SetPhraseListAsync("person", _friendlyName);
}
}
catch (Exception ex)
{
System.Diagnostics.Debug.WriteLine("Update PhraseList element in VCD: " + ex.ToString());
}
}
[/code]
As you can see, extending Cortana with functionality from your app can be incredibly powerful. FamilyNotes just scratches the surface with its implementation. The more naturally a user can speak to their app, the happier they will be.
Dictation mode
Now we’ll look at how we added dictation support to the app.
Speech input is handled in the SpeechManager class, which uses the SpeechRecognizer in the Windows.Media.SpeechRecognition namespace to analyze the sound stream from the microphone.
Note: Don’t confuse this implementation of speech recognition with the desktop speech recognizer in the System.Speech.Recognition namespace.
When the user creates a new note by using speech input, the app enters dictation mode, enabling the user to dictate the content of the note. When the user has finished dictating, the app automatically returns to listening for command phrases. Much of the state management in SpeechManager involves setting the input mode of the SpeechRecognizer from commands to dictation and back.
The SpeechManager provides state management around these operations. Before a new recognition session can start, any running session must end. The EndRecognitionSession method calls the StopAsync or CancelAsync method, depending on the state of the speech recognizer: if it’s idle, which means that it’s not processing audio input, the session is stopped. Otherwise, the session and any current processing are canceled. Calling StopAsync and CancelAsync when the speech recognizer is in an incompatible state raises an InvalidOperationException, so one of main purposes of SpeechManager is to ensure that these methods are called correctly, depending on the session state and the speech recognizer state.
[code lang=”csharp”]
private async Task EndRecognitionSession()
{
// Detach event handlers.
SpeechRecognizer.ContinuousRecognitionSession.Completed -= ContinuousRecognitionSession_Completed;
SpeechRecognizer.ContinuousRecognitionSession.ResultGenerated -= ContinuousRecognitionSession_ResultGenerated;
// Stop the recognition session, if it’s in progress.
if (IsInRecognitionSession)
{
try
{
if (SpeechRecognizer.State != SpeechRecognizerState.Idle)
{
await SpeechRecognizer.ContinuousRecognitionSession.CancelAsync();
}
else
{
await SpeechRecognizer.ContinuousRecognitionSession.StopAsync();
}
IsInRecognitionSession = false;
}
catch (Exception ex)
{
Debug.WriteLine(ex.ToString());
}
}
}
[/code]
The StartRecognitionSession method manages the session state and the speech recognizer state, and the SetRecognitionMode method calls the StartRecognitionSession method to start a new session for the requested mode. Compiling constraints for the new mode is potentially a high-latency operation, and it’s easy for various threads to call this method concurrently. So, SpeechManager provides a Mutex property, which is implemented by using the SempahoreSlim class, to serialize access to this method. The mutex allows only one thread at a time to execute the StartRecognitionSession code path.
The following code example shows how the StartContinuousRecognition method manages state for the speech recognizer. For the full code listing, see SpeechManager.
[code lang=”csharp”]
public async Task StartContinuousRecognition()
{
await Mutex.WaitAsync();
// End the previous speech recognition session.
await EndRecognitionSession();
try
{
// If no mic is available, do nothing.
if (!await IsMicrophoneAvailable())
{
return;
}
// Compile the grammar, based on the value of the RecognitionMode property.
await CompileGrammar();
// You can attach these event handlers only after the grammar is compiled.
SpeechRecognizer.ContinuousRecognitionSession.Completed += ContinuousRecognitionSession_Completed;
SpeechRecognizer.ContinuousRecognitionSession.ResultGenerated += ContinuousRecognitionSession_ResultGenerated;
// Start the recognition session.
await SpeechRecognizer.ContinuousRecognitionSession.StartAsync();
// Keep track of the the recognition session’s state.
IsInRecognitionSession = true;
}
catch (Exception ex)
{
Debug.WriteLine("SpeechManager: Failed to start continuous recognition session.");
var messageDialog = new Windows.UI.Popups.MessageDialog(
ex.Message,
"Failed to start continuous recognition session");
await messageDialog.ShowAsync();
}
finally
{
Mutex.Release();
}
}
[/code]
Talking back
Speaking to your software is more fun if your software answers you. The SpeechSynthesizer class provides the SynthesizeTextToStreamAsync method to create a playable sound stream from the specified text. The SpeechManager.SpeakAsync method passes this stream to a MediaElement to play the stream.
The SpeakAsync method is awaitable, because in the case of a speech prompt, the speech recognizer can hear the prompt and may process it, along with the user’s speech. The FamilyNotes app avoids this bug by awaiting the call to the SpeakAsync method and setting RecognitionMode to SpeechRecognitionMode.Dictation after it completes. This way, the speech prompt ends before recognition begins.
To make the SpeakAsync method awaitable, SpeechManager uses the SemaphoreSlim class to implement a signal from the MediaElement.MediaEnded event to the SpeakAsync method.
The following code example shows how the SpeakAsync method uses a semaphore to wait for the MediaElement to finish playing a speech prompt. For the full code listing, see SpeechManager.
[code lang=”csharp”]
public async Task SpeakAsync(string phrase, MediaElement media)
{
if (!String.IsNullOrEmpty(phrase))
{
// Turn off speech recognition while speech synthesis is happening.
await SetRecognitionMode(SpeechRecognitionMode.Paused);
MediaPlayerElement = media;
SpeechSynthesisStream synthesisStream = await SpeechSynth.SynthesizeTextToStreamAsync(phrase);
// The Play call starts the sound stream playback and immediately returns,
// so a semaphore is required to make the SpeakAsync method awaitable.
media.AutoPlay = true;
media.SetSource(synthesisStream, synthesisStream.ContentType);
media.Play();
// Wait until the MediaEnded event on MediaElement is raised.
await Semaphore.WaitAsync();
// Turn on speech recognition and listen for commands.
await SetRecognitionMode(SpeechRecognitionMode.CommandPhrases);
}
}
[/code]
Adding ink support
After all the excitement of speaking, you might think ink is a poor cousin of input options. However, as anyone with a Surface Book, Surface Pro or other 2-in-1 computer with a stylus will tell you, once you’ve discovered the joy of drawing on your computer, you’ll never go back. We wanted to add the ability for users to create doodles as well as dictate or type their notes.
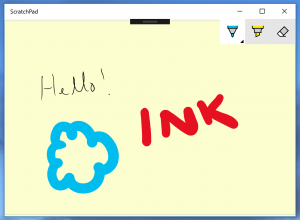
XAML provides the InkCanvas control, and in many situations this is ideal. For example, if you only need a single instance of ink, you can draw, load and save it with very little code. See this ScratchPad sample for a quick demo.
Each new instance of a sticky note is implemented through a partnership between the StickyNote.cs class, which provides the data for a note, and this Note.xaml object, which displays the note’s contents.
The note’s inking capability is provided by an InkCanvas control. To bind ink data from XAML, you bind to the InkStrokeContainer on the InkCanvas. Unfortunately, this property is not available for binding from XAML. This required us to create a new class, BindableInkCanvas.cs, for this capability.
BindableInkCanvas derives from InkCanvas and adds a Strokes dependency property:
[code lang=”csharp”]
public class BindableInkCanvas : InkCanvas
{
public InkStrokeContainer Strokes
{
get { return (InkStrokeContainer)GetValue(StrokesProperty); }
set { SetValue(StrokesProperty, value); }
}
public static readonly DependencyProperty StrokesProperty = DependencyProperty.RegisterAttached(
"Strokes",
typeof(InkStrokeContainer),
typeof(BindableInkCanvas),
new PropertyMetadata(null, StrokesChanged)
);
private static void StrokesChanged(DependencyObject d, DependencyPropertyChangedEventArgs e)
{
var instance = d as BindableInkCanvas;
if (instance != null)
{
instance.InkPresenter.StrokeContainer = instance.Strokes;
}
}
}
[/code]
With the Strokes dependency property, we can bind the InkCanvas’s InkPresenter.StrokeContainer from XAML:
[code lang=”csharp”]
<local:BindableInkCanvas
x:Name="containerForInk"
Strokes="{Binding Path=Ink, Mode=TwoWay}"
[/code]
We can then use this binding to connect the ink data stored in the StickyNote to the InkCanvas that will display it.
Incidentally, we cheated a little bit with the appearance of the note and created a drop shadow effect by abusing the Border property of the grid that defined the note, like this:
[code lang=”csharp”]
<Border x:Name="DropShadow" Width="400" Height="300" Opacity="0.3" RenderTransformOrigin="0,0" BorderThickness="1,1,8,8" BorderBrush="Black" CornerRadius="8" >
<Border.RenderTransform>
<CompositeTransform ScaleX="1.02" ScaleY="1.02" />
</Border.RenderTransform>
</Border>
[/code]
Wrap up
And that’s our app! We hope you enjoy working with it and extending it with your own features and ideas. Or, just borrowing the code for your own projects. If do you, please let us know what you made with it!
Written by Karl Bridge, Senior Content Developer for Windows & Devices Group