

Many visual effects implemented through the Composition APIs, such as blur, use the CompositionEffectBrush class in order to apply effects. Additional examples of Composition effects include 2D affine transforms, arithmetic composites, blends, color source, composite, contrast, exposure, grayscale, gamma transfer, hue rotate, invert, saturate, sepia, temperature and tint. A few very special effects go beyond the core capabilities of the effect brush and use a slightly different programming model. In this post, we’re going to look at an effect brush-based effect, as well as two instances of visual flare that go beyond the basic brush: drop shadow and scene lighting.
Blur
The blur effect is one of the subtlest and most useful visual effects in your tool chest. While many visual effects are design to draw in the user’s attention, the blur’s purpose in user experience design is to do the opposite – basically saying to the user, “Move along, there’s nothing to see here.” By making portions of your UI a little fuzzier, you can direct the user’s attention toward other areas of the screen that they should pay more attention to instead. Aesthetically, blur has a secondary quality of transforming objects into abstract shapes that simply look beautiful on the screen.

Until you get used to the programming model, implementing effects can seem a little daunting. For the most part though, all effects follow a few basic recipes. We’ll use the following in order to apply a blur effect:
- Prepare needed objects such as the compositor
- Describe your effect with Win2D
- Compile your effect
- Apply your effect to your image
The compositor is a factory object to create the classes you need to play in the Visual Layer. One of the easiest ways to get an instance of the compositor is to grab it from the backing visual for the current UWP page.
[code]
_compositor = ElementCompositionPreview.GetElementVisual(this).Compositor;
[/code]
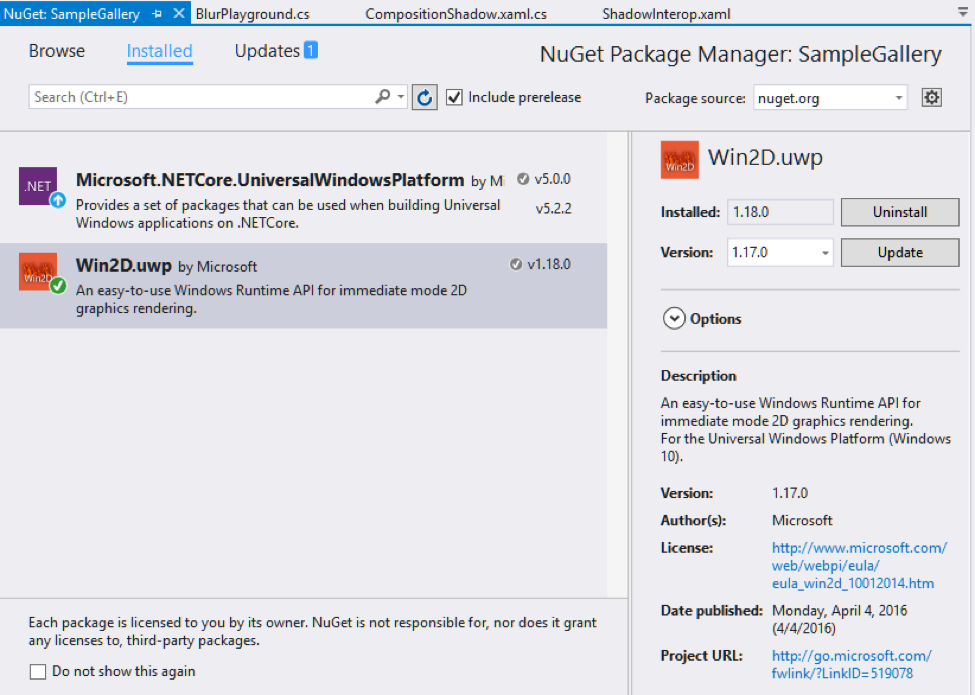
To use composition effects, you also need to include the Win2D.uwp NuGet package in your Visual Studio project. To promote consistency across UWP, the Composition effects pipeline was designed to reuse the effect description classes in Win2D rather than create a parallel set of classes.
Once the prep work is done, you will need to describe your (Win2D) Gaussian blur effect. The following code is a simplified version of the source for the BlurPlayground reference app found in the Windows UI Dev Labs GitHub repository, should you want to dig deeper later.
[code lang=”csharp”]
var graphicsEffect = new GaussianBlurEffect()
{
Name = "Blur",
Source = new CompositionEffectSourceParameter("Backdrop"),
BlurAmount = (float)BlurAmount.Value,
BorderMode = EffectBorderMode.Hard,
};
[/code]
In this code, you are basically creating a hook into the definition with the Backdrop parameter. We’ll come back to this later. Though it isn’t obvious from the code, you are also initializing the BlurAmount property – which determines how blurry the effect is – of the GaussianBlurEffect to the value property of a Slider control with the name BlurAmount. This isn’t really binding, but rather simply setting a starting value.
After you’ve defined your effect, you need to compile it like this:
[code]
var blurEffectFactory = _compositor.CreateEffectFactory(graphicsEffect,
new[] { "Blur.BlurAmount" });
_brush = blurEffectFactory.CreateBrush();
[/code]
Compiling your blur effect probably seems like an odd notion here. There’s basically a lot of magic being done behind the scenes on your behalf. For one thing, the blur effect is being run out of process on a thread that has nothing to do with your app. Even if your app hangs, the effect you compile is going to keep running on that other thread at 60 frames per second.
This is also why there are a lot of apparently magic strings in your Composition effect code; things are being hooked up at the system level for you. “Blur.BlurAmount” lets the compiler know that you want to keep that property of the “Blur” object accessible in case you need to change its value later. The following sample handler for the Slider control will dynamically reset the blur amount on your compiled effect, allowing your users to change the blur by simply moving the slider back and forth.
[code lang=”csharp”]
private void BlurAmount_ValueChanged(object sender, RangeBaseValueChangedEventArgs e)
{
// Get slider value
var blur_amount = (float)e.NewValue;
// Set new BlurAmount
_brush.Properties.InsertScalar("Blur.BlurAmount", blur_amount);
}
[/code]
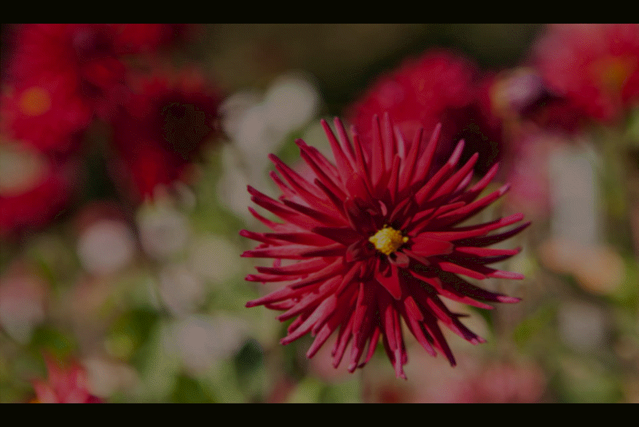
The last step in implementing the blur is to apply it to an image. In this sample code, the Image control hosts a picture of a red flower and is named “BackgroundImage.”
[code lang=”xml”]
<Image x:Name="BackgroundImage"
Grid.Column="1"
SizeChanged="BackgroundImage_SizeChanged"
Margin="10"/>
[/code]
To apply the blur to your image control you need to be able to apply your compiled blur to a SpriteVisual, which is a special Composition class that can actually be rendered in your display. To do that, in turn, you have to create a CompositionBackdropBrush instance, which is a class whose main purpose is to let you apply an effect brush to a sprite visual.
[code]
var destinationBrush = _compositor.CreateBackdropBrush();
_brush.SetSourceParameter("Backdrop", destinationBrush);
var blurSprite = _compositor.CreateSpriteVisual();
blurSprite.Brush = _brush;
ElementCompositionPreview.SetElementChildVisual(BackgroundImage, blurSprite);
[/code]
Once everything is hooked up the way you want and the blur has been applied to a new sprite visual, you call the SetElementChildVisual method to insert the sprite visual into the BackgroundImage control’s visual tree. Because it is the last element in the tree, it gets placed, visually, on top of everything else. And voila, you have a blur effect.
Effect brushes can also be animated over time by using the Composition animation system in concert with the effects pipeline. The animation system supports keyframe and expression animations, of which keyframe is generally better known. In a keyframe animation, you typically set some property values you want to change over time and set the duration for the change: in this case a start value, a middle value and then an ending value. The animation system will take care of tweening your animation – in other words, generating all the values between the ones you have explicitly specified.
[code]
ScalarKeyFrameAnimation blurAnimation = _compositor.CreateScalarKeyFrameAnimation();
blurAnimation.InsertKeyFrame(0.0f, 0.0f);
blurAnimation.InsertKeyFrame(0.5f, 100.0f);
blurAnimation.InsertKeyFrame(1.0f, 0.0f);
blurAnimation.Duration = TimeSpan.FromSeconds(4);
blurAnimation.IterationBehavior = AnimationIterationBehavior.Forever;
_brush.StartAnimation("Blur.BlurAmount", blurAnimation);
[/code]
You’ll notice that when it comes time to apply the animation to a property, you once again need to refer to the magic string “Blur.BlurAmount” in order to access that property since it is running in a different process.
By animating your effects and chaining them together with other effects, you can really start to unlock the massive power behind the Composition effects pipeline to create beautiful transitions like the one below.
Here the blur effect is combined with a scaling animation and an opacity animation in order to effortlessly draw the user’s attention to the most significant information. In addition, effective and restrained use of effects and animations, as in this sample, creates a sense of pleasure and surprise as you use the app.
Drop Shadow
A drop shadow is a common and effective way to draw attention to a screen element by making it appear to pop off of the screen.

The simplest (and probably most helpful) way to show how to implement a drop shadow is to apply one to a SpriteVisual you create yourself, in this case a red square with a blue shadow.
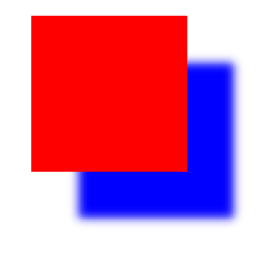
You create the actual drop shadow by calling the CreateDropShadow method on the compositor instance. You set the amount of offset you want, as well as the color of the shadow, then attach it to the main element. Finally, you add the SpriteVisual “myVisual” to the current page so it can be rendered.
[code]
_compositor = ElementCompositionPreview.GetElementVisual(this).Compositor;
// create a red sprite visual
var myVisual = _compositor.CreateSpriteVisual();
myVisual.Brush = _compositor.CreateColorBrush(Colors.Red);
myVisual.Size = new System.Numerics.Vector2(100, 100);
// create a blue drop shadow
var shadow = _compositor.CreateDropShadow();
shadow.Offset = new System.Numerics.Vector3(30, 30, 0);
shadow.Color = Colors.Blue;
myVisual.Shadow = shadow;
// render on page
ElementCompositionPreview.SetElementChildVisual(this, myVisual);
[/code]
A shadow effect can be attached to basic shapes, as well as to images and text.

The Windows UI Dev Labs sample gallery even has an interop XAML control called CompositionShadow that does most of the work for you.
[code lang=”xml”]
<common:CompositionShadow OffsetY="5" OffsetX="2"
Width="200" Height="200"
HorizontalAlignment="Left"
VerticalAlignment="Top"
Margin="10">
<Image Source="ms-appx:///Assets/Ninjacat-3.png"
HorizontalAlignment="Left"
VerticalAlignment="Top"/>
</common:CompositionShadow>
[/code]
Scene Lighting
One of the coolest effects to come with the Composition APIs is the new scene lighting effect. In the animated gif below, this effect is applied to a collection of images being displayed in a ListView.
While there isn’t space to go into the detailed implementation here, a very general recipe for creating this effect looks like this:
- Create various lights and place them in coordinate space.
- Identify objects to be lit by targeting the lights at the root visual or any other visuals in the visual tree.
- Use SceneLightingEffect in the EffectBrush to customize displaying the SpriteVisual.
Wrapping up
As mentioned, the best place to go in order to learn more about these and other effects is the repository for the Windows UI Dev Labs samples. You should also view these two short but excellent videos on the topic:
Get started on your own app with Visual Studio.
The Windows team would love to hear your feedback. Please keep the feedback coming using our Windows Developer UserVoice site. If you have a direct bug, please use the Windows Feedback tool built directly into Windows 10.