

How to use ND filters to take magical Lumia photos
If you’re a Lumia photographer likelihood is you use apps with filters.
But filters are nothing new. In fact, photographers have been using the real world versions pretty much since the camera was invented. So, how about we take a trip back in time and go old school. Yep, today I’m going to show you how to get creative with some “real” filters. Get your Lumia at the ready!
What are ND Filters?
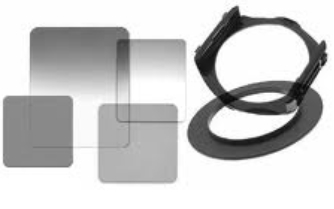
A Neutral Density Filter (ND filter), is filter which reduces the amount of light entering the lens without altering the hue or colour tones of the image. By reducing the amount of light reaching the sensor (or film) it is possible to select combinations of shutter speeds and aperture that would otherwise create overexposed images. ND filters have numbers which equate to ‘stops’. That is, the equivalent of stopping down the lens one aperture stop. (For example, from f.1.4 to f.2 or from f.5.6 to f.8 etc.)
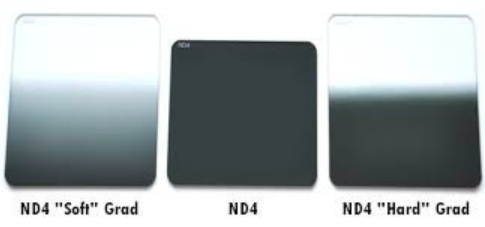
They come in a variety of forms which either screw to the lens or slide into a filter holder. They can be completely grey or a soft or hard graduated fade.
What does that mean in the real world?
The ND filter comes into its own when trying to blur some part of a photograph, especially if you want to make dreamy waterscapes. Below is an example of how the automatic settings capture this waterfall in daylight conditions.
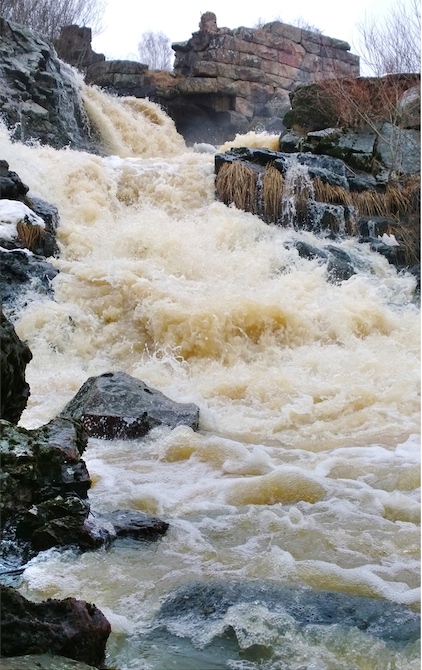
Here the Lumia 1020, like all automatic cameras, will select the quickest shutter speed and therefore reduce the chance of camera shake. However, when photographing water this ‘freezes’ the motion. In itself, this is fine, but what if you’re trying to capture something a bit different?
Normally, if you want to crate some blur in a photograph you slow the shutter speed. But that only works to a certain degree and in certain light conditions. If there is too much light, slowing the shutter speed will not work. For example, if we set the ISO as low as possible and slow the shutter speed down to a (still quite quick) 1/80 second, this is the result we get:
It is quickly apparent that this is massively over exposed and is not a useable image.
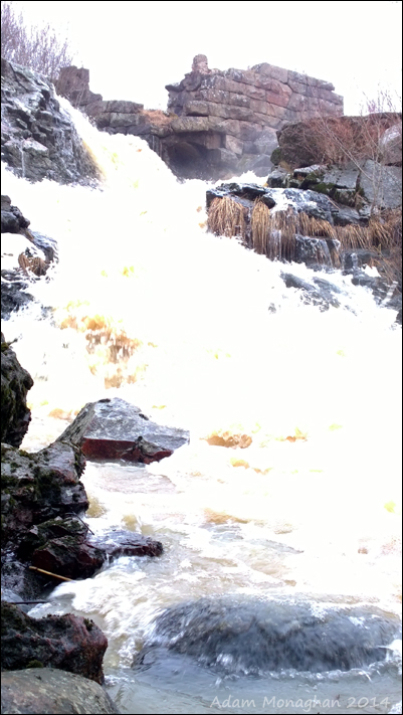
However, by using a selection of filters, we can get the shutter speed down to a full half of a second and still get a great result!
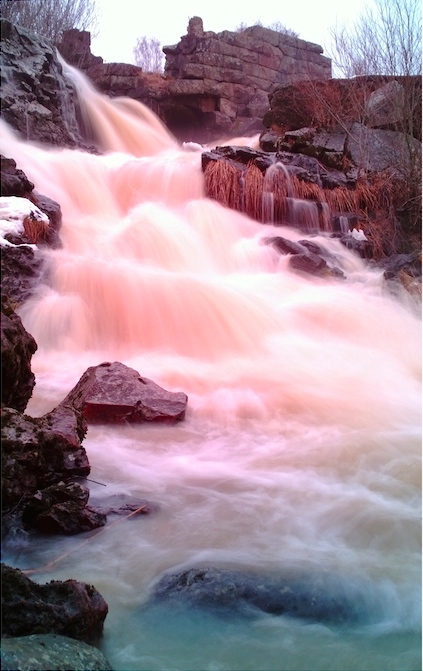
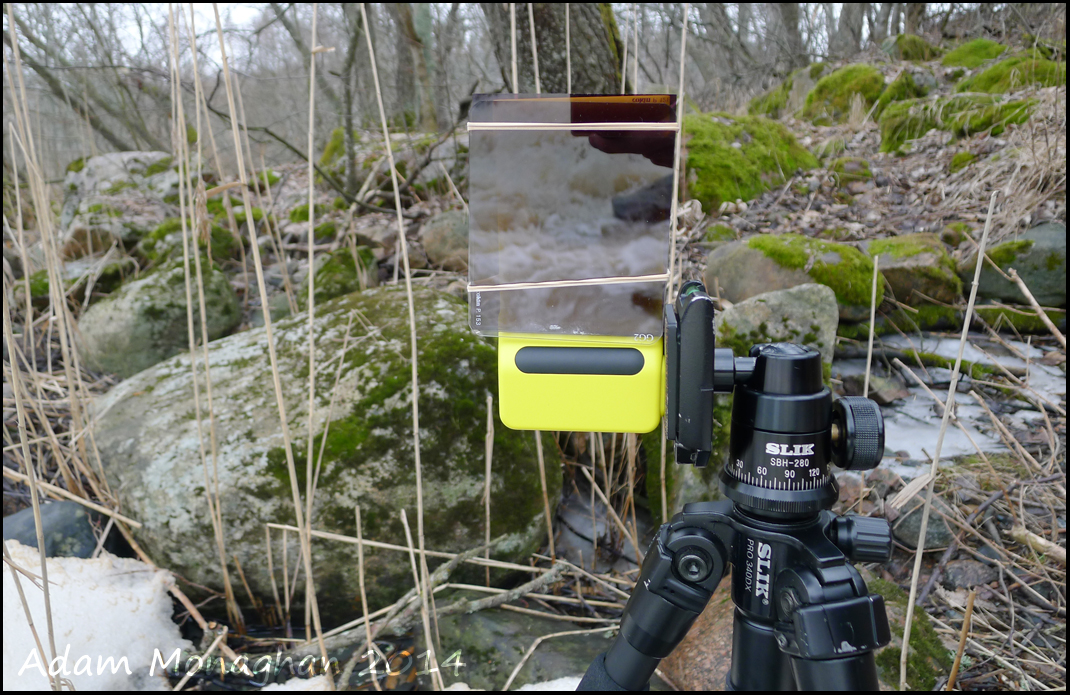
This shot was taken using three ‘real’ filters held in front of the lens with elastic bands! The warm, graduated hue is also the result of a real filter and not a post-shoot effect.
And here’s how…
OK, so it’s not going to win any design awards, but it’s results we’re after!
You need to find somewhere steady and secure to place the tripod. If you are photographing slower moving water, you may even be able to place the tripod legs directly into the water. Indeed, they make carbon fibre tripods specifically for this reason! (Just be sure to be at hand in case a freak water movement does topple your beloved kit and you need to catch it)!
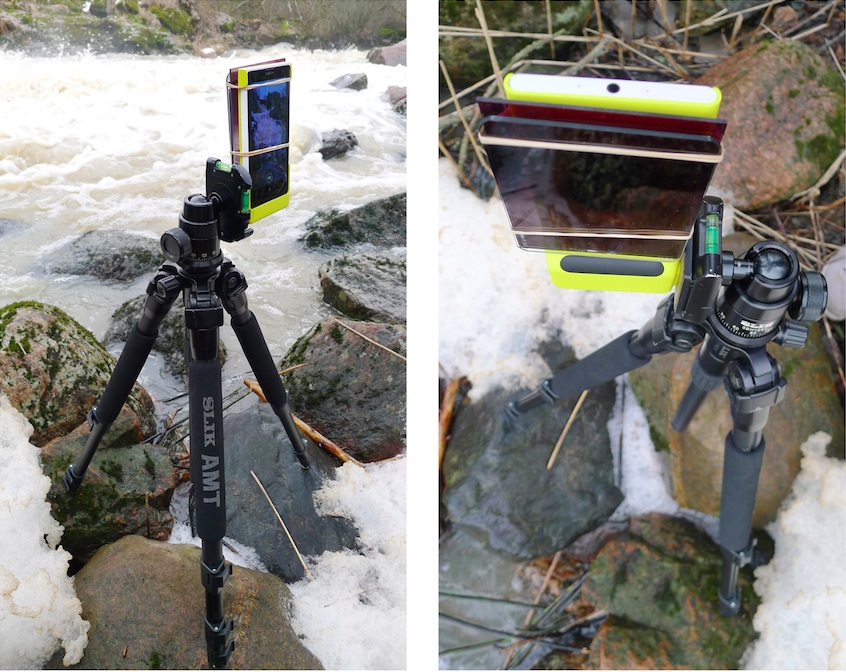
The excellent controllability of the Lumia 1020 makes this sort of shot a doddle! You can manually set the ISO and the exposure time. The exposure time may take some experimentation – but there are apps such as ND Converter which will help you calculate the timings. You can even manually set the focus. Once everything is set, select the timer function. This is crucial for a ‘long’ exposure shot, since depressing the button with your finger may cause some camera shake. And then take a (small) step back and fire away.
ND filters open up a world of exciting new Lumia photography opportunities, so why not get out there and get shooting. In the meantime, if you have any questions be sure to let us know in the comments below.