


The TimeTrigger class is extremely useful when your Universal Windows Platform (UWP) app has background tasks you want to run periodically. For instance, if you are writing a mail app, you will want to regularly poll for new messages in the background with a time trigger. If you have a weather app, you will want to check occasionally to see if the forecast has changed. If you want to use toast notifications in your app, in turn, you will need a time trigger to update your toast.
In this post, we’ll first review time triggers, and then look at how to debug them.
Understanding your time trigger
A new TimeTrigger instance has two parameters. The first argument is the interval between calls to the background task that the time trigger is associated with. It is known as the FreshnessTime. The second argument is a Boolean that indicates whether the background task should be called only once or repeatedly. This is known as the OneShot argument. If OneShot is set to true, the task will only be called once.
The built-in timer for UWP apps runs background tasks in intervals of 15-minutes or above. The system schedules the task within 15 minutes after your FreshnessTime elapses.
- If FreshnessTime is set to 15 minutes and OneShot is true, the task will be scheduled to run once starting between 15 and 30 minutes from the time it is registered. If it is set to 25 minutes and OneShot is true, the task will be scheduled to run once starting between 25 and 40 minutes from the time it is registered.
- IfFreshnessTime is set to 15 minutes and OneShot is false, the task will be scheduled to run every 15 minutes starting between 15 and 30 minutes from the time it is registered. If it is set to n minutes and OneShot is false, the task will be scheduled to run every n minutes starting sometime between n and n + 15 minutes after it is registered.
Registering a background task with a time trigger
Because background tasks are a somewhat complicated topic in their own right, this article will assume you are already familiar with the documentation on creating a background task.
Registering a background task and creating a trigger are somewhat easier. For the sample below, we’ll assume that you’ve already created the background task. To register it, you will want to use a BackgroundTaskBuilder class as shown below.
[code lang=”csharp”]
//build the background task
var builder = new BackgroundTaskBuilder();
builder.Name = "TimerDebugTest";
builder.TaskEntryPoint = "MyBackgroundTask.MyTask";
[/code]
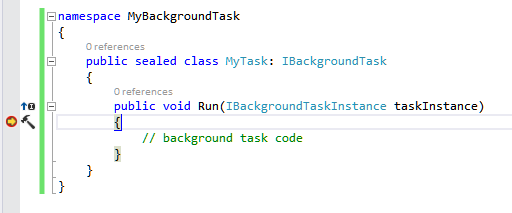
This example uses a background task called MyTask contained in a separate Windows Runtime Component project named MyBackgroundTask. You will want to use the background task’s namespace and class name as the property value for the builder’s TaskEntryPoint.
You also need to declare your background task in your app manifest. To do so, follow these steps:
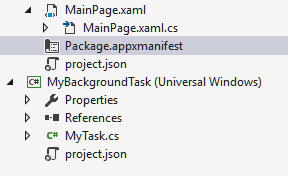
- Open the package manifest designer by opening the file named Package.appxmanifest.
- Open the Declarations tab.
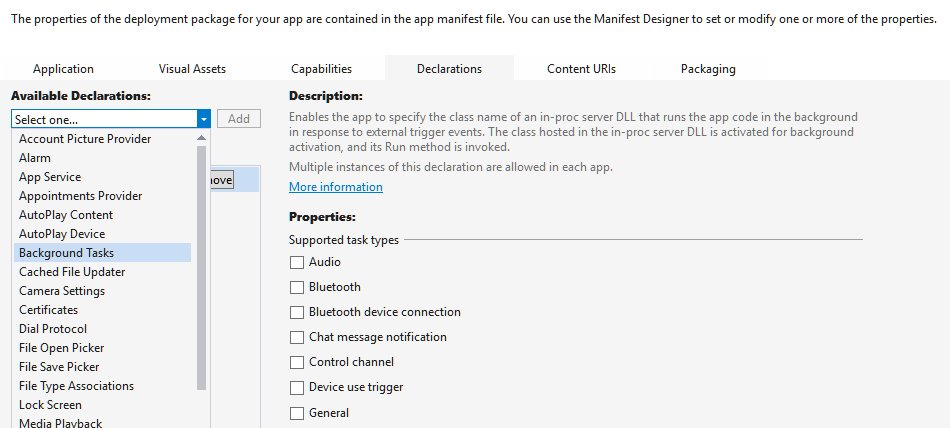 From the Available Declarations drop-down, select Background Tasks and click Add.
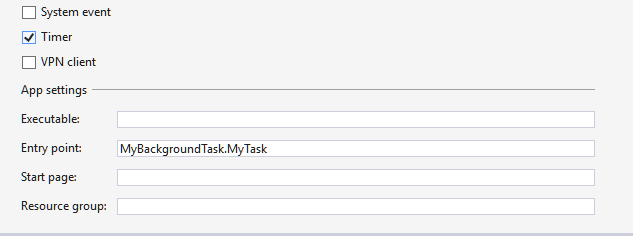 Select the Timer checkbox.
- In the Entry point: textbox, enter the namespace and name of your background class as you did in the code above, which in this example is MyBackgroundTask.MyTask.
- Save.
Once you have declared your background task, you create a time trigger and associate it with your background task. Be sure to set your FreshnessTime to a value greater than 15 minutes.
[code lang=”csharp”]
//create time trigger
var timeTrigger = new TimeTrigger(15, false);
//set time trigger
builder.SetTrigger(timeTrigger);
[/code]
The final step is to register your background task. You will need to call RequestAccessAsync initially. UWP requires that you make this call before registering a background task. Unlike earlier platforms, this will not prompt the user with a dialog box.
[code lang=”csharp”]
//required call
var access = await BackgroundExecutionManager.RequestAccessAsync();
//abort if access isn’t granted
if (access == BackgroundAccessStatus.Denied)
return;
//register task
BackgroundTaskRegistration task = builder.Register();
//handle task completed event
task.Completed += Task_Completed;
[/code]
You can also add an event handler to the task Completed event for additional internal logic or for debugging purposes as shown below.
[code lang=”csharp”]
private void Task_Completed(BackgroundTaskRegistration sender, BackgroundTaskCompletedEventArgs args)
{
Debug.WriteLine(string.Format("Background task completed at {0}", DateTime.Now.TimeOfDay));
}
[/code]
Once you have all the background task code implemented and configured, it’s time to start debugging. Special thanks to long-time Windows Dev MVP Lance McCarthy for popularizing this particular debugging tip in the developer community.
Debugging time
In order to debug your background task, use Visual Studio to run your app in debug mode as usual.
- Go into your background task code and set your breakpoints.
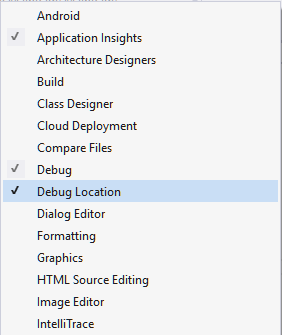
- Right click on your Visual Studio toolbar and select Debug Location if it isn’t already checked.
- Go to the Lifecycle Events dropdown on the Debug Location toolbar and find the name you assigned to your background task. (Because registration occurs in code, you will need to run your app at least once before the task shows up in the dropdown.) In the sample code above, the task is named TimerDebugTest.
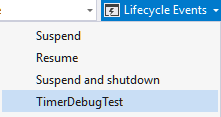 Click on the task to trigger your timer.
You won’t have to wait very long before the debugger hits your breakpoints in UWP and you can start walking through your background task code.
Wrapping up
Background task time triggers are an important aspect of building UWP applications, especially if your app requires polling or uses notifications. Building and debugging time triggers in UWP is now a better experience than ever. With the Lifecycle Events feature in Visual Studio, you can trigger your background tasks immediately. This allows you to debug your tasks in a way that is both convenient and effective.