

Why Adobe XD?
A well-designed app often starts out with a sketch, a rough prototype, something that can be shared with stakeholders. But the challenge has always been that to get something testable and demonstrable, you needed to do some coding, you needed to get developers involved in building a prototype that might get thrown away. But once you have developers investing in coding, they are reluctant to change the code – even if that’s the right thing to do based on the feedback from your prototype. In his book The Inmates are Running the Asylum, Alan Cooper discusses just this challenge. That’s where Adobe XD comes in – it is a tool expressly designed for building quick prototypes as well as high-fidelity user experience designs. With Adobe XD, anyone can create wireframes, interactive prototypes, and high-fidelity designs of apps and websites. Once you have your prototype, you then can import the visuals into Visual Studio or the IDE of your choice to start building out the final application.
Below is a quick walk-through of using Adobe XD.
Designing a User Experience
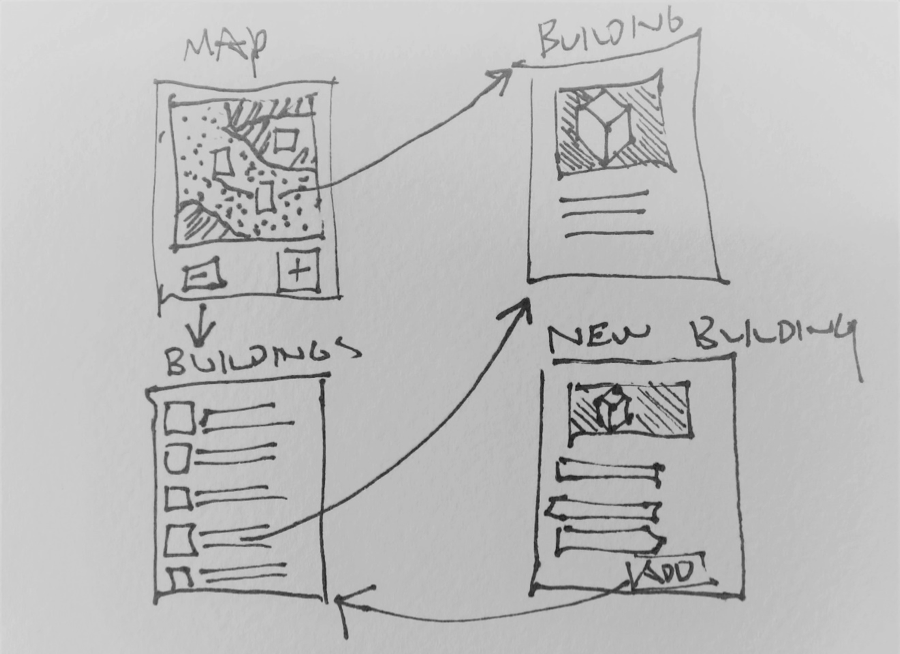
To give you an idea of how to use Adobe XD to design quick prototypes, I am going to walk you through the process that I am going through to redesign an app and create a quick prototype with Adobe XD. I have found that having an interactive prototype with transitions and multiple screens is much more effective at illustrating a user journey than a storyboard of screen images. I am designing a new version of an app, Architecture, that I originally built for Windows but now I’m using Xamarin to make a cross-platform version that works on Windows, iOS and Android. Having studied architecture in college, I have always loved the field. Quite often, I start off with a rough sketch in my journal but that isn’t typically something that is interactive or in a state that can be shared with enough fidelity, so I use XD.
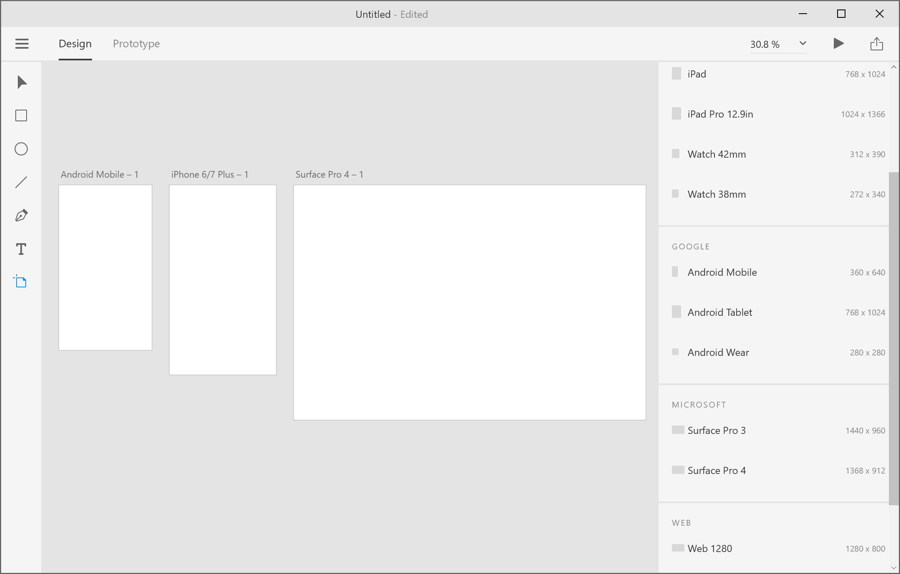
When I start it up, Adobe XD greets me with a blank canvas where I want to place artboards, one for each screen of my app. To place artboards on the canvas, I press the artboard button (the last icon on the left toolbar) – then I see options for various device form factors, including options for iOS, Android, Surface and Web.

To start, I pick a few screen sizes by tapping on Android Mobile, iPhone and Surface Pro 4 on in the property inspector on the right and blank artboards for each format are created on the design canvas.
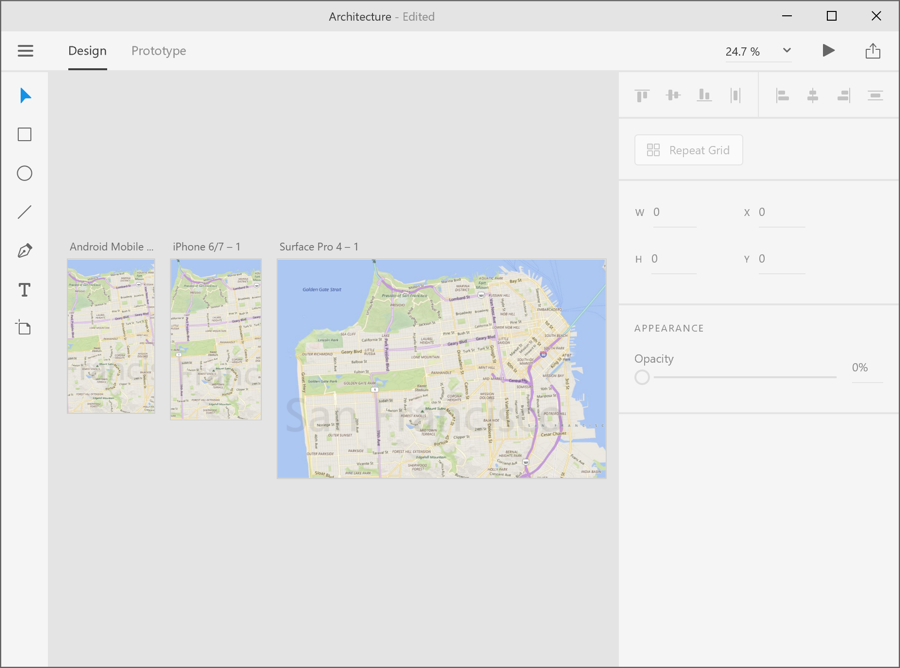
To start my design I first focus on designing a map page which would show a map of the user’s current location and notable buildings nearby. I grab a screenshot of San Francisco in a folder on my PC and drag it onto each page, resizing it. Once I place an image onto a page, any overflow is hidden once I deselect the image. This is very helpful as I design multiple screen sizes in parallel.
Now I want to focus on one of the designs to add some more detail, in this case, the Android design on the left. I navigate around the artboard by using the trackpad on my computer, panning with two fingers and zooming in and out on the trackpad by pinching and expanding gestures. This is similar to the interaction method for XD on macOS. In this initial preview of XD for Windows, touch and pen support are not enabled yet on the design canvas but they do work on the toolbar and in the property inspector. My team is working closely with the XD team to enable a great experience for pen and touch with Adobe XD that will be ready later in 2017.
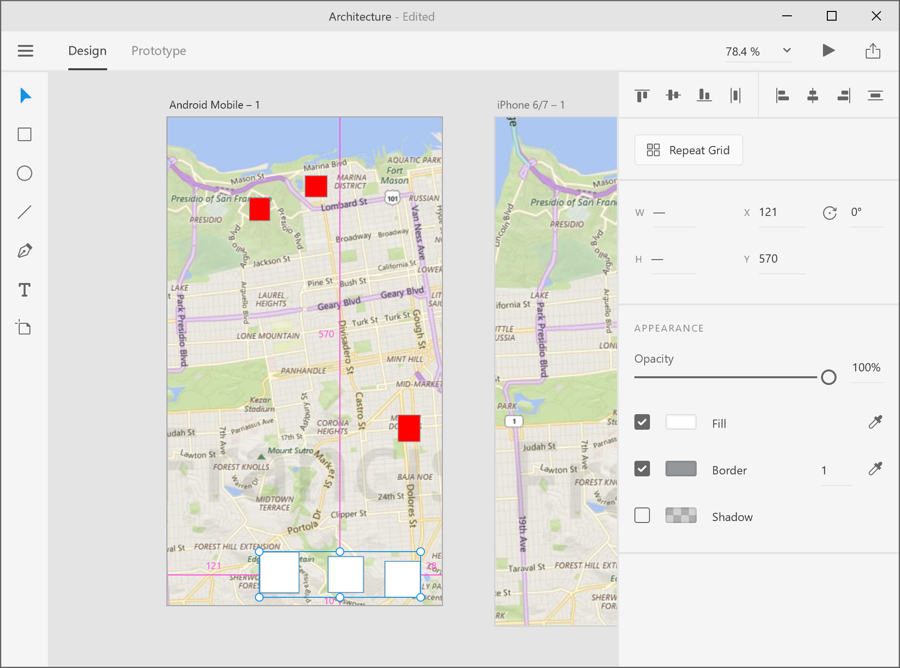
I’ve started by adding three red boxes for architectural landmarks in San Francisco, and three boxes at the bottom that will work as buttons for UI interactions. As I draw each button, XD puts snapping guidelines in to help me position the buttons relative to each other. I ignore the guidelines to show that by selecting all three buttons and pressing the align bottom button at the top of the property inspector (the pane on the right), I can quickly align the buttons and set them all to have the same width and height in the property task pane. I can then distribute the buttons horizontally using the hotkey Ctrl-Shift-H. You can also distribute objects horizontally and vertically using the distribute icons in the property inspector.
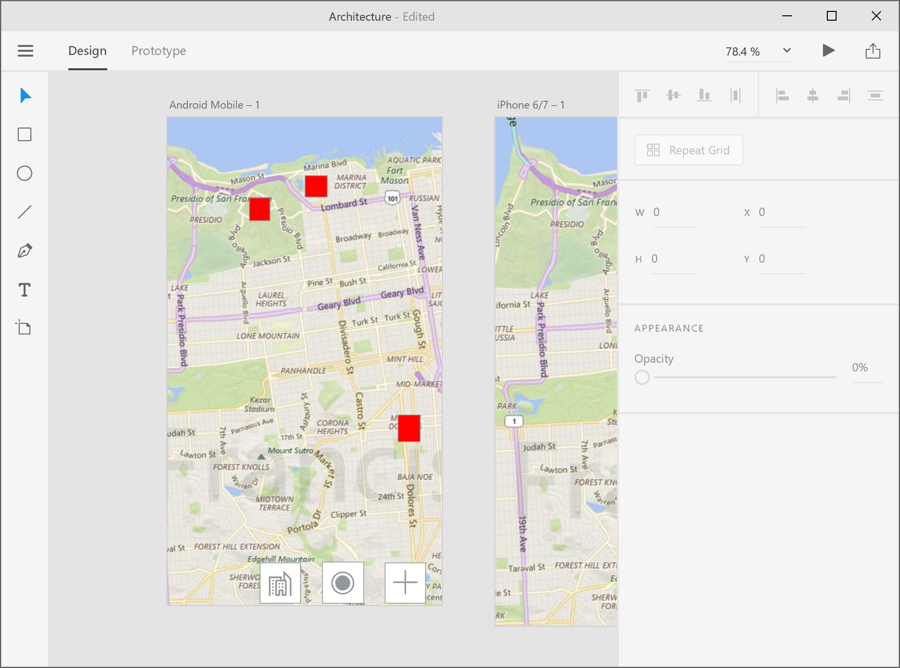
I then use the text tool to add placeholder icons to the buttons, taking advantage of the Segoe MDL2 Assets Font (use the Character Map app that comes with Windows) for graphics for the Buildings, Locate Me, and Add buttons. In a few minutes, I get my ideas out and start a first page of my Architecture app. Now I want to add another page that would be used to browse a list of buildings by pressing the first button on the first page. I add another Android mobile page by clicking on the artboard button and selecting a new Android mobile page. A new artboard page is now placed on my design canvas right below the page I’m working on. Since this page is for browsing a list of buildings, I start with a design of what each building in the list would look like. I drag an image of a building from my desktop onto a square and it automatically resizes and crops the image to the square.

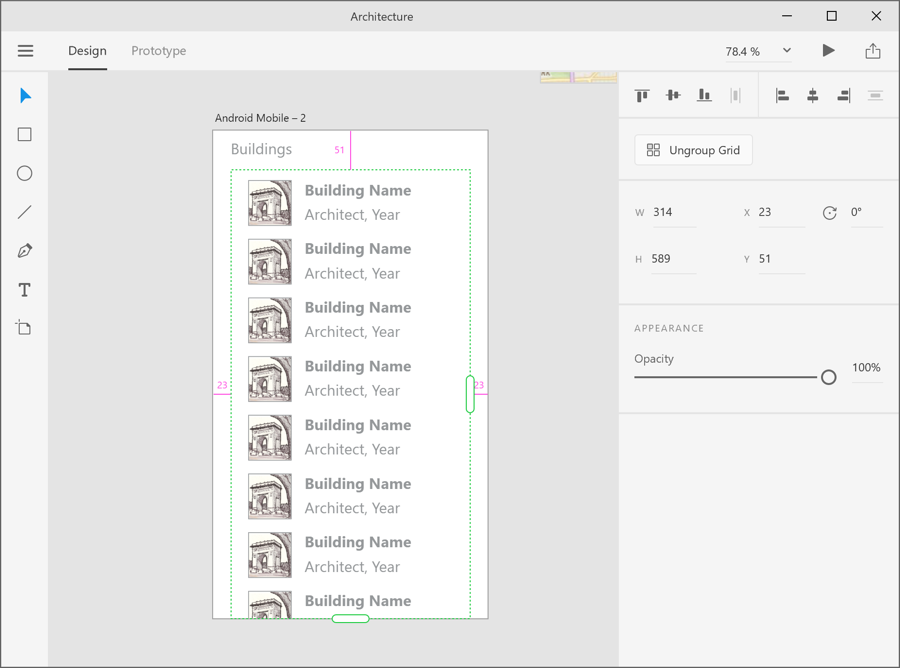
After finishing that first item design, I select all of the elements for the building and press the Repeat Grid button on the right and then drag the handle that appeared on the bottom of the rectangle to the bottom of the page, repeating the element.
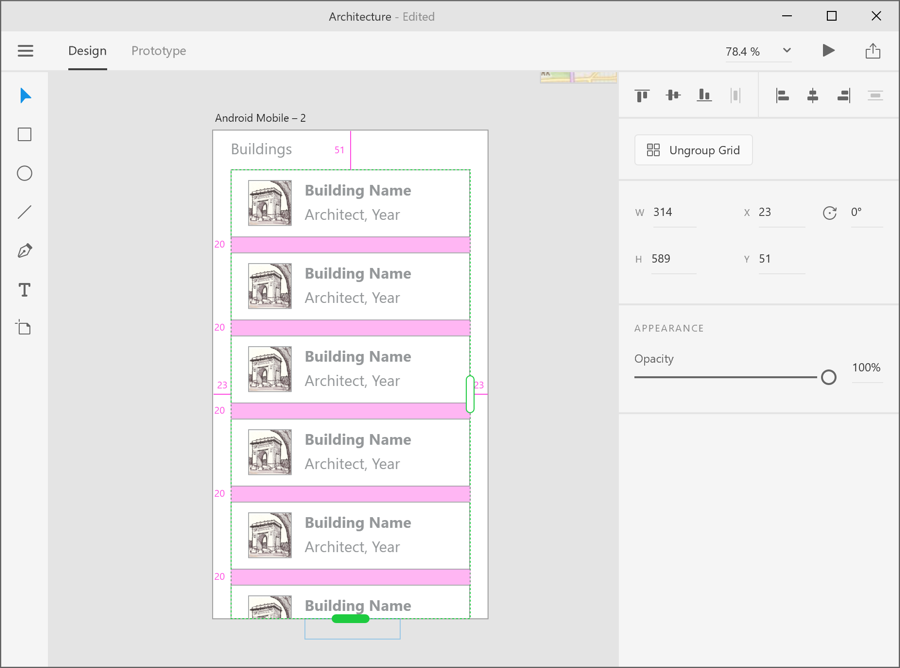
While I’m dragging the repeat grid, I see the items building instantly and hints showing me the spacing between the items. Once I look at the items together, it becomes clear that I don’t need the frame around the items and the spacing is a bit wide. All I need to do is select the prototypical items at the top of the list and edit the that item – the changes are replicated throughout the list. To change the spacing, I put my cursor between the items and the pink spacing guide appears. By dragging that, I change the spacing between the items and see the results instantly.
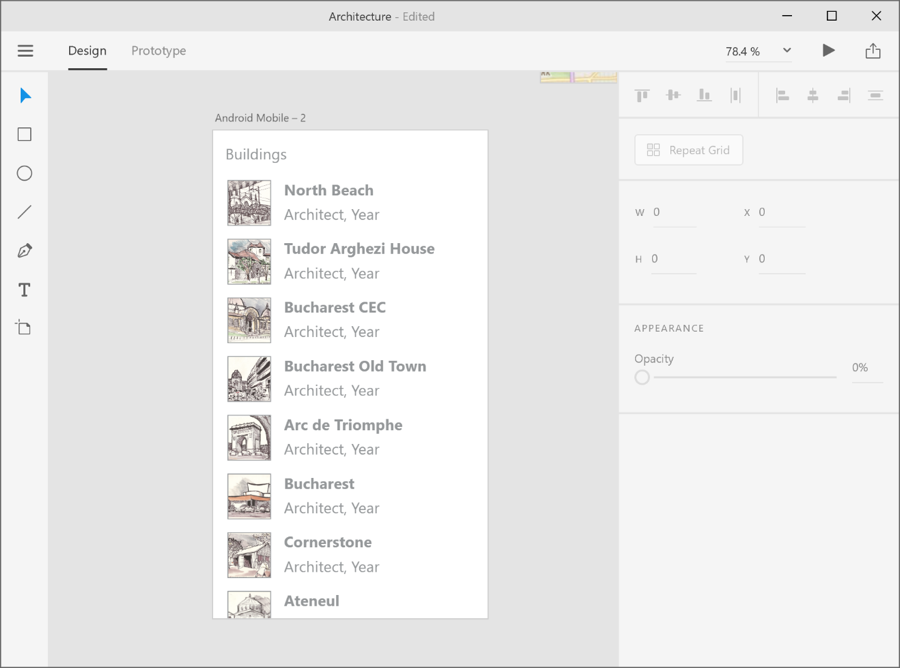
The last thing I want to do on this page is to use different images and text for each building in the list. To do this, I just grab some images that I have in a folder on my PC and drop them on one of the images in the list. I also have a text file with the names of the buildings that I drag onto the “Building Name” text. I instantly have a list of items with unique text images and text, a perfect design for the Xamarin ImageCell element when I’m ready to code this.
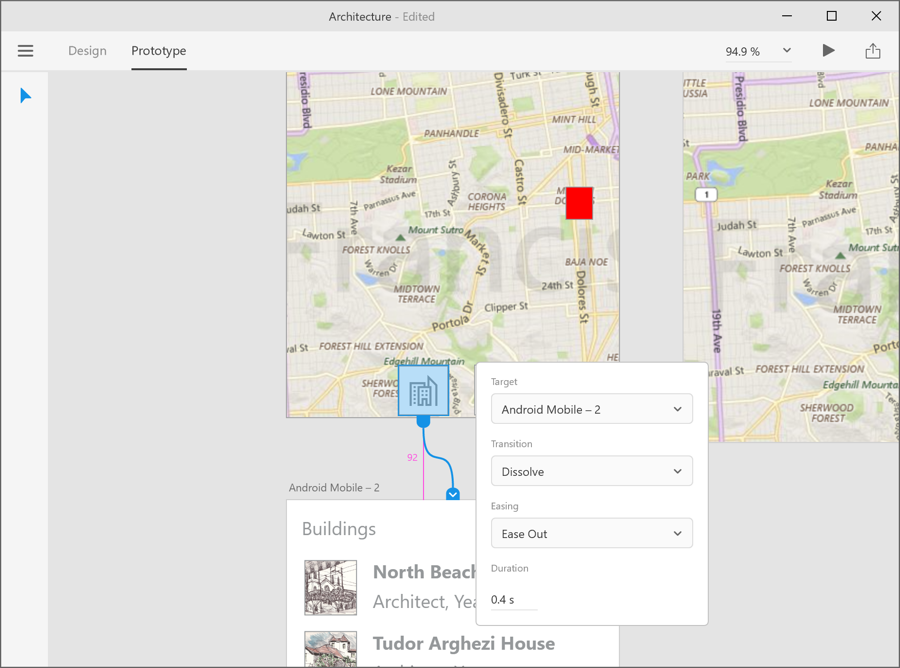
Now that I have two related pages, I want to connect them so I have a prototype that starts on the map page and then shows the Buildings page when the user clicks on the Buildings button. I do that in the Adobe XD Prototyping interface by pressing the Prototype button at the top of the window. I start by clicking on the Buildings button on the maps page and the button is highlighted in blue and a blue arrow appears on the right of the button. All I do is drag and drop that arrow onto the Building page and a connection is made – I can set the transition type, easing type and duration – very easy.
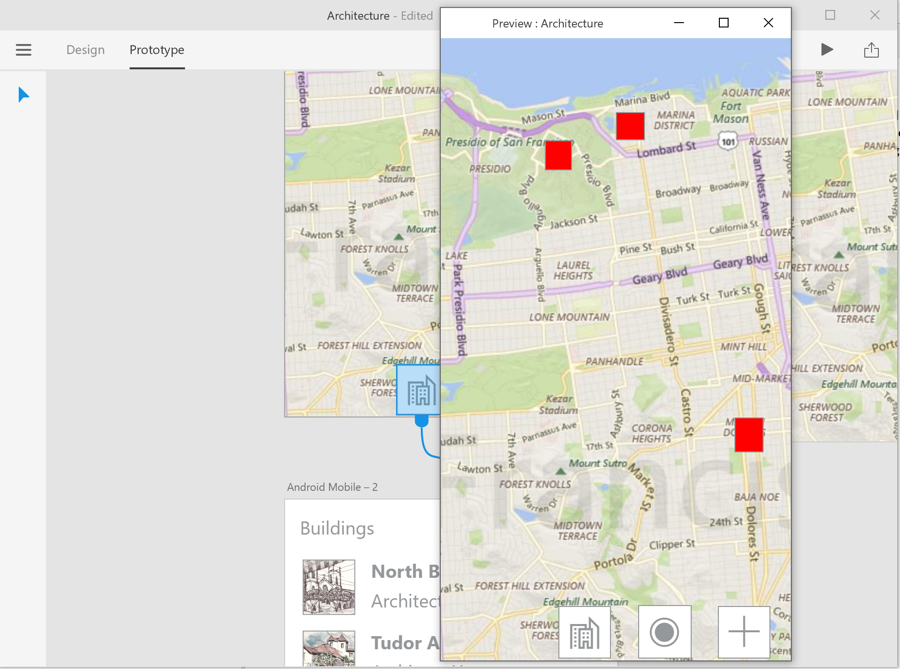
To test that action, I press the desktop preview button (Play button) in the upper right of the application window and a new window with the map page pops up. I can then press the Buildings button and see the transition as the app preview shows the Buildings page. I can also drag that preview page to another screen if I have an extended desktop and I can even make changes in the design view while the preview is running. Once you are done with the design prototype, you can easily export the artboards as images that developers could use as starting points for app development.
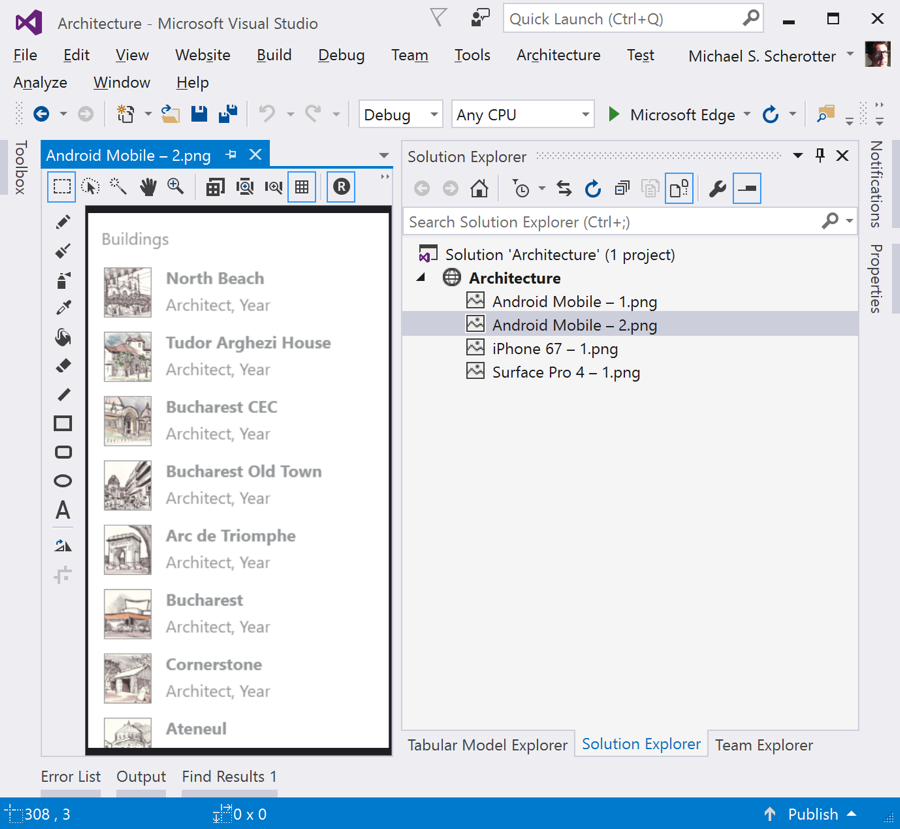
As a last step, I exported the artboards as PNG images and opened them up in Visual Studio to start the process of laying out the Xaml for my app:
“Design at the Speed of Thought”
Adobe looked at making XD enable “design at the speed of thought” and through this short walk-through, I hope you get the idea that adding the app to your toolbox will help you design, prototype, test and refine your designs quickly and fluidly.
The Technology Behind Adobe XD
Working with Adobe to bring an app of this sophistication and quality will help other developers prepare for Windows 10. Through close collaboration on this app, we have taken much of the feedback from the Adobe developers to make the Universal Windows Platform even better.
Adobe XD on Windows is a UWP app using XAML, C++, JavaScript, and ANGLE striving for a best-in-class Windows UWP experience while sharing as much code as possible with their Mac version. As Adobe has a very high quality bar for app development, the app is testable through automated tests using the Adobe first released Adobe XD earlier this year on the Mac as a public preview and through that preview, Adobe got input that enabled them to make it the best app for designing user experiences. That feedback went into making both the Mac and Windows versions of XD even better. Interestingly, Adobe is taking advantage of some of the new functionality in the Windows Anniversary Edition to enable them to release Adobe XD through their Creative Cloud app (how you get Photoshop, Illustrator Lightroom and other creative apps today) instead of the Windows Store.
Help Shape Adobe XD on Windows
Now that you can start using Adobe XD on Windows, please try it and submit your feedback to Adobe through their UserVoice site and help shape the future of Adobe XD on Windows 10. This is just the beginning.
- Read Adobe’s blog post about today’s release of Adobe XD on Windows 10.
- Try the Adobe XD public preview (all you need is a Windows 10 PC running the Anniversary Edition and a free Adobe ID or Creative Cloud account).
- Provide feedback to Adobe on any topic but we’re especially interested in understanding how would you want to use pen and touch in Adobe XD and how you would want to use the new Surface Dial? How would you use pen and touch simultaneously with Adobe XD? What other apps and services would you want Adobe XD to connect with? What kinds of extensibility would make Adobe XD even better for your designer-developer workflow?
Get started today with Adobe XD on Windows 10 with the public preview today.