

A deep-dive into WinUI 3 in desktop apps
XAML Islands was our first solution to enable developers to use UWP XAML inside their desktop (Win32) apps. Within a couple of months after the release of XAML Islands, behavioral insights and customer interviews raised some signals about how developers were using it. We discovered that a significant number of apps were using XAML for the entire UI; in fact, many apps were using WPF’s Window and Windows Forms’s Form classes for the sole purpose of hosting XAML. Additionally, interviews revealed that C++ Windows developers were interested in XAML as a replacement for MFC.
This made us think about whether we can help customers further. We listed a set of hypotheses about what Windows developers were expecting and created a prototype to validate/invalidate these hypotheses. The outcome of this validation process was very enlightening. Windows developers were hungry for creating beautiful, modern, and refreshing apps reusing the desktop code (in the form of .NET or C++ Win32) that they had already been using. In most cases, this code needed to run outside of the security sandbox (AppContainer) and work in all versions of Windows 10 in the market. So we extended WinUI 3 to support desktop apps in addition to UWP apps. WinUI 3.0 Preview 1 introduced project templates to create desktop C# .NET 5 apps and C++ 17 desktop apps where the entire user interface is implemented using windows, controls, and other UI elements provided by the WinUI framework.
But enough of so much chatter and let’s get to work! In this blog post I’m going to focus on building a desktop app with WinUI 3 Preview 1 and .NET, leaving C++ for future posts.
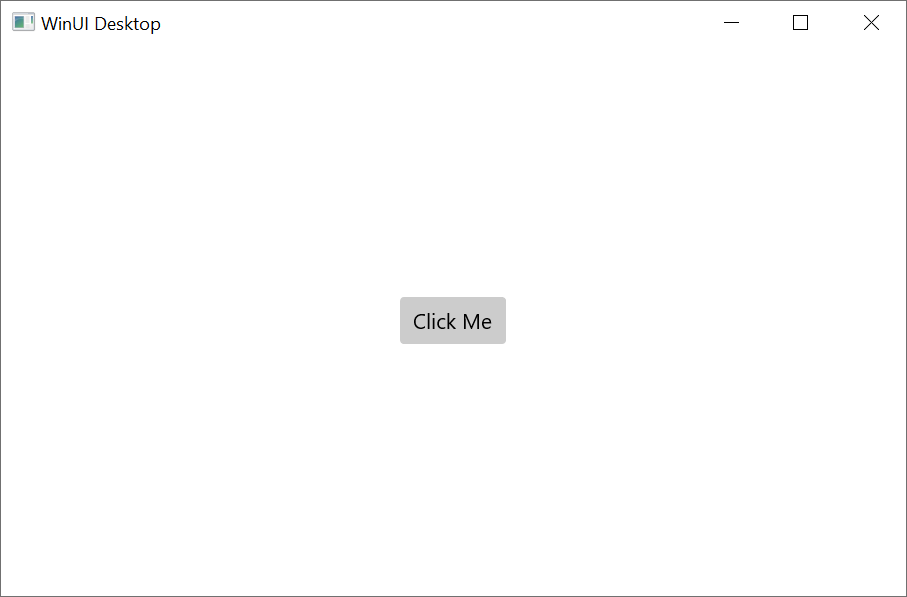
The first step is to install WinUI3 Preview 1 (or Preview 2 when available) in your development machine. I recommend visiting this link and following the Prerequisites instructions to download and install the VSIX that contains the project templates. After that, follow the instructions to create a WinUI 3 desktop app for C# and .NET 5. Press F5 and you will see something like this:
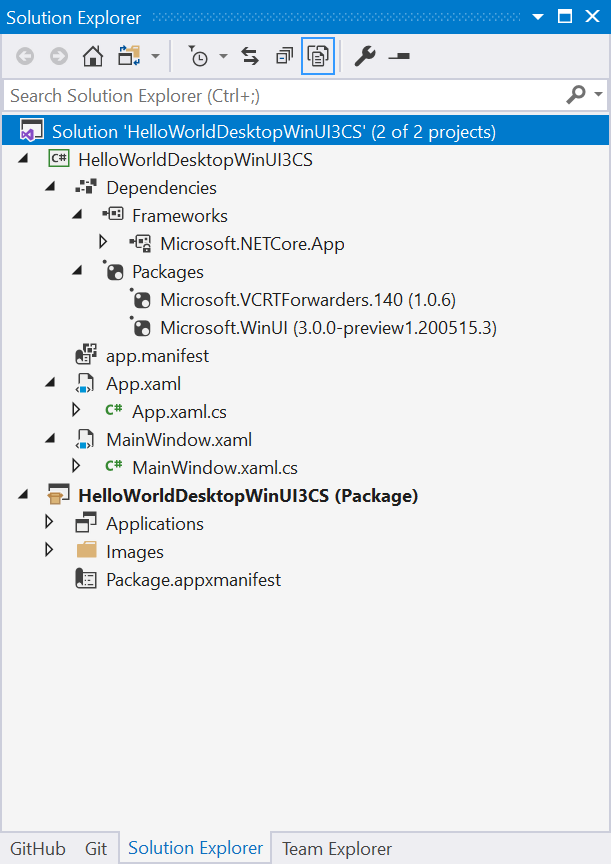
There are a lot of things that you can learn from this project without writing a line of code. The first noticeable thing is that there are two projects in the solution. One is for the Desktop WinUI 3 app itself, and the other is for packaging the app into a MSIX. In Preview 1 it’s required to package your project to run your app. Although MSIX is our recommended packaging technology, we’re aiming to make a UI Framework that’s independent of the deployment mechanism. This is a temporary limitation that we will address in subsequent previews , as you can see in the Preview 1 known issues documentation.
Embracing .NET 5
If you double click on the WinUI 3 app project, Visual Studio opens the project file with the XML text editor, and you can observe several things. First, C# Desktop WinUI 3 projects embrace the SDK-style project so it’s human readable/understandable. Second, the Target Framework is .NET 5. Desktop WinUI 3 can be used with the next big release in the .NET family. Third, you can see that this project has a reference to the Microsoft.WinUI NuGet package, which pulls in the WinUI 3 tools and runtime.
[code lang=”xml”]
WinExe
netcoreapp5.0
10.0.18362.0
10.0.17134.0
x86;x64
true
win-x86;win-x64
win-$(Platform)
[/code]
Speaking of tools, WinUI 3 uses the new C#/WinRT projections. The WinUI 3 framework is a set of WinRT components, and while WinRT has similar types and objects as those found in .NET, they are not inherently compatible. The C#/WinRT projections handle the interop between .NET and WinRT, allowing you to freely create and use WinUI objects in your .NET app today.
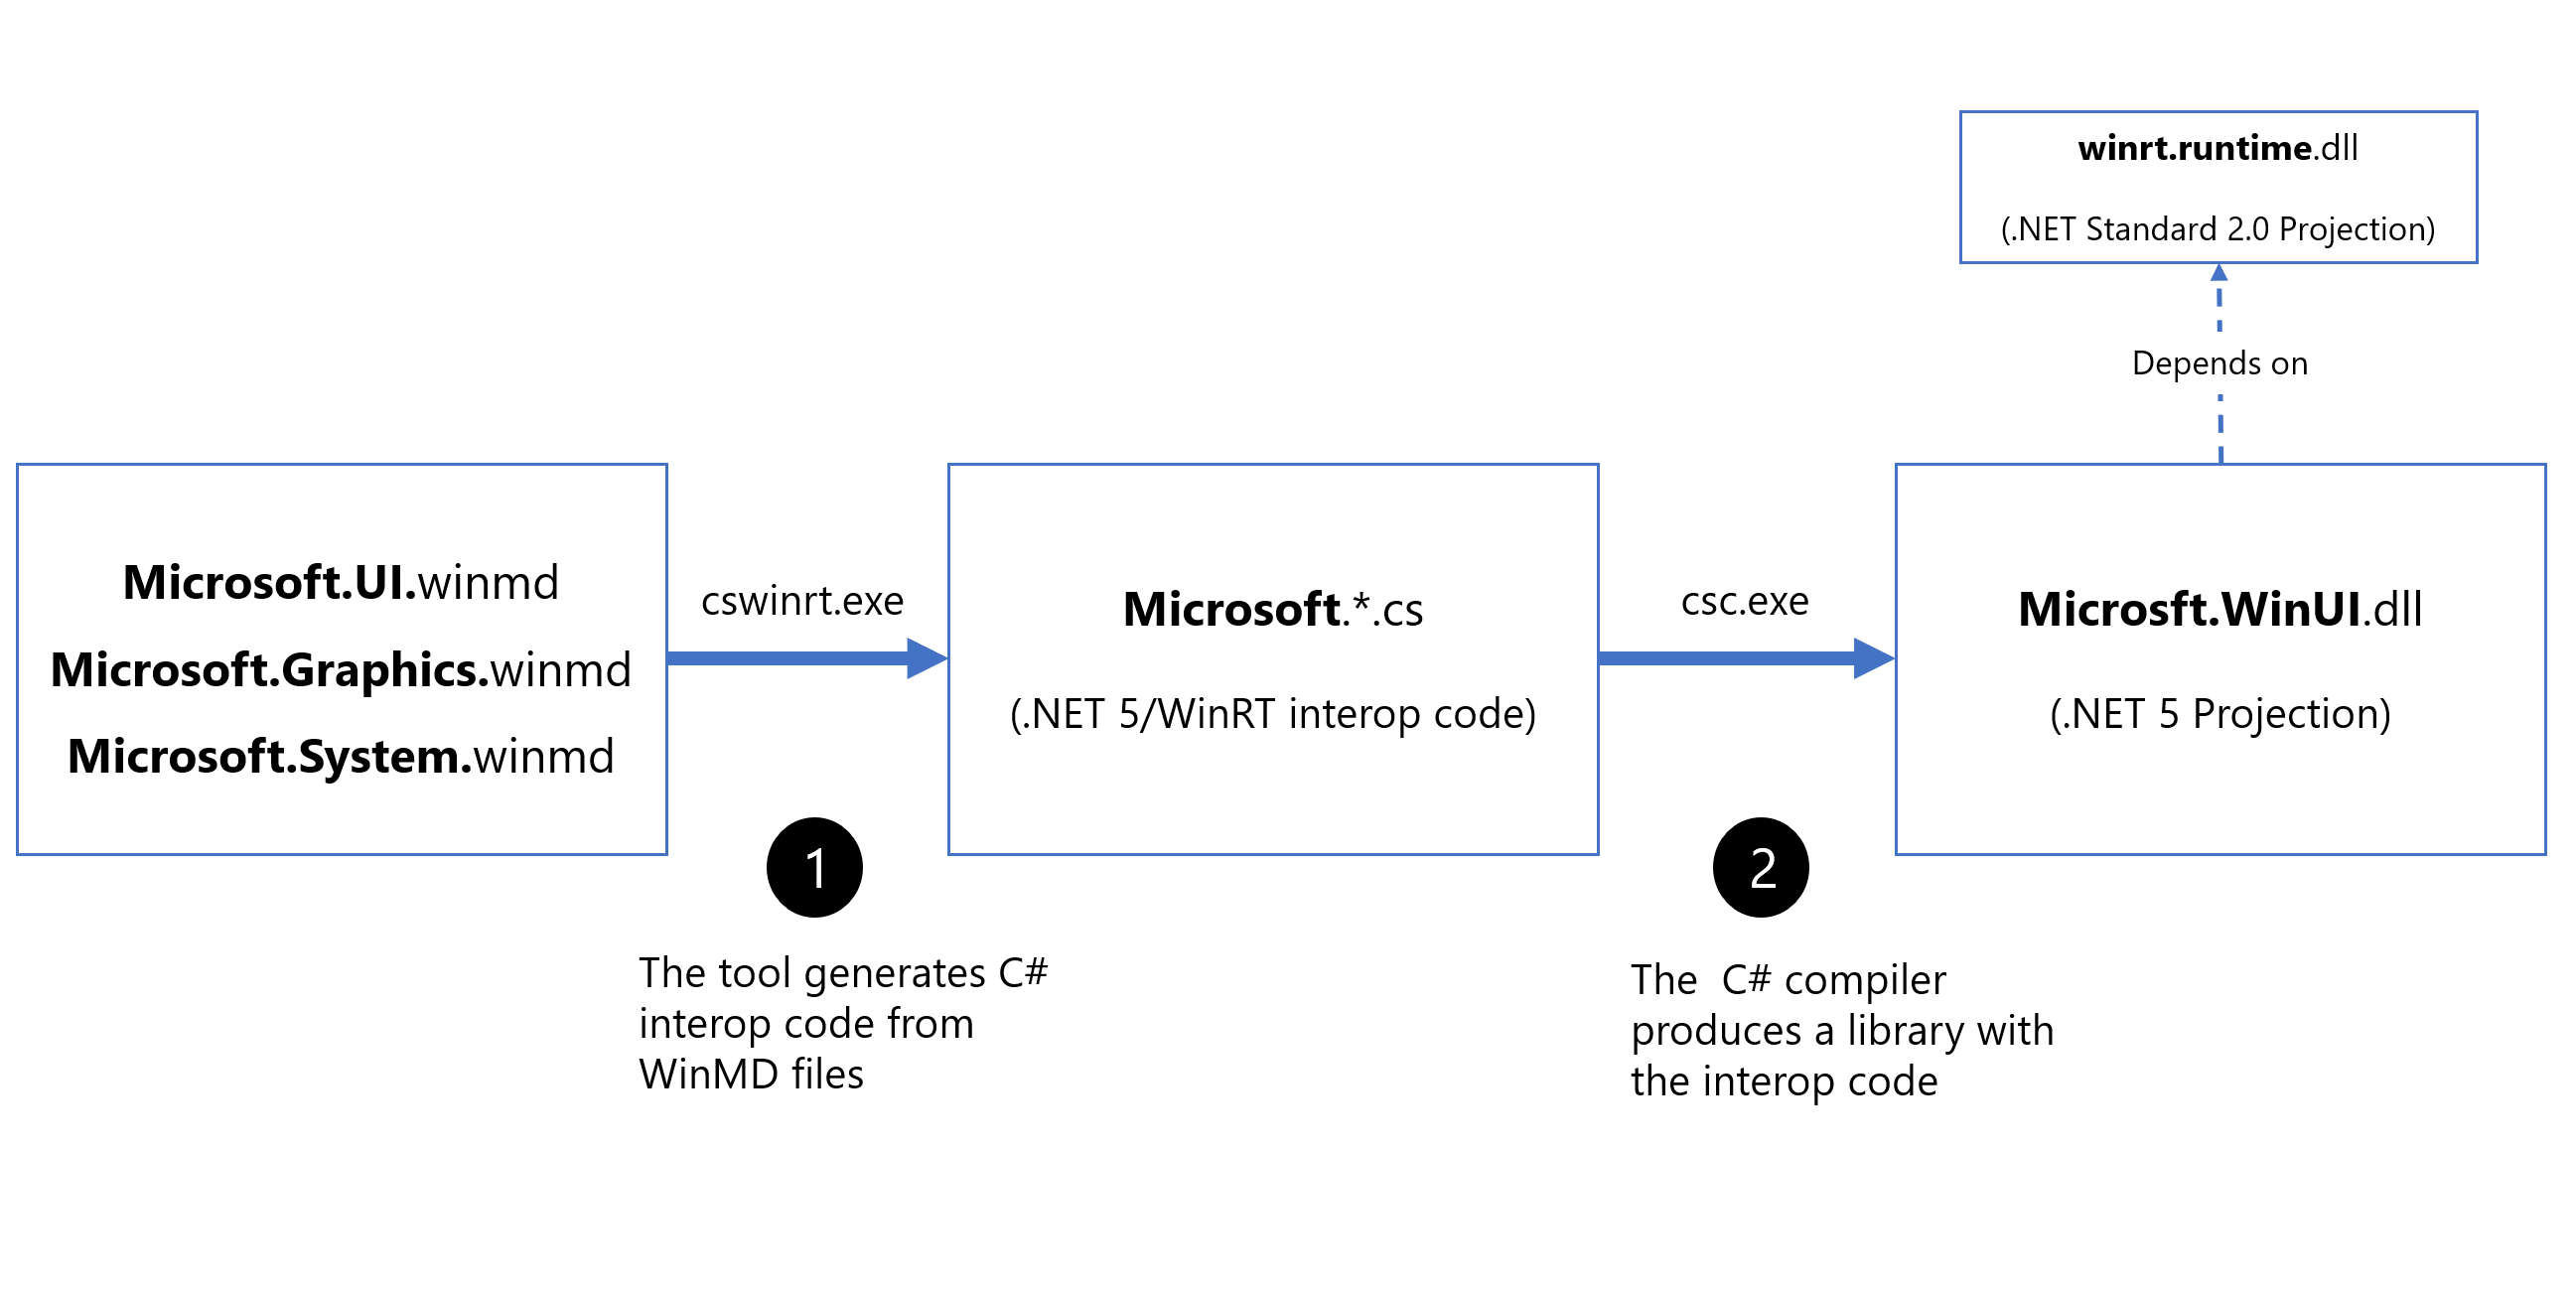
The WinUI 3 NuGet package has a dependency on the C#/WinRT NuGet package which brings the winrt.runtime.dll library and the cswinrt.exe tool. The cswinrt.exe tool consumes WinMD metadata files that define the WinRT libraries and generates interop .NET 5 and .NET Standard 2.0 C# code. This interop code uses the winrt.runtime.dll library. As you can guess, the cswinrt.exe gets all the WinUI WinMD files and generates C# interop code .NET 5 code for the WinUI library. Then you can compile these files into a .NET library (e.g. using the csc.exe compiler) and use it in every .NET 5 Desktop WinUI application. Fortunately, we already have created this library for you. It’s the Microsoft.WinUI.dll library. This library is included in the WinUI 3 NuGet Package.
The WinUI NuGet package also has a dependency on the Microsoft.Windows.SDK.NET NuGet package. This package includes the Microsoft.Windows.SDK.NET.dll .NET 5 (and .NET Standard 2.0) interop library that allows use of the other non-WinUI WinRT APIs that are available as part of the Windows 10 OS. Like Microsoft.WinUI.dll, this DLL is generated by C#/WinRT.
Window class and Win32 APIs
With WinUI 3 Preview 1, you can create instances of the Window class in XAML markup. Double click on the MainWindow.xaml file and you will see an example of this:
[code lang=”xml”]
[/code]
The XAML Window class was extended to support desktop windows, turning it into an abstraction of the low-level window implementation used by each app model. For instance, the UWP app model uses CoreWindow, while the Win32 app model uses Win32 window handles (HWND). So if you’re building a Desktop WinUI app, you can get the window handle and use Win32 APIs with it.
For example, let’s maximize the Window programmatically using the classic User32 ShowWindow API. To call Win32 APIs from User32.dll you can use the NuGet package PInvoke.User32. Once you have added it, open the code-behind of MainWindow.xaml.cs and add these lines to the button event handler:
[code lang=”csharp”]
private void myButton_Click(object sender, RoutedEventArgs e)
{
myButton.Content = “Clicked”;
IntPtr hwnd = (App.Current as App).MainWindowWindowHandle;
PInvoke.User32.ShowWindow(hwnd, PInvoke.User32.WindowShowStyle.SW_MAXIMIZE);
}
[/code]
The ShowWindow method uses the window handle and maximizes it using the second parameter. To get the window handle you can use the GetActiveWindow method that returns the window handle of the current active Window. For example, you can call this method after activating the Window.
The MainWindow object is created, instantiated, and activated in the OnLaunched event that you can find in the App.xaml.cs.
[code lang=”csharp”]
IntPtr m_windowhandle;
public IntPtr MainWindowWindowHandle { get { return m_windowhandle; } }
protected override void OnLaunched(Microsoft.UI.Xaml.LaunchActivatedEventArgs args)
{
m_window = new MainWindow();
m_window.Activate();
m_windowhandle = PInvoke.User32.GetActiveWindow();
}
[/code]
To show the window and the focus you need to call Activate. Easy, right?
Like we did within the Window class, we also extended the Application class to support both UWP and Win32 app models. The Application object is aware of whether the runtime environment is Win32 or UWP, and fires the appropriate application life cycle events. For example, the Resuming event is never fired in Win32 but is in UWP.
Full trust desktop apps
I mentioned earlier that developers want their code to be able to run outside of the security sandbox without any AppContainer – this is called “full trust permission” in the WinRT jargon – and Desktop WinUI 3 allows them to do so. You can call all the .NET 5 APIs without restrictions. For instance, you can query the current process and get a list of its loaded modules; this is something you can’t do in the UWP app model. Let’s see how easy it is:
In the MainWindow.xaml create a ContentDialog:
[code lang=”xml”]
[/code]
And in the code-behind of MainWindow.xaml.cs call the .NET APIs from System.Diagnostics to get the modules loaded in a process:
[code lang=”csharp”]
private async void myButton_Click(object sender, RoutedEventArgs e)
{
myButton.Content = “Clicked”;
var description = new System.Text.StringBuilder();
var process = System.Diagnostics.Process.GetCurrentProcess();
foreach (System.Diagnostics.ProcessModule module in process.Modules)
{
description.AppendLine(module.FileName);
}
cdTextBlock.Text = description.ToString();
contentDialog.XamlRoot = myButton.XamlRoot;
await contentDialog.ShowAsync();
}
[/code]
Press F5 to Run and you will get something like this picture when clicking the button:

I have shown you a lot of things with just a few lines of code. .NET with WinUI 3 in Desktop apps allows you to use the .NET APIs as you expect (no limitations) while using WinUI 3 as your UI Framework. Getting access to the underlying window implementation, in this case Win32 and HWNDs, enables you to use the vast set of Win32 APIs in your app in addition to the WinRT APIs of Windows 10. This will allow you to create new Desktop WinUI 3 apps reusing the majority of your current code.
You can get more samples of WinUI 3 in desktop here, and you leave feedback on our Github repo.
Happy WinUI coding devs!
Miguel Ramos – WinUI/XAML PM
Twitter: @marbtweeting
GitHub: @marb2000