

Calling Windows APIs in .NET5
With the release of .NET5 Preview 8, we have introduced a streamlined way for .NET developers to access the set of Windows Runtime (WinRT) APIs that are shipped as part of Windows. .NET5 applications can now access Windows APIs through a new set of Target Framework Monikers (TFMs), which have been extended to support platform specific APIs. This is the recommended mechanism for .NET going forward. For more information on this change, please refer to the .NET5 Preview 8 announcement.
This change means that applications targeting .NET5 no longer need to reference the Microsoft.Windows.SDK.Contracts NuGet package.
Developers can access this functionality by installing the latest preview for .NET5 (preview 8) and Visual Studio 16.8 (preview 2):
- https://devblogs.microsoft.com/dotnet/announcing-net-5-0-preview-8/
- https://devblogs.microsoft.com/visualstudio/visual-studio-2019-v16-8-preview-2/
Getting Started with .NET5 Windows TFMs
To access WinRT APIs in your .NET5 desktop , specify the appropriate TFM in the <TargetFramework> tag for your csproj file. Unlike with .netcore3, there is no need to reference a NuGet package—instead, the TFM pulls in the Windows APIs allowing you to achieve the same functionality. Note that Windows desktop APIs will only be available when targeting net5.0-windows, and you need to target a Windows 10 version if you want to use WinRT APIs.
<Project Sdk="Microsoft.NET.Sdk.WindowsDesktop">
  <PropertyGroup>
     <OutputType>WinExe</OutputType>
     <TargetFramework>net5.0-windows10.0.17763.0</TargetFramework>
     <UseWindowsForms>true</UseWindowsForms>
  </PropertyGroup>
</Project>
To demonstrate the usage of an API, we will call the Geolocation WinRT APIs with a simple Windows Forms app. This code snippet shows latitude and longitude coordinates by clicking a button on the UI.
private async void Button_ClickAsync(object sender, EventArgs e)
  {
    var locator = new Windows.Devices.Geolocation.Geolocator();
    var location = await locator.GetGeopositionAsync();
    var position = location.Coordinate.Point.Position;
    var latlong = string.Format("lat:{0}, long:{1}",
                                position.Latitude, position.Longitude);
    var result = MessageBox.Show(latlong);
  }
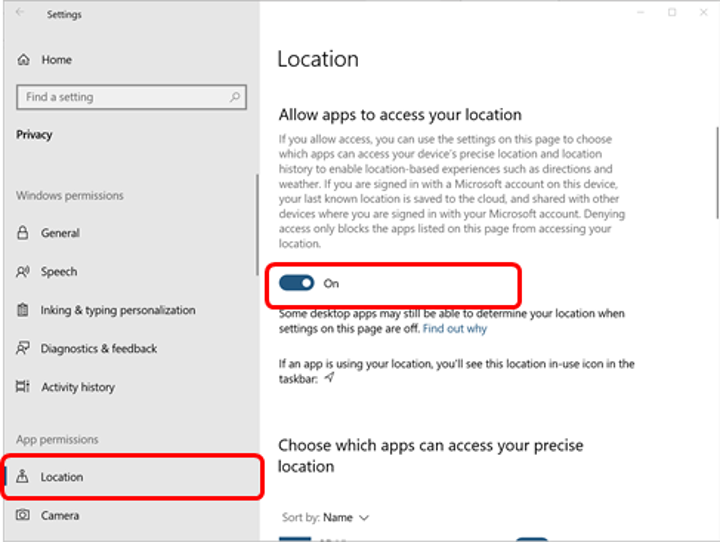
To use this API, you will need to turn on location settings so the app can find your location. To do this, go to Settings->Privacy->Location and toggle on ”Allow apps to access your location”.
The code using the Geolocation APIs above is the same as this previous walkthrough that showed you how to call WinRT APIs in .NET Core 3.0 using the Microsoft.Windows.SDK.Contracts nuget package. The outputs of both programs are the same – the only difference is that for targeting .NET5, the NuGet package reference to Microsoft.Windows.SDK.Contracts is removed and the TFM is updated to the appropriate Windows 10 SDK version.
Behind the Scenes
This functionality is the evolution of both C#/WinRT – the tooling that provides WinRT projection support for .NET5, and .NET5 itself as it evolves its support for platform APIs. C#/WinRT was used to build the projection assemblies for the Windows APIs, which were packaged up as part of a .NET5 Reference and Targeting pack that is included in the .NET5 SDK and accessed via the TFM. More details about the .NET5 design can be found here.
Currently supported TFM versions include:
- 10.0.17763.0
- 10.0.18362.0
- 10.0.19041.0
Future versions will be added as new Windows versions are released.
Multitargeting
It is also possible to target multiple frameworks in your app, for example, .NET Core 3.1 and .NET5, at the same time. To do this, in your project file simply use the <TargetFrameworks> element (note the plural), and specify the TFMs you wish to support separated by semicolons. You can then use statements in your <PackageReference> element when you need to enable or disable a given reference. In the example below, the NuGet package is only referenced when targeting .NET Core 3.1 but not with .NET5. In our sample, the NuGet package is not needed for .NET5 because the TFM for .NET5 will include references to the WinRT APIs.
<Project Sdk="Microsoft.NET.Sdk.WindowsDesktop">

  <PropertyGroup>
    <OutputType>WinExe</OutputType>
    <TargetFrameworks>netcoreapp3.1;net5.0-windows10.0.19041.0</TargetFrameworks>
    <UseWPF>true</UseWPF>
  </PropertyGroup>
  <ItemGroup>
   <PackageReference Condition="'$(TargetFramework)' == 'netcoreapp3.1'"
                     Include="Microsoft.Windows.SDK.Contracts"
                     Version="10.0.19041.0" />
  </ItemGroup>
</Project>
We will demonstrate multitargeting using a simple WPF app with an image control and a button.
Add the following XAML markup to your MainWindow.Xaml:
<Grid>
  <Button Content="Take Picture"
          HorizontalAlignment="Center" VerticalAlignment="Bottom”
          Height="50" Width="200" Margin="0,0,0,20"
          Click="TakePicture_Click" />
  <Image Name="CameraImage" HorizontalAlignment="Center" VerticalAlignment="Center"
          Height="500" Width="300" />
</Grid>
Now let’s add the following code snippet below, which takes a picture using an attached Web Camera and displays the image using the Windows.Media.Capture APIs. For simplicity, this code does not include error handling, please ensure you have a webcam attached.
private async void TakePicture_Click(object sender, RoutedEventArgs e)
{
  // Initialize the webcam
  MediaCapture captureManager = new MediaCapture();
  await captureManager.InitializeAsync();

  ImageEncodingProperties imgFormat = ImageEncodingProperties.CreateJpeg();
  // create storage file in local app storage
  StorageFile file =
              await KnownFolders.CameraRoll.CreateFileAsync("TestPhoto.jpg",
                                 CreationCollisionOption.GenerateUniqueName);

  // take photo
  await captureManager.CapturePhotoToStorageFileAsync(imgFormat, file);

  // Get photo as a BitmapImage
  BitmapImage bmpImage = new BitmapImage(new Uri(file.Path));
  // CameraImage is an <Image> control defined in XAML
  CameraImage.Source = bmpImage;

}
When you debug a multi-targeted application, Visual Studio enhances the Debug target drop down so you can choose which version you wish to run. Simply click the Framework arrow and choose your target as follows:

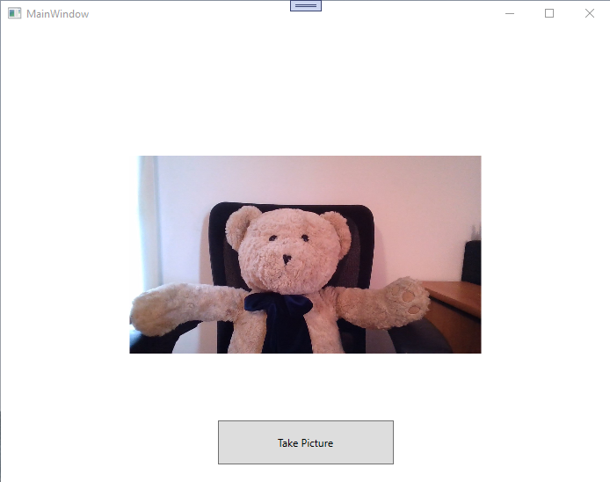
When you run the application and click the button, you will now get a picture from your webcam:
Adaptive Code for previous OS
To call WinRT APIs on earlier versions of Windows 10, you can still reference the latest SDK that you wish to support while using version adaptive code to detect if a given API is supported. You may want to consider adjusting your functionality on the detected platform version if you are supporting earlier platforms.
For more details on adaptive code, see the following docs.
Summary
We are excited to provide this improved functionality that provides easy access to Windows APIs from your .NET5 applications. For additional information and feedback, please see the docs on http://aka.ms/cswinrt and our repo at https://aka.ms/cswrint/repo.