After working professionally at McGraw-Hill as well as prior work in the telecommunications industry, Tanya Gordon relocated to southwest Iowa in conjunction with her husband’s job. She launched Mommy Goggles over 5 years ago, rising to prominence as a national Mom Blogger. In addition, Tanya happily parents two wondrous children who despite best efforts still have been known to engage in ongoing sibling squabbles: Tucker, 5, and Kambry, 3. She can be reached at [email protected].
I am a mother, blogger, active photographer and travel for media events. I use all four when it comes to bringing in a personal feel to my blog posts whether that be a review or posting pictures from our daily events. I cannot even begin to fathom how many hours I have spent using a high priced photo editing program to create an image, copyright in layers, adjust the opacity, crop images, tweak the brightness and flatten the image to use for my blog or daily 365 photo program. Once, after a travel event, I spent a good 3 solid days doing this. In April, I went to Mom 2.0 Summit where I was able to meet with Windows and learn all about Windows Live Writer. Needless to say, I was excited to get my hands on the program and try it out.
Writing posts, offline and online
The main thing I want to tell you about Windows Live Writer is that you do not have to be connected to the internet to use it. You can use Live Writer right from your computer, and upload once you are in an internet area. Being a blogger, this makes it so nice for when I am traveling; I can write posts en-route and publish once I get connected online.
Images: Individually or Slideshow
You can add images to show up individually, or you can add them as a group to make a a slideshow. This is especially good when you have multiple images so you won’t bog your post down with solid images.
Image Cropping
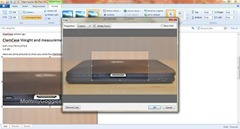
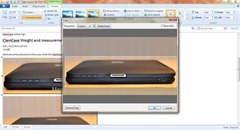
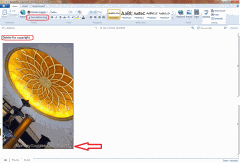
Within Windows Live Writer, I am able to upload an image, add my website copyright name & date info, as well as crop, right from Windows Live Writer. I simply pick out the image I am going to use for the post, click on the crop button to the top left and crop.
This was a review where I had my image picked out, but I needed it to be cropped thinner.
How long did this take me? Oh, about 2 minutes, if that.
Post Title & Post Link
One thing that I do with my blog posts is to create a title that may be lengthy, but I don’t want the link to be that long. Personally, I like shorter links with specific key words included. You can do this!
· Create your post title
· Write your post
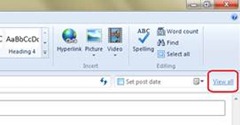
· Click on ‘View All’
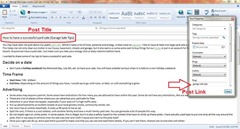
Once that box opens, scroll down to ‘Slug’ and you can enter what you want your link to read.
· For this specific post, my post title was: “How to have a successful yard sale (Garage Sale Tips)”
· The Slug is: “garage sale tips” once published is: http://www.mommygoggles.com/garage-sale-tips/
Image Copyright
One thing that I love about Windows Live Writer is that you have the ability to copyright your images. This comes in handy especially when I want to watermark images of my kids, or even for my daily projects like the 365 Photo Project. For something like a 365 Project, what I will do is create a new post within Windows Live Writer, make the post title something with ‘Delete’ in the title’, add my image, resize or crop as needed, add my copyright to the image, then post to a draft within my blog.
Once I go online to my drafts, I will see the post that I just added to my drafts.
From my drafts, I will click on preview (to open in a new window), right-click & save my image back to my computer, then I can go to my 365 Project and add that copyrighted image to my gallery.
Once I get my image saved back for my 365 project, I know to go back to my drafts and delete it. All in a matter of a minute, I have my image copyrighted to use for my daily photo project.
Overall: I love Windows Live Writer! I tried this program over a year ago, but wasn’t too fond of it at the time. This was before a lot of these features were added. Now that I have been using it for several weeks, I am in love with it! When we go on long family road trips, I will take my laptop, open Windows Live Writer, write on the road and once I get to internet, my posts are ready to publish. Windows Live Writer has saved me so much time!


