You don’t need to take a class to take some classy looking photos. Here are a few tips and tricks to get the most out of your photos—and how to show them off.*
1. It was the best of modes, it was the Burst of modes…
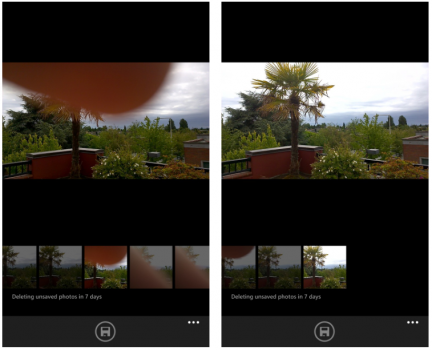
At one time, I needed to take multiple photos to make sure I didn’t a) frame the shot as if taking pictures during an earthquake, and/or b) cover the lens with my finger. Now, Burst mode lets me take a bunch of shots in rapid succession with one tap, so I don’t need to worry about my photog deficiencies (or my friends’ severe blinking issues).
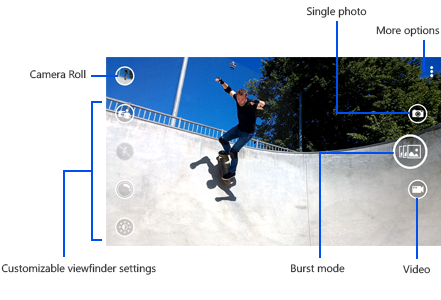
Switching to Burst mode is easy: open Camera and tap Burst mode (see the rad skateboard pic above for reference). Once you’re done shooting your Burst, find the photo in your Camera Roll, and then tap Burst to choose the best shot(s). The photos you don’t save will be automatically deleted after seven days, so no need to worry about them taking up precious storage space on your phone.
2. Shutter the camera shutter
If you want to keep your shameful selfie habit a secret, turning off the camera shutter sound is a must. In your phone’s Settings, tap Ringtones + sounds, and then clear the Camera shutter check box to keep your phone silent during photo ops. Your secret is safe with me.
3. Get a hot Date view
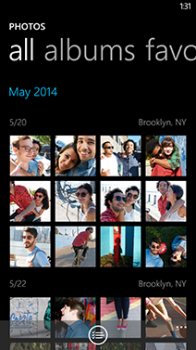
After hanging out on the beach a few months ago, a friend of mine crafted a makeshift hat out of a towel. Naturally, I needed to remind him how ridiculous he looked. But scrolling through my long list of photos proved tedious and time consuming. The solution? Date view, which shows you every photo on your phone in chronological order. In Photos > All, tap the current month and year to open a full list of every month in which you’ve taken photos. From there, tap a month to find the photo you’re looking for. My hat-crafting friend is now painfully aware that I can pull up any embarrassing photo in a matter of seconds.
4. Setting yourself up for success
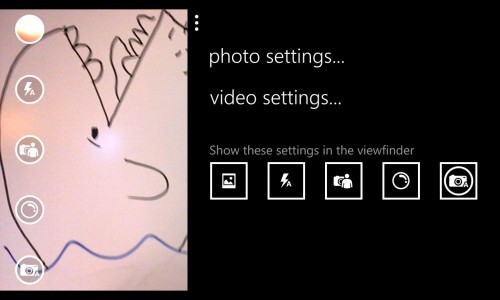
Pick the quick settings you want to see on your Camera viewfinder for instant access while taking photos. To find and change your quick settings, go to Camera > More…, and then tap any of the icons under Show these settings in the viewfinder. The same tubular skateboard pic above shows off the five customizable viewfinder settings.
Among the settings are the usual suspects, like Flash (On, Off, or Automatic) and a front/rear camera switcher, plus more advanced options to control White Balance, Exposure Value, and ISO. You can also select Lenses for more pre- and post-photo editing options. Different phones, especially those not of the Nokia Lumia variety, may have different settings.
5. See the world through rose-colored Lenses
When looking through your viewfinder, what you see doesn’t always have to be what you get. Open Camera and tap the Lenses quick setting icon for a list of camera-enhancing apps already on your phone. For example, the Bing Vision Lens turns your viewfinder into a scanner for QR Codes and barcodes. On Nokia phones, Lenses include Nokia Cinemagraph, which lets you blend photos and movie-like animation to create some impressive and trippy visuals, which you can then export as GIFs. It’s so engrossing I spent almost an hour “researching” what it can do.
There are plenty of other Lenses and photo editing apps available. To search for something new, tap Lenses > Find more lenses, and then choose between dozens of apps, like Vine, Office Lens, Fhotoroom, and more.
* This post refers to features in Windows Phone 8.1. If your phone is running Windows Phone 8, some of them won’t be available. Check to see which software version you have and find out if an update is available.


