Windows 10 Tip: Getting started with the Windows Ink Workspace
Get started with the Windows Ink Workspace

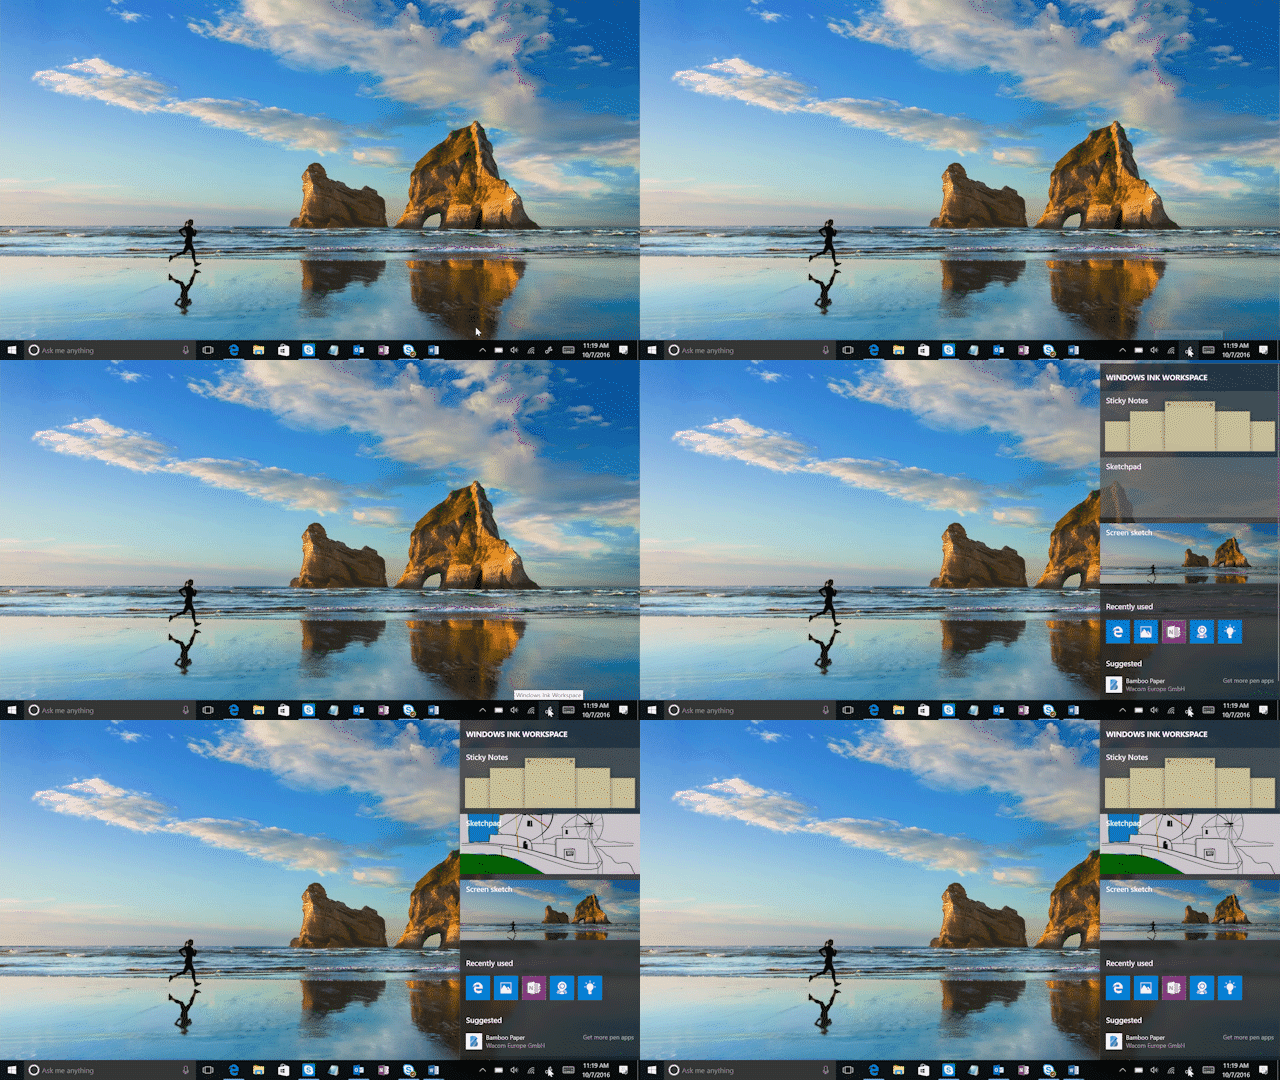
First, find the Windows Ink Workspace, your canvas for all the ink-powered features and apps on your PC. The Workspace has built-in experiences like sketchpad, screen sketch and Sticky Notes, as well as apps optimized for pen use.
Press the Windows Ink Workspace button in your system tray at the bottom right of your screen or click the back of your pen**! If you don’t see the icon, right-click anywhere in the system tray and click on “Show Windows Ink Workspace Button.”
Take notes that become smart and active with Sticky Notes

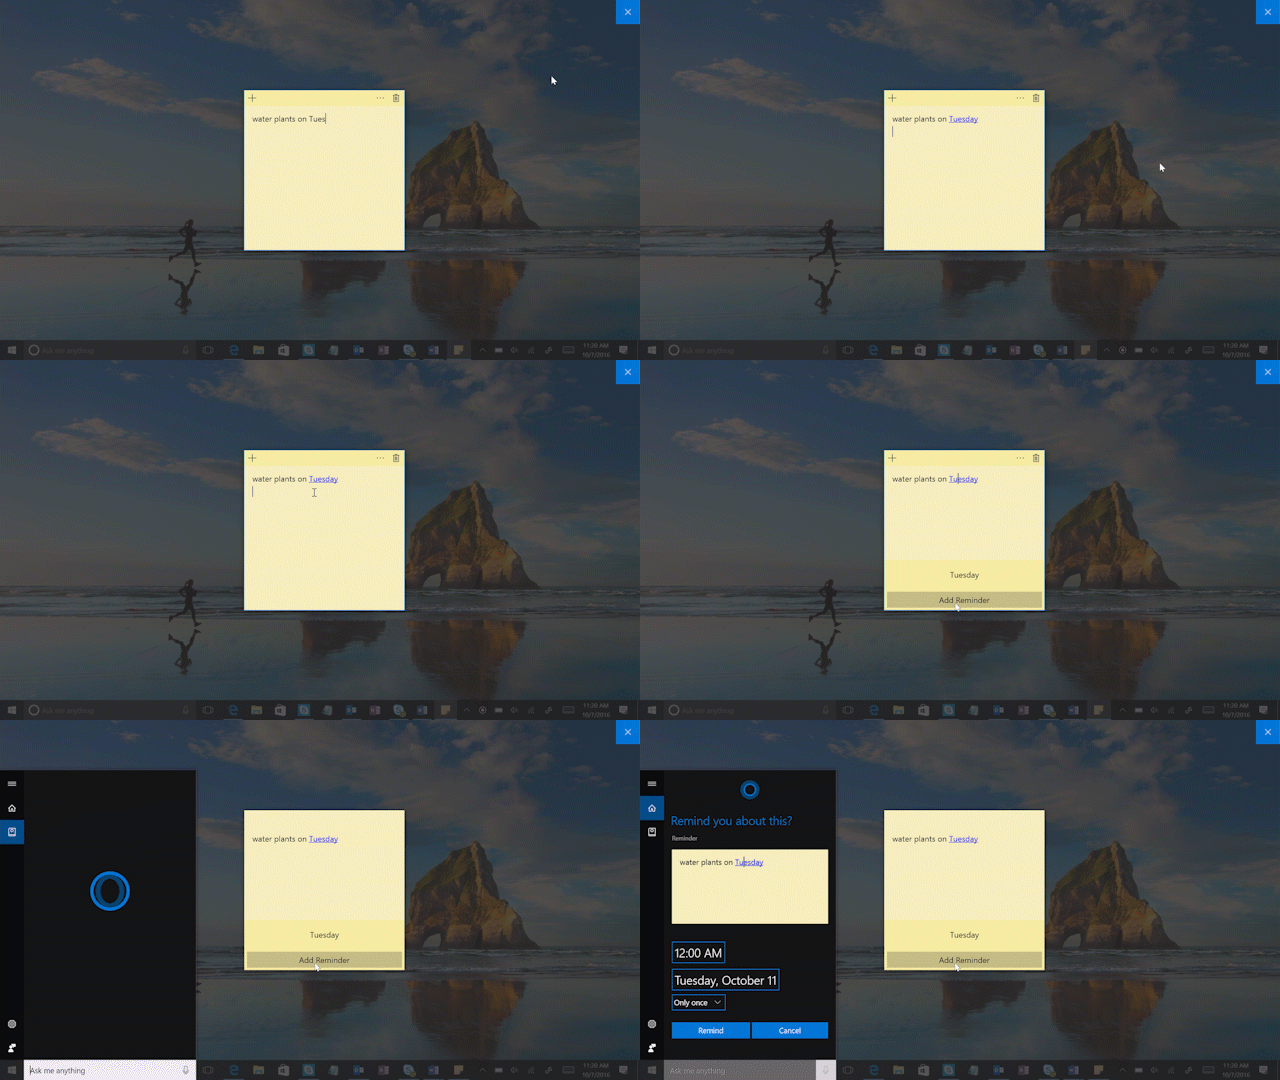
You can find Sticky Notes in the Start menu or at the top of your Windows Ink Workspace. Write an address and Maps readies it for finding a route; jot down a few items and they become an easy-to-manage checklist; scribble down an email address and it tees up in your Mail app.*** And, with Cortana, you can simply jot down a time or date with your note and it will be highlighted. You can then tap on it to create a Cortana reminder, available across all the devices you have Cortana installed on. 1
You can even write down a flight number and click on the text when it turns blue to track the flight right in the Sticky Note***.
Create in the sketchpad and trace with the digital ruler

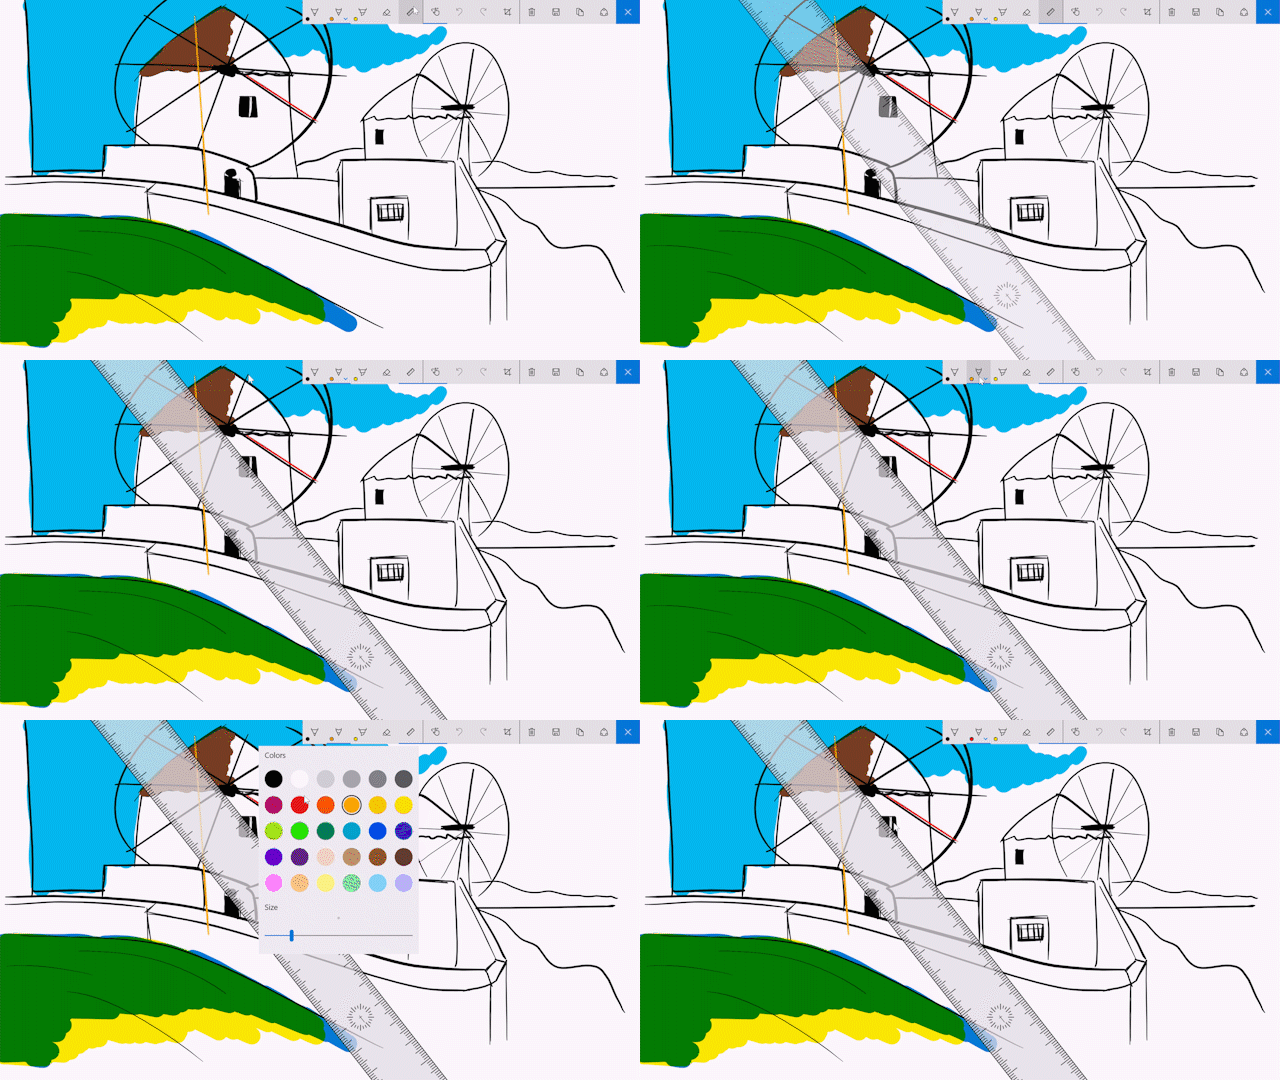
The sketchpad in the Windows Ink Workspace is a simple blank canvas where you can quickly and easily draw an idea, doodle, create, and solve problems.
You can also use the digital ruler with Windows Ink to measure distance or trace along a straight edge, just like on paper! Head to the sketchpad or screen sketch within the Windows Ink Workspace and click on the ruler icon in the upper right-hand corner of the toolbar. Then, adjust the digital ruler and with your pen (or finger, if you click on the “touch writing” icon) to draw sharp lines along the edge.
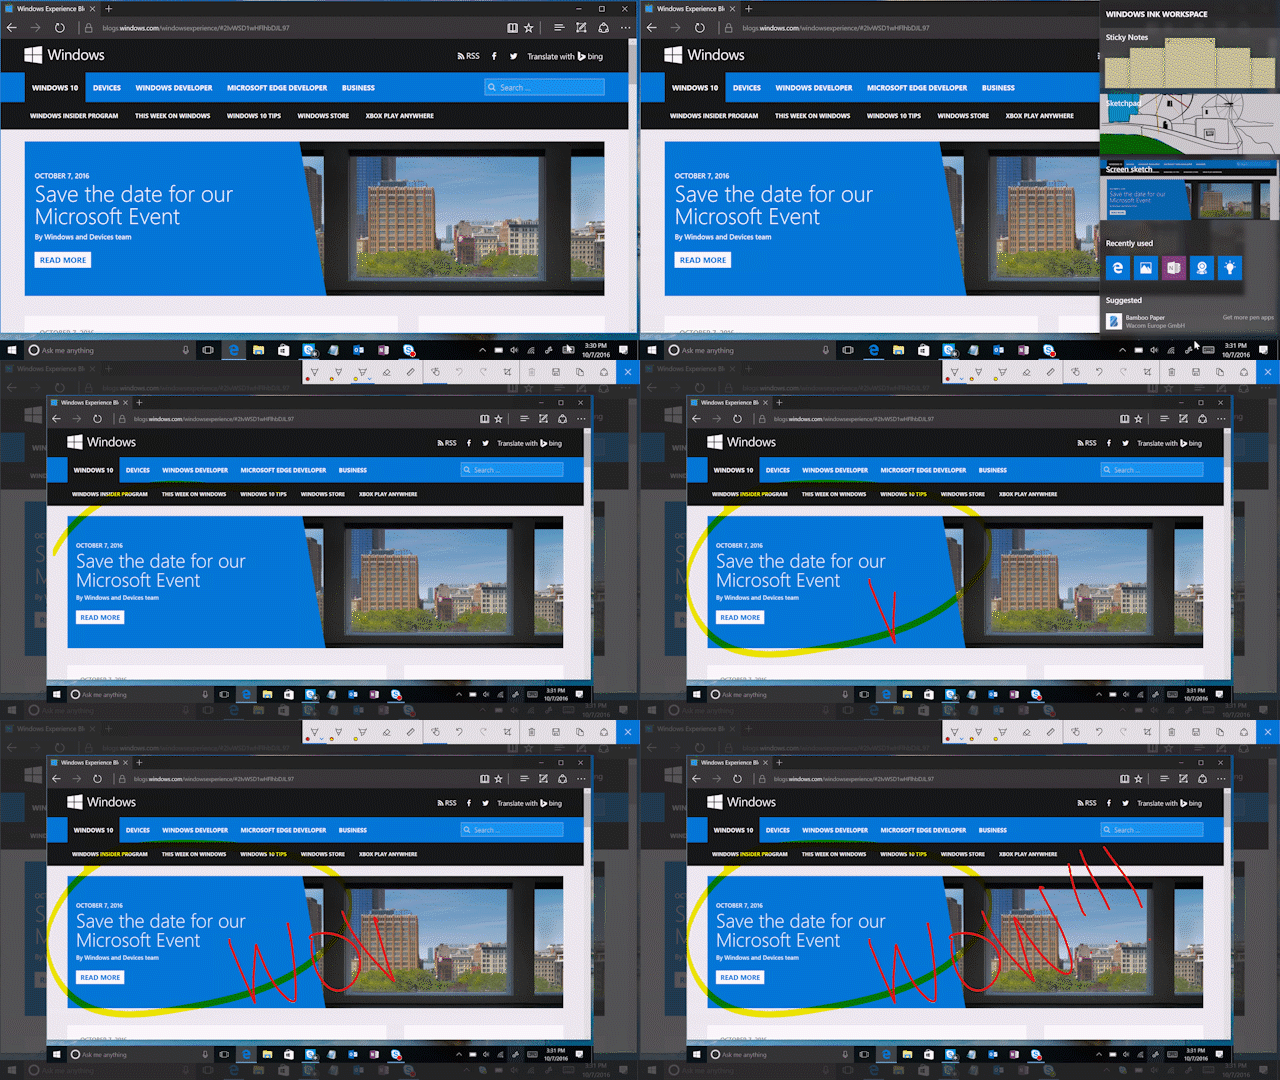
Draw, crop and markup your desktop with screen sketch

Screen sketch lets you draw on a screen capture of your entire desktop – allowing you to collaborate on documents as though you would with pen and paper or add your personal touch to an awesome picture you saw in the Photos app, then easily share this with the rest of your world. Screen sketch is designed to be the most natural way to freely express emotions and personalize content, so you can draw, crop and mark up the entire image. Similar to the sketchpad, it’s easy for you to save and share these creations with your friends and colleagues.
If you aren’t running the Windows 10 Anniversary Update yet, learn how to get it here.
Have a great week!
*Touch-capable tablet or PC required. Pen accessory may be sold separately.
**User must enable in settings and have a Bluetooth button on pen.
1Available in select markets; experience may vary by region and device.
***US only
