

Windows 10 Tip: Keep your apps organized with virtual desktops
Here’s how to get started with virtual desktops:
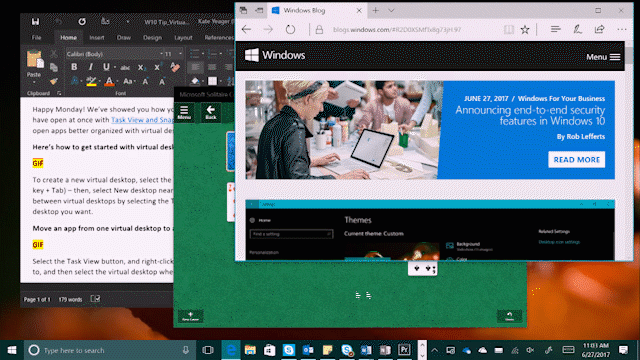
To create a new virtual desktop, select the Task View button on the Windows Taskbar (or hit Windows key + Tab) – then, select New desktop near the lower-right corner of the screen. You can switch between virtual desktops by selecting the Task View button, and then the thumbnail for the virtual desktop you want.
Move an app from one virtual desktop to another:

Select the Task View button, and right-click on the thumbnail of the app you want to move. Select Move to, and then select the virtual desktop where you want to move the app.
Have a great week!

