Windows 10 Tip: Add 3D to your PowerPoint presentation in 5 steps
Did you know that with the Windows 10 Fall Creators Update, you can now easily add 3D objects in your PowerPoint presentations, Word, and Excel documents?
First, open a presentation in PowerPoint.
You don’t need any fancy extensions or plug-ins, just the latest version of Office 365 will do.
Inserting a 3D model is just as easy as inserting a photo or a video.
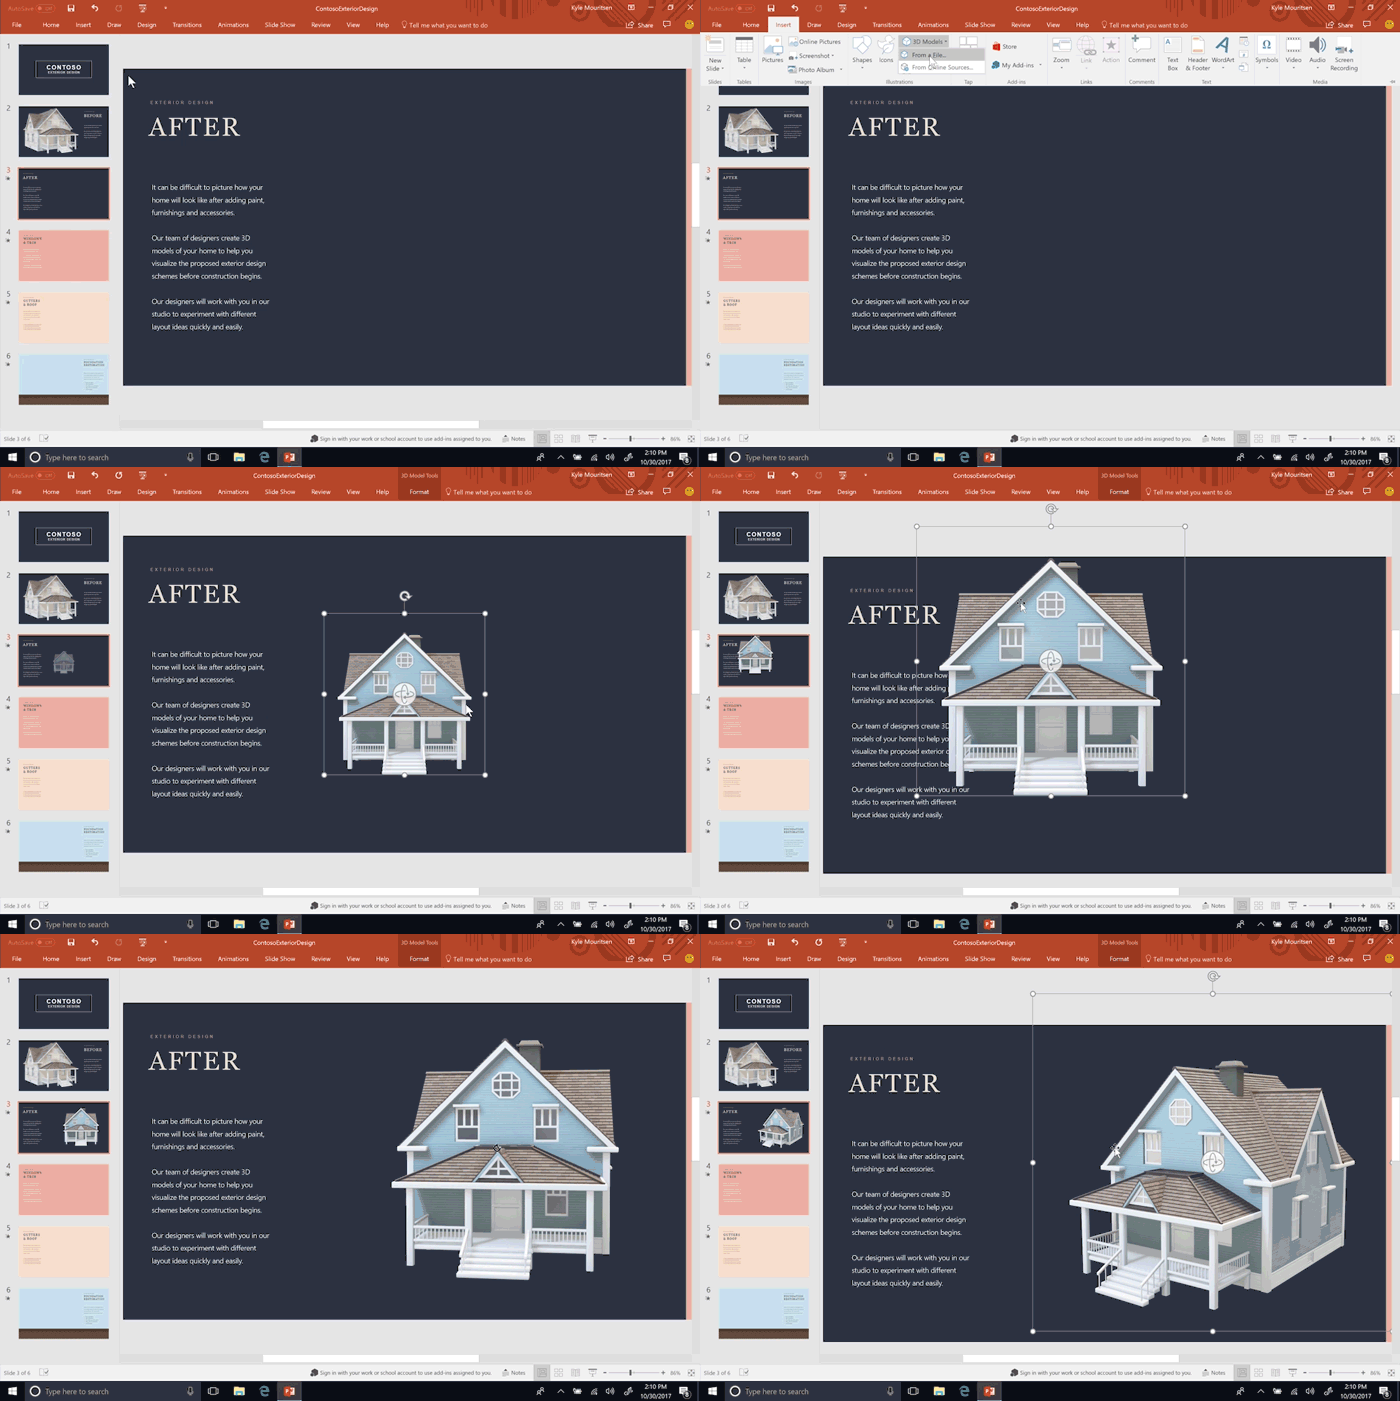
On the Insert tab, you’ll find the 3D Models drop-down to either add a model you’ve created in Paint 3D or grab one from Remix3D.com, an online community and catalog of 3D content.
View, resize, and rotate your 3D object.

Drop it into the slide and use the controls to manipulate the model, rotating, sizing and positioning until you like the way it looks. A new contextual tab 3D Model Tools will appear, and you can use the preset 3D Model Views to choose the specific orientation you want your audience to see.
Duplicate your slide and reposition your model to the next view you’d like to highlight.
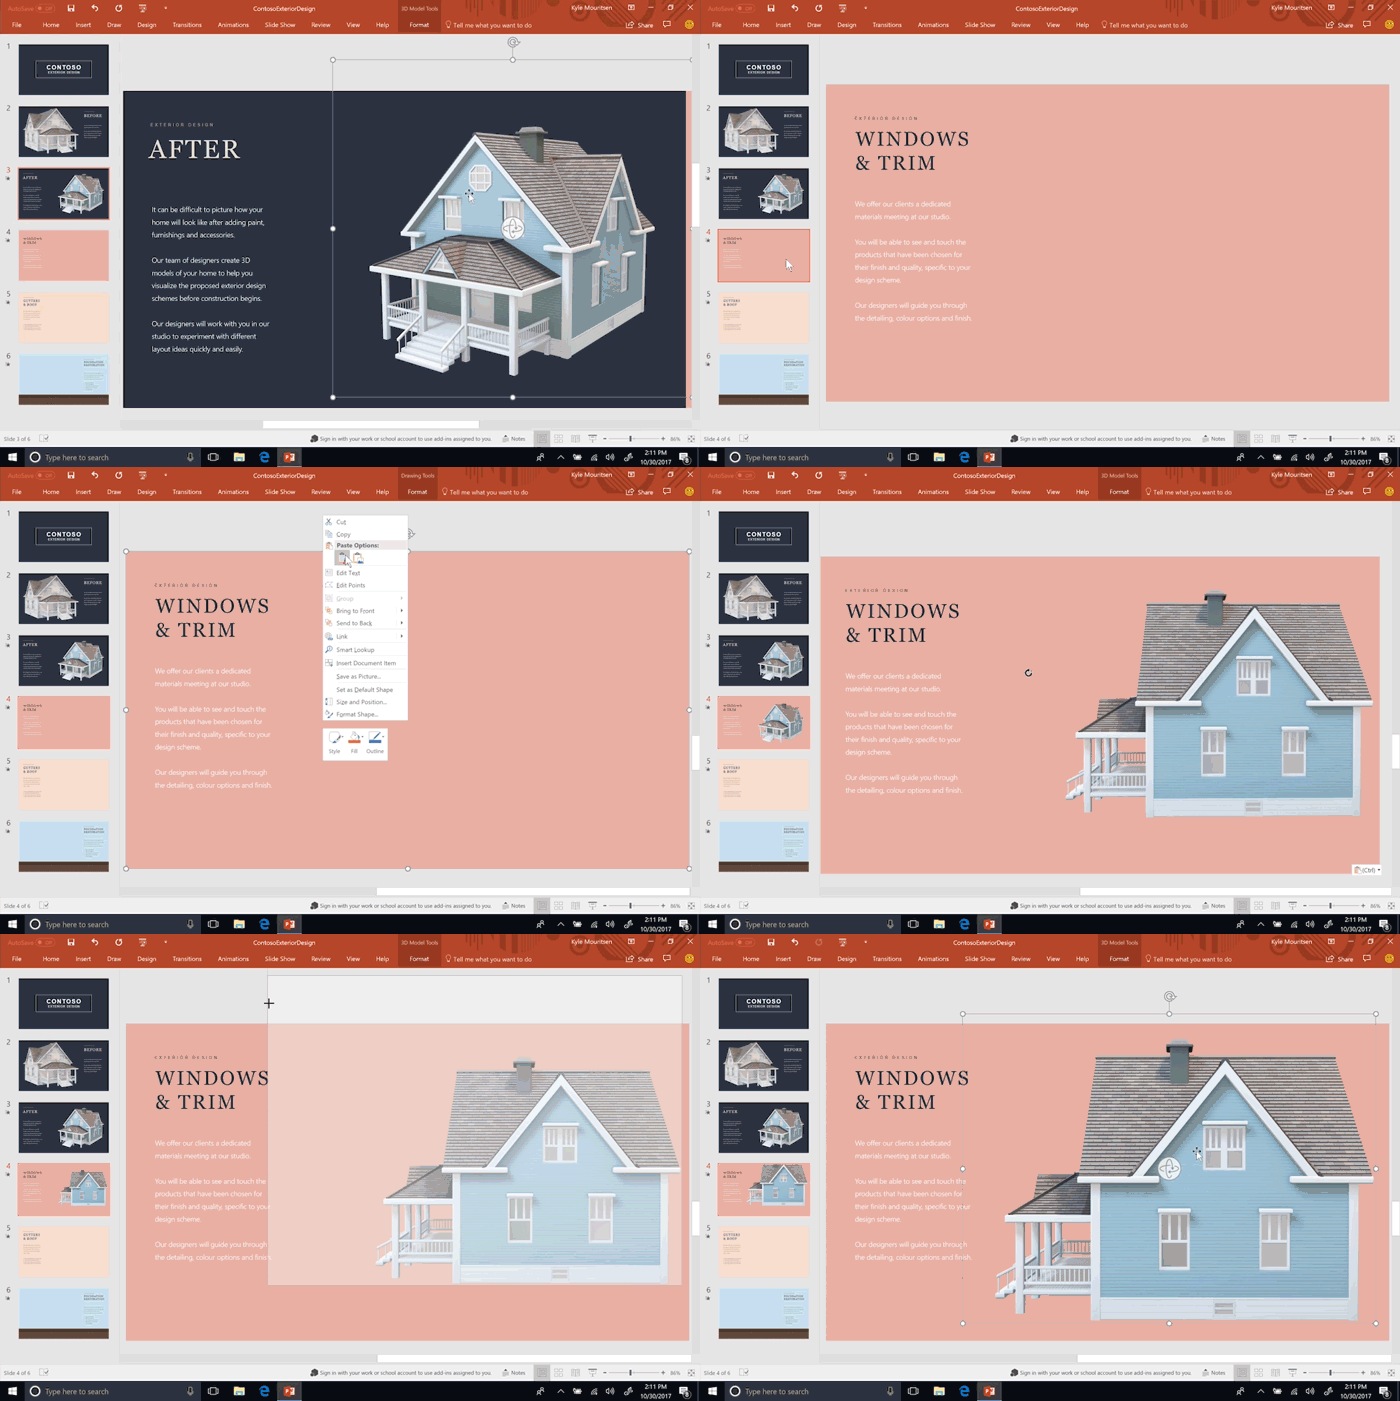
No need to find different images to identify different perspectives. With 3D, you are in control!
Use a brand-new transition type, Morph, with 3D models to create cinematic transitions between slides.
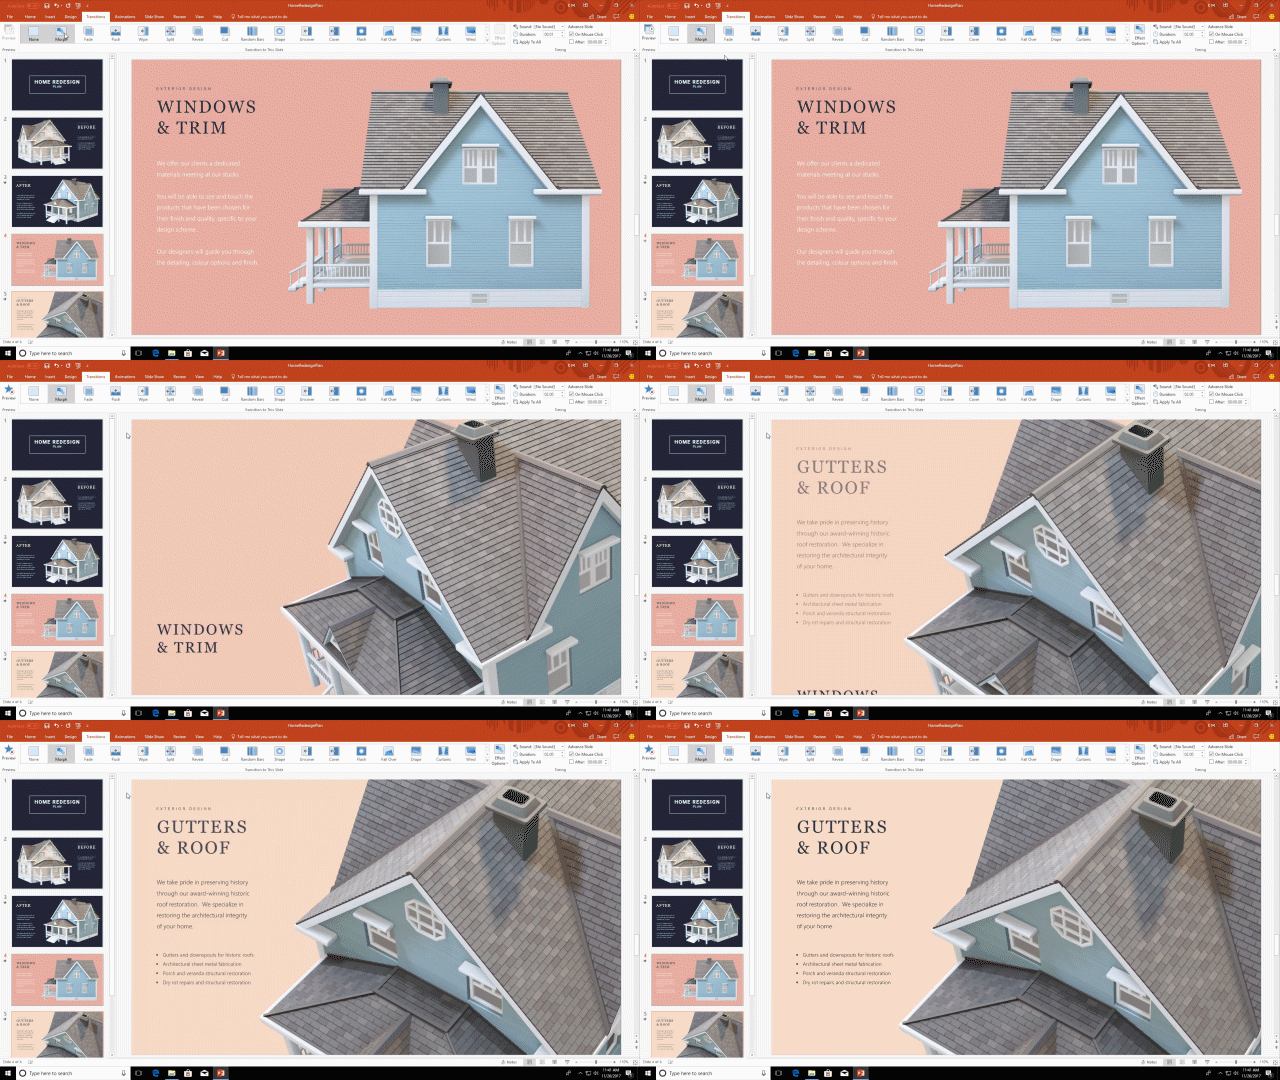
The final step is to add the Morph transition to automatically have your 3D object animate and shift in perspective seamlessly across all your slides.
To see what else is new and available in the Fall Creators Update, check out this blog!


