


This post will cover the specific APIs for pulling Visuals out of your XAML as well as pushing Visuals back into your layout. These are also known as hand-out Visuals and hand-in Visuals. Additionally, we’ll cover some details of property sharing between the Framework Layer and the Visual Layer which you will find helpful to get under your belt. We’ll finish off with a dessert recipe (hint, it includes frosting) that demonstrates how the interop between XAML and the Visual Layer is used to create sweet effects.
Let’s talk about hand-out Visuals
Each XAML UIElement in your page layout has a backing Visual that is used for rendering. Because Visuals can contain other Visuals, the tree made up of Visuals tends to be larger than the logical tree made up of XAML elements. If you have been working with XAML for a while, you are probably already familiar with this concept of visual trees and logical trees.
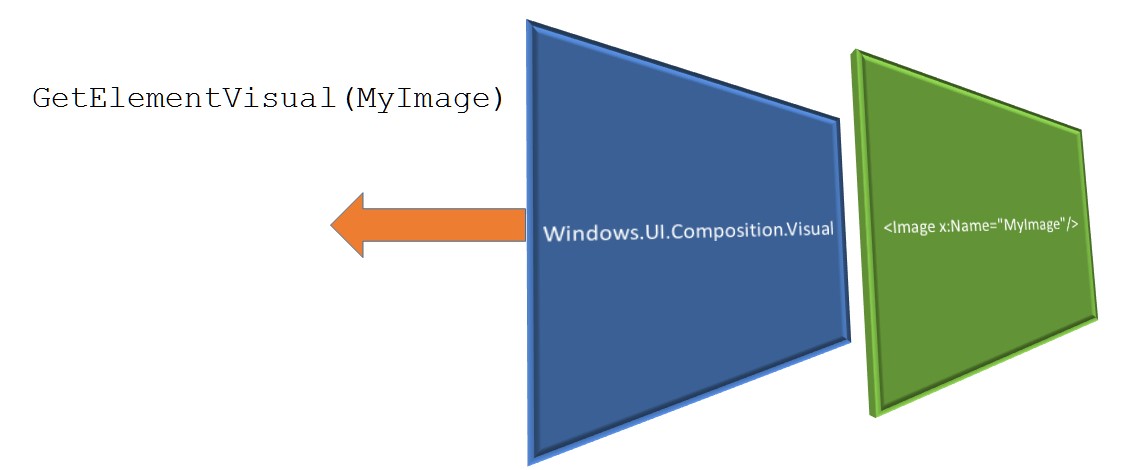
Using the interop class ElementCompositionPreview, which is the workhorse of XAML-Composition interop, you can grab the backing visual for any page element by calling the GetElementVisual method.
[code]
Visual backingVisual = ElementCompositionPreview.GetElementVisual(MyImage);
[/code]
In fact, grabbing the root backing Visual for your page, rather than a specific element, is a common way to retrieve the current Compositor instance.
[code]
// Get the current compositor
Compositor compositor = ElementCompositionPreview.GetElementVisual(this).Compositor;
[/code]
The Visual you receive from ElementCompositionPreview in this way is referred to as a hand-out Visual. Several properties of a hand-out Visual are effectively shared between your XAML and the Composition API so that changes to UIElement properties — such as those related to position, height and width — can alter the Offset and Size properties of the Visual. Some care should be taken when working with these properties, however. While hand-out Visuals receive property changes made to UIElements, UIElements will not read property changes made to hand-out Visuals. The flow of property information flows in only one direction.
Welcome to Composition Island
The SetElementChildVisual method of ElementCompositionPreview plays the role of equal and opposite reaction to the GetElementVisual method. It allows you to take a Visual you have created and add it to a UIElement’s visual tree. When a Visual is added in this way, it is called a hand-in Visual. It doesn’t participate in property sharing the way hand-out Visuals do. Instead, a hand-in Visual acts as a Composition Island: an isolated piece of Visual-based content surrounded by a sea of XAML.
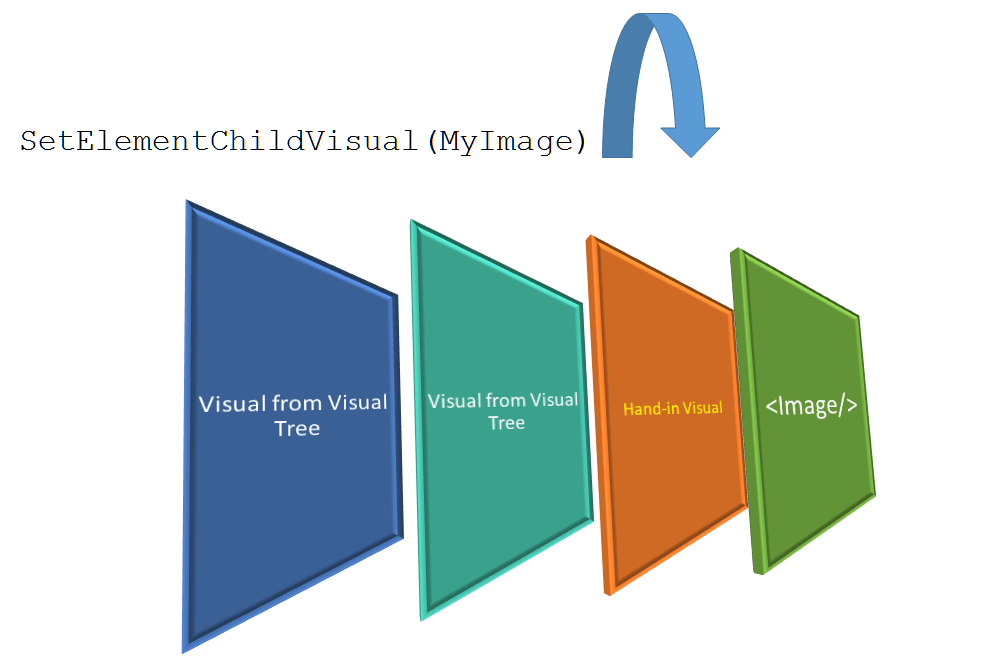
By default, a hand-in Visual is added as the last member of the UIElement’s visual tree, placing it prominently on top of other child Visuals.
[code]
Visual dataIsland = _compositor.CreateSpriteVisual();
ElementCompositionPreview.SetElementChildVisual(MyImage, dataIsland);
[/code]
ElementCompositionPreview also has a third method, GetElementChildVisual, which takes a UIElement as an argument and returns the hand-in Visual you previously added to the element’s visual tree.
Things you should know about property sharing and property stomping
As discussed above, property sharing between the Framework Layer and the Visual Layer can be a little tricky if you aren’t careful. The following Visual properties are shared between UIElements and their backing Visuals:
- Offset
- Size
- Opacity
- TransformMatrix
- Clip
- CompositeMode
Size and Offset are especially tricky because, as mentioned before, a UIElement isn’t aware of changes to the property values on the hand-out Visual, even though the hand-out Visual is aware of changes to the UIElement. Consequently, if you change the value of the hand-out Visual’s Offset or Size property and the UIElement’s position changes due to a page resize, the UIElement’s previous position values will stomp all over your hand-out Visual’s values.
There is a simple trick that will allow you to avoid property stomping, though. Place your UIElement inside a Grid control or Border control. Then instead of setting position properties directly on your UIElement, you should set them on the wrapper instead.
[code lang=”xml”]
<Border x:Name="ElementWrapper" Margin="5" VerticalAlignment="Top" Width="300">
<Image x:Name="MyImage" Source="Assets/Lenna.png"/>
</Border>
[/code]
By doing this, the UIElement’s position appears to never change from its default settings, and so it doesn’t draw any attention during the layout pass, thus avoiding any unwanted property stomping. Additionally, changes to the hand-out Visual’s Offset property will be relative to the position of the wrapper.
You can find out more about property stomping in Robert Mikhayelyan’s blog post about Changes to XAML-Composition Interop.
Recipe: How to add frosting to the Visual Layer
In the following recipe, you will add a frosted glass effect to a XAML element that is overlaid on top of an image. This effect illustrates both the GetElementVisual and SetElementChildVisual methods at work. A more detailed example of this recipe can be found in the Dev Center post Visual Layer with XAML.
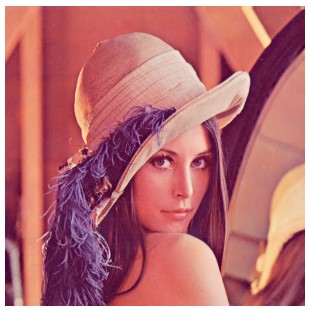
Let’s start with a simple image control.
While you could add the frosting effect directly to the Image control, placing a canvas over it and then applying a Composition effect to the canvas better demonstrates how smoothly XAML and the Visual Layer work together.
[code lang=”xml”]
<Border x:Name="ElementWrapper" Margin="5" VerticalAlignment="Top" Height="300" Width="300">
<Image x:Name="MyImage" Source="Assets/Lenna.png"/>
</Border>
<Canvas x:Name="FrostHost" Width="130" Height="300" Margin="5"
HorizontalAlignment="Right" VerticalAlignment="Top"/>
[/code]
There are basically four steps involved in adding frosting to the FrostHost element:
- Grab the backing Visual for FrostHost with GetElementVisual
- Define and create the effect
- Create a new Visual and apply the effect to it
- Insert the new Visual into FrostHost’s visual tree with SetElementChildVisual
In the first step, you can kill two birds with one stone by grabbing the backing Visual with GetElementVisual and retrieving the current Compositor at the same time.
[code]
Visual hostVisual = ElementCompositionPreview.GetElementVisual(FrostHost);
Compositor compositor = hostVisual.Compositor;
[/code]
You define the frost effect by creating a blur effect and chaining it to a tint effect by setting one of its sources to a solid color. The compositor is then used to actually create the effect.
[code lang=”csharp”]
// Create a frosty glass effect
var frostEffect = new GaussianBlurEffect
{
BlurAmount = 15.0f,
BorderMode = EffectBorderMode.Hard,
Source = new ArithmeticCompositeEffect
{
MultiplyAmount = 0,
Source1Amount = 0.5f,
Source2Amount = 0.5f,
Source1 = new CompositionEffectSourceParameter("backdropBrush"),
Source2 = new ColorSourceEffect
{
Color = Color.FromArgb(255, 245, 245, 245)
}
}
};
// Create an instance of the effect and set its source to a CompositionBackdropBrush
var effectFactory = compositor.CreateEffectFactory(frostEffect);
var backdropBrush = compositor.CreateBackdropBrush();
var effectBrush = effectFactory.CreateBrush();
effectBrush.SetSourceParameter("backdropBrush", backdropBrush);
[/code]
Next, you create a new SpriteVisual using your compositor instance and add the frosting effect you created above to it.
[code]
// Create a Visual to contain the frosted glass effect
var frostVisual = compositor.CreateSpriteVisual();
frostVisual.Brush = effectBrush;
[/code]
All that remains is to insert the new Visual back into your XAML as a hand-in Visual by using SetElementChildVisual. As a final touch, you can also sync your hand-in Visual with your hand-out Visual.
[code lang=”xml”]
// Add the blur as a child of the host in the visual tree
ElementCompositionPreview.SetElementChildVisual(FrostHost, frostVisual);
// Make sure size of frost host and frost visual always stay in sync
var bindSizeAnimation = compositor.CreateExpressionAnimation("hostVisual.Size");
bindSizeAnimation.SetReferenceParameter("hostVisual", hostVisual);
[/code]
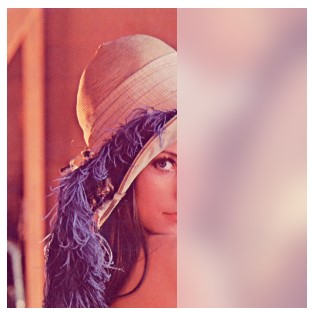
The result is a picture half-frosted over by the FrostHost canvas placed on top of it. What’s interesting here is that the frosting was not added to the picture but to a different element. As we would hope, though, the effect passes through to the underlying image without any artifacts or airspace issues.
Wrapping up
The ability to pull hand-out Visuals from your XAML and to insert Composition Islands back into it provides a highly accessible way to go back and forth between the Framework Layer and the Visual Layer. Understanding the central role of the ElementCompositionPreview class is important to accomplishing smooth integration between your XAML and the Composition APIs. If you would like to go even deeper into the Interop story behind Windows.UI.Composition, we highly recommend the following resources.
- Changes to XAML-Composition Interop
- Visual Layer with XAML
- Visual Layer Offsets
- XAML Composition Interop Behavior Changes
- Creating Beautiful UX in a Real World App using Visuals, Animations, and Effects
- Bring Fluid, Responsive, and Highly Scalable UI Experiences to Your Universal Windows Apps with the New Visual Layer
Get Started with Visual Studio.
The Windows team would love to hear your feedback. Please keep the feedback coming using our Windows Developer UserVoice site. If you have a direct bug, please use the Windows Feedback tool built directly into Windows 10.