

Built with simplicity and performance in mind, it is the engine that fuels the Remix3D site, Xbox Design Lab or 3D objects preview in Teams or OneDrive on the web.
Earlier this year we announced the third version of the engine. Today I’m glad to announce its first update: Babylon.js v3.1.

The main goal of this version was to provide helpers to achieve high end tasks. Let’s see some of them:

Improving VR experiences with the VRExperienceHelper
Babylon.js v3.0 introduced support for WebVR and VR controllers (including Windows Mixed Reality, Oculus and HTC Vive). With 3.1 release, we wanted to make the process to add VR experience in your code simple.
Therefore, we introduced the VRExperienceHelper which will take care of the following for you:
- Create the HTML button to enter VR mode
- Create a WebVRCamera (if supported) and a DeviceOrientationCamera as a fallback (this camera will allow you to use device orientation events to control your scene. This is useful on mobiles for instance)
- Add support for teleportation and rotation in the same way you can experience it in the Windows Mixed Reality cliff house
- Add support for controllers picking (you can use your controllers to interact with the scene) and gaze picking (you can use your gaze to interact)
All of this will be available with literally 3 lines of code:
[code]
var VRHelper = scene.createDefaultVRExperience();
VRHelper.enableTeleportation({floorMeshName: "Sponza Floor"});
[/code]
You can try it here: https://www.babylonjs-playground.com/frame.html#JA1ND3#15

We also added more WebVR demos on our homepage for you to try:

Building a 3D experience with 2 lines of HTML with Babylon.js Viewer
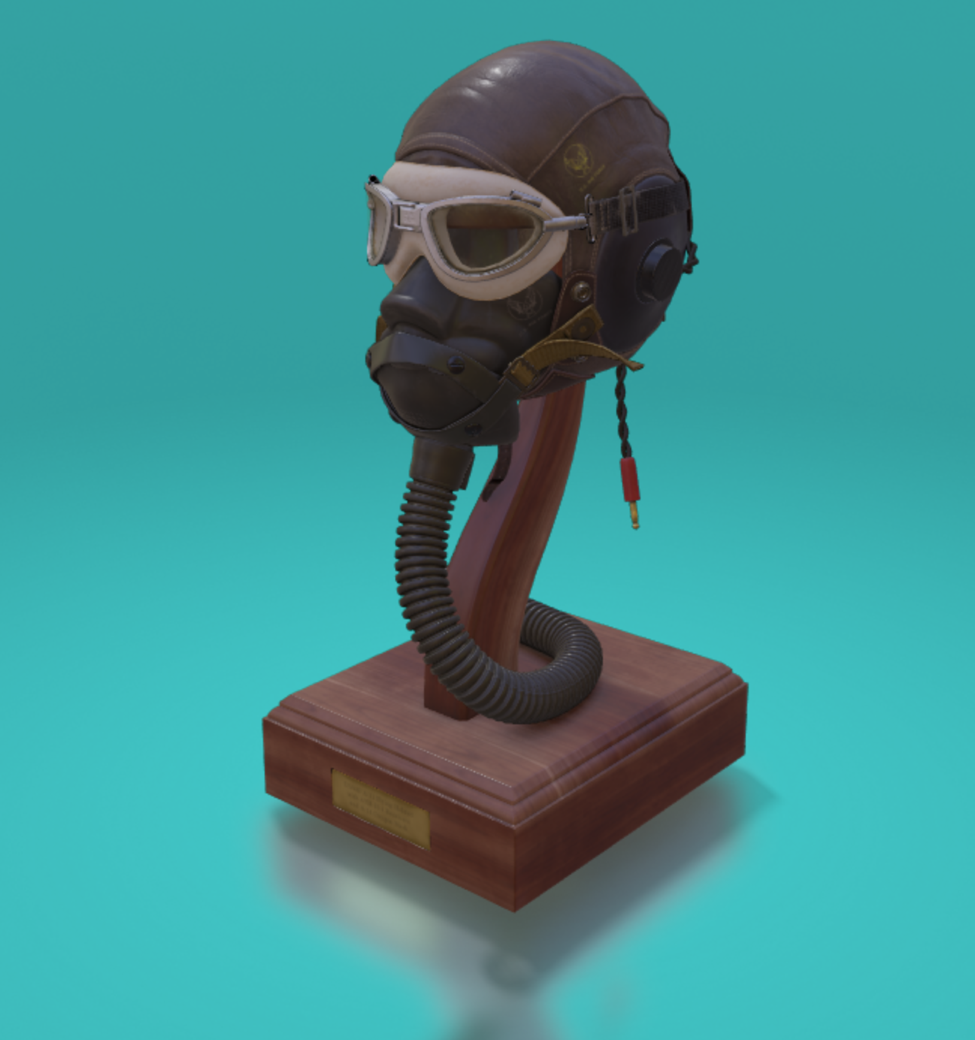
Babylon.js viewer is a new tool to allow you to integrate 3D into your web sites or web apps in a couple of seconds. Everything can be done directly from your web page:
[code lang=”xml”]
<body>
<babylon model.title="Damaged Helmet"
model.subtitle="BabylonJS"
model.thumbnail="https://www.babylonjs.com/img/favicon/apple-icon-144×144.png"
model.url="https://www.babylonjs.com/Assets/DamagedHelmet/glTF/DamagedHelmet.gltf">
</babylon>
<script src="//viewer.babylonjs.com/viewer.js "></script>
</body>
[/code]
With these two lines of HTML you can create a complete touch aware 3D viewer anywhere in your page.

http://viewer.babylonjs.com/basicexample
The viewer can be configured in all possible way either with HTML attributes, JavaScript code or even with DOM elements:
[code lang=”xml”]
<babylon extends="minimal" scene.default-camera="false">
<model url="https://playground.babylonjs.com/scenes/BoomBox.glb" title="GLB Model" subtitle="BabylonJS">
</model>
<camera>
<behaviors>
<auto-rotate type="0"></auto-rotate>
</behaviors>
</camera>
<lights>
<light1 type="1" shadow-enabled="true" position.y="0.5" direction.y="-1" intensity="4.5">
<shadow-config use-blur-exponential-shadow-map="true" use-kernel-blur="true" blur-kernel="64" blur-scale="4">
</shadow-config>
</light1>
</lights>
</babylon>
[/code]
All the user interface can be updated to reflect your brand and the configuration model can also be extended.
Please follow this link to our documentation to learn mode about the Babylon.js viewer: http://doc.babylonjs.com/extensions/the_babylon_viewer
Create your demo setup with a few lines of code thanks to the EnvironmentHelper
For non-3D experts, setting up a 3D environment (lights, skyboxes, etc.) could be tricky. Therefore, we added a tool named EnvironmentHelper and directly available on the scene to help you with this task.
Using it is straightforward:
[code]
var helper = scene.createDefaultEnvironment();
helper.setMainColor(BABYLON.Color3.Teal());
[/code]
And you can then get a good-looking setup (skybox + ground) adapted to your scene:

The helper offers a lot of options like enabling reflections or shadows:
[code]
var helper = scene.createDefaultEnvironment({
enableGroundMirror: true,
groundShadowLevel: 0.6,
});
[/code]
See a live version here: https://www.babylonjs-playground.com/#4AM01A
Helping the community with our glTF exporter for Autodesk 3dsmax
We introduced support for glTF 2.0 in Babylon.js 3.0 and we wanted to help our community to produce assets in this open standard format. This is the reason why we worked on adding support for glTF export in our Autodesk 3dsmax exporter.
You can now create your scene in 3dsmax and directly export it to glTF in one click:

More info here: http://doc.babylonjs.com/resources/3dsmax_to_gltf
From the client to the server: Introducing the NullEngine
Starting with Babylon.js v3.1, we introduced the NullEngine which is a version of the main Babylon.js engine but we no need for a WebGL capable device.
The NullEngine will obviously not produce any rendering and thus can be used in a node.js / server-side environment.
It can be used to:
- Run tests
- Run a server-side version of your application / game
- Use specific Babylon.js services (like glTF loaders for instance)
More details can be found here: http://doc.babylonjs.com/features/nullengine
Improving the codebase
Babylon.js is entirely written in TypeScript. In order to improve the quality of the code we decided to turn on all strict type checking offered by the latest version of TypeScript (like the strict null check introduced by TypeScript 2.0 or the strict function types added by TypeScript 2.6).
With stricter type checking we can capture errors and bugs at compilation time and thus provide more reliable code for the community.
Improving documentation
Writing good documentation is a complex task. With this release we added more content for beginners. We now have complete course starting from scratch and going through all important aspects of the engine.
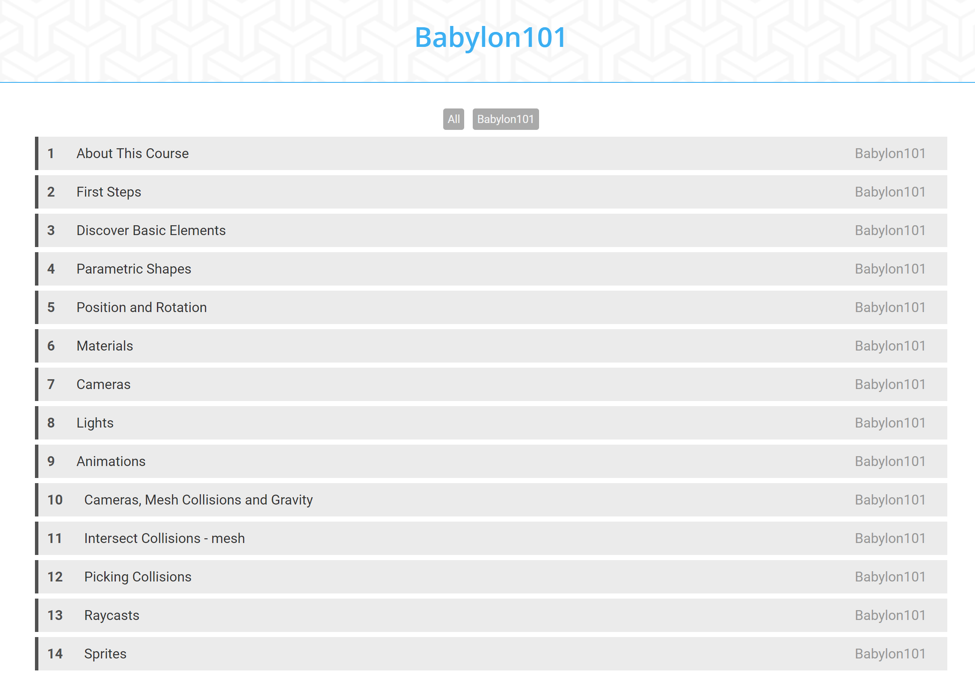
We also added several multi-steps guide so you can read and learn at your own pace.
If you want to know more or just want to experiment with our latest demo, please visit http://www.babylonjs.com/.
And if you want to join the community and contribute, please join us on GitHub!