

Getting started guide for Nokia Lumia 2520 – part 1
The Nokia Lumia 2520 is Nokia’s first tablet running Windows RT 8.1. And if you’ve never used the platform before, we’ve put together some tips so you will be able to explore your new device with confidence.
If you’ve been using a traditional PC for years, you’ll notice a big difference between it and the Nokia Lumia 2520 running Windows RT 8.1. To begin with, the conventional desktop has been swapped for the Start screen.
The Start screen
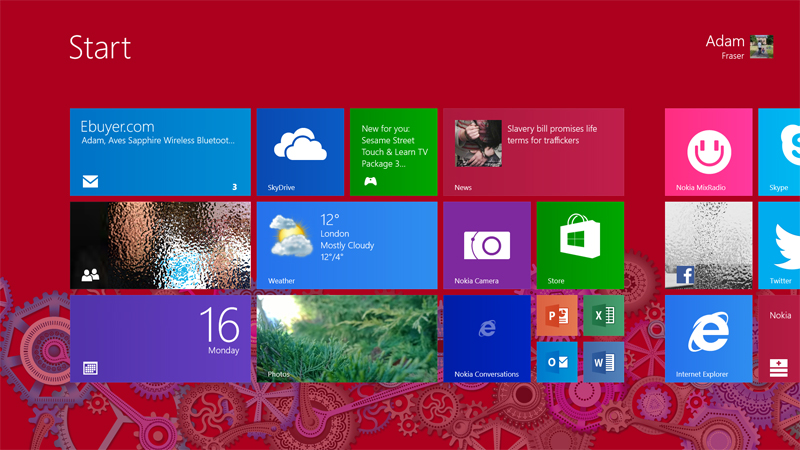
Much like on a Nokia Lumia smartphone you’ll see tiles of different sizes and each one will represent an app or perform an action. Some of these are Live tiles and change dynamically depending on the content within the app.
Any app or feature can be pinned to your Start screen, repositioned and resized depending on your preference. To do this, long press on a tile to access the customisation bar that runs across the bottom of the screen.
To move an app or tile to a new position on the screen, simply drag and drop it into the place you prefer.
If you like to keep things super-organised, you can add your tiles into groups and give those groups names to suit your needs.
Pinning, resizing and repositioning is just the beginning of personalising your Start screen; further customisation options are available through the charms menu.
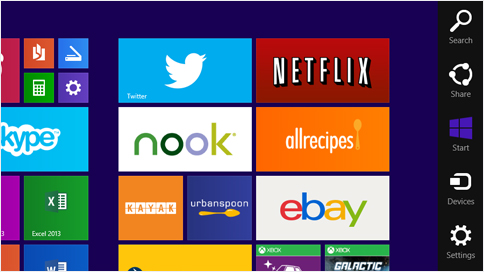
Charms
The charms menu is hidden on the right, and contains five charms: Search, Share, Start, Devices, and Settings.
Just swipe from the right side of the screen to access the charm menu.
Search is what you’d expect, although it searches far more than just your PC. Using Bing Smart Search, it delves into the files stored on your device, the Web, your SkyDrive cloud storage, and also some installed apps and from the Windows Store. This saves you hunting through different apps or directories to find what you’re looking for.
The Share charm is the place to go to quickly share files, photos, info and even apps. If you’re in a game and at the high score section, reading a story from within a news app or within the browser, use the share charm to share it quickly via email, social apps and to also pass info between apps, such as OneNote.
The Share charm is also where you can take screenshots, by selecting the right option in the drop down menu at the top of that Share charm.
Start charm is fairly simple in its use. No matter where you are, tap on it to get to the Start screen. Tapping it again will take you back to the last app you were using.
Much like the Share charm, the Devices charm is where you share content. Although, rather than sharing content to apps, you can share directly to other devices that are connected to your Lumia 2520, such as: printers, Xbox, TV, speakers or a projector.
If you need to change a setting, you’ll find it under the Settings charm.
Here you can customise your Start screen further using the Personalise option. Select one of 20 backgrounds and fine-tune that background and accent colour using the large colour palette.
You’ll also find network settings for connecting to the Internet and screen rotation lock, notification, volume and other settings for updating the OS.
Apps view
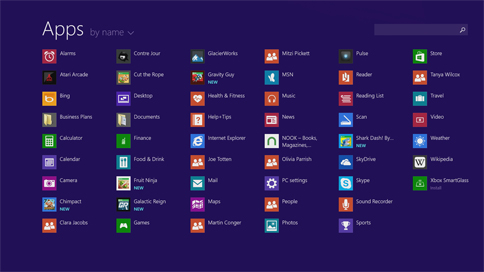
If you’ve installed any app onto your Nokia Lumia 2520, you’ll find it in the Apps view – listed alphabetically.
At the Start screen, slide the screen upwards; this’ll bring up the Apps view.
Launch an app by tapping on it, or if you want to pin it to the Start screen tap and hold on the relevant app and tap Pin to start. You can also uninstall apps here, too.
Signing into your Microsoft account
We’ll leave you with one more important to-do as you get started with your Lumia 2520.
You’ll need to sign in to your Microsoft account in order to download apps, create backups of your important data, connect to your SkyDrive, and also connect with your friends and family.
Navigate to the Settings charm and Change PC settings. Under the Accounts section you can sign into your account, change your account picture as well as change your device password to keep out prying eyes.
It’s also here that you can add a picture password; a nice feature for inputting gestures at the lock screen rather than a conventional password.
Check back later this week for part two of this guide.