

The Universal Windows Platform is filled with powerful and unique capabilities that allow the creation of some remarkable experiences on any device form factor. This week we are looking at an experience that builds on top of the Adventure Works sample we released last week by adding a social experience with the capability (1) to extend the experience to other devices that the user owns through the Project “Rome” APIs, (2) to be location aware using the powerful Maps API, and (3) to integrate with third-party social networks. As always, you can get the latest source code of the app right now on GitHub and follow along.
And if you missed last week’s article on how to enable great camera experiences, we covered how to build UWP apps that take advantage of camera APIs on the device and in the cloud through the Cognitive Services APIs to capture, modify, and understand images. To read last week’s blog post or any of the other blog posts in the series, or to watch the recordings from the App Dev on Xbox live event that started it all, visit the App Dev on Xbox landing page.
Adventure Works (v2)
To give you a quick recap of the sample app, we released the Adventure Works source code last week and we discussed how we used a combination of client and cloud APIs to create a camera app capable of understanding images, faces and emotion, as well as being able to modify the images by applying some basic effects. Building on top of that, the goal for Adventure Works is to create a larger sample app that extends the experience, to add more social features in which users can share photos and albums of their adventures with friends and family across multiple devices. Therefore, we’ve extended the sample app by:
- Adding the ability to have shared second screen experiences through Project Rome
- Adding location and proximal information for sharing with the location and Maps APIs
- Integrating with Facebook and Twitter for sharing by using the UWP Toolkit.
Project Rome
Most people have multiple devices, and often begin an activity on one device but end up finishing it on another. To accommodate this, apps need to span devices and platforms.
The Remote Systems APIs, also known as Project Rome, enable you to write apps that let your users start a task on one device and continue it on another. The task remains the central focus, and users can do their work on the device that is most convenient for them. For example, you might be listening to the radio on your phone in the car, but when you get home you may want to transfer playback to the Xbox One that is hooked up to your home stereo system.
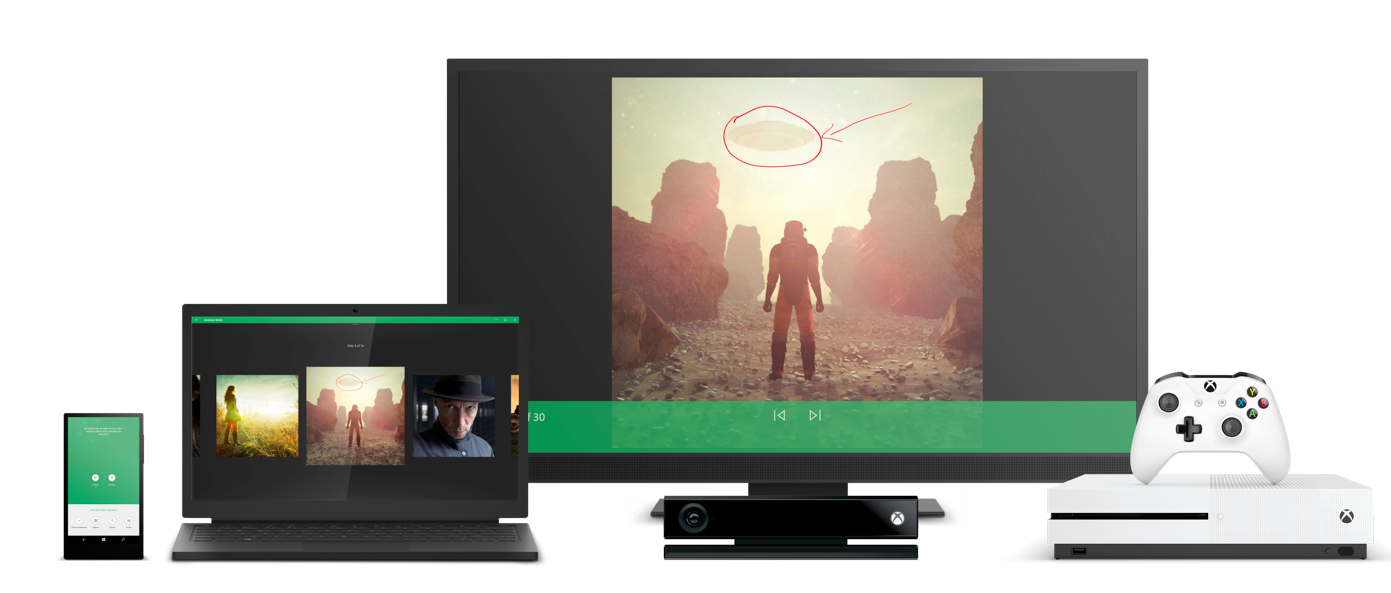
The Adventure Works app takes advantage of Project Rome in order to create a second screen experience. It uses the Remote System APIs to connect to companion devices for a remote control scenario. Specifically, it uses the app messaging APIs to create an app channel between two devices to send and receive custom messages. Devices can be connected proximally through Bluetooth and local network or remotely through the cloud, and are connected by the Microsoft account of the person using them.
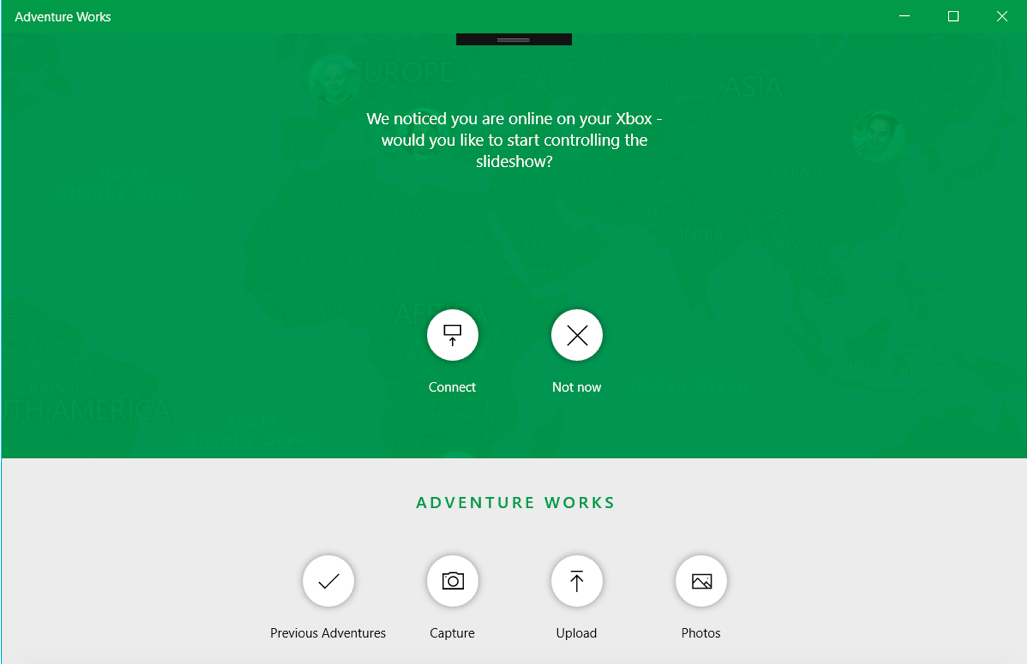
In Adventure Works, you can use a tablet, phone or even your desktop as a second experience for a slideshow displayed on your TV through the Xbox One. The slideshow images can be controller easily on the Xbox through the remote or controller, and the second screen experience allows the same. However, with the second device, the user has the ability to view all photos at once, select which one to show on the big screen and even take advantage of the capabilities of the smaller device otherwise not available to the Xbox, such as enabling inking on images for a collaborative experience.
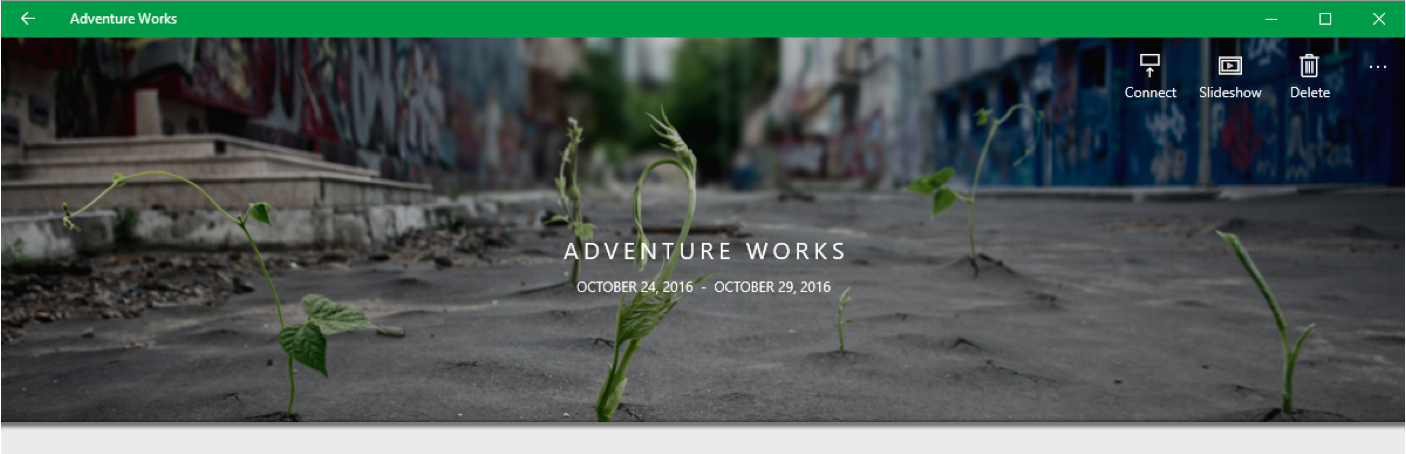
Adventure Works uses Project Rome in two places to start the second screen experience. First, when a user navigates to a collection of photos, they can click on Connect at the top to see available systems and connect to one of them. Or, if the Xbox is already showing a slideshow, a companion devices will prompt the user to start controlling the experience.
For these scenarios to work, the app needs to be aware of other devices, and that is where Project Rome comes in. To start the discovery of devices, use the RemoteSystem.CreateWatcher method to create a remote system watcher and subscribe to the appropriate events before calling the Start method (see code on GitHub):
[code]
_remoteSystemWatcher = RemoteSystem.CreateWatcher(BuildFilters());
_remoteSystemWatcher.RemoteSystemAdded += RemoteSystemWatcher_RemoteSystemAdded;
_remoteSystemWatcher.RemoteSystemRemoved += RemoteSystemWatcher_RemoteSystemRemoved;
_remoteSystemWatcher.RemoteSystemUpdated += RemoteSystemWatcher_RemoteSystemUpdated;
_remoteSystemWatcher.Start();
[/code]
The BuildFilters method simply creates a list of filters for the watcher. For the purposes of Adventure Works we chose to limit the discovery to only Xbox and Desktop devices that are available in proximity.
We wanted to be able to launch the app on the Xbox from any other device and go directly to the slideshow. We first declared a protocol in the app manifest and implemented the OnActivated method in App.xaml.cs to launch the app directly to the slideshow. Once this was done, we were able to use the RemoteLauncher.LaunchUriAsync command to launch the the slideshow on the remote app if it wan’t already running (see code on GitHub).
[code]
var launchUriStatus =
await RemoteLauncher.LaunchUriAsync(
new RemoteSystemConnectionRequest(system.RemoteSystem),
new Uri("adventure:" + deepLink)).AsTask().ConfigureAwait(false);
[/code]
To control the slideshow, we needed to be able to send and receive messages between the two devices. We covered AppServiceConnection in a previous blog post, but it can also be used to create a messaging channel between apps on different devices using the OpenRemoteAsync method (see code on GitHub).
[code lang=”csharp”]
var appService = new AppServiceConnection()
{
AppServiceName = "com.adventure",
PackageFamilyName = Windows.ApplicationModel.Package.Current.Id.FamilyName
};
RemoteSystemConnectionRequest connectionRequest = new RemoteSystemConnectionRequest(remoteSystem);
var status = await appService.OpenRemoteAsync(connectionRequest);
if (status -= AppServiceConnectionStatus.Success)
{
var message = new ValueSet();
message.Add("ping", "");
var response = await appService.SendMessageAsync(message);
}
[/code]
Once the app is running, both the client and the host can send messages to communicate status and control the slideshow. Messages are not limited to simple strings; arbitrary binary data can be sent over, such as inking information. (This messaging code happens in SlideshowClientPage and SlideshowPage, and the messaging events are all implemented in the ConnectedService source file.)
For example, in the client, the code to send ink strokes looks like this:
[code]
var message = new ValueSet();
message.Add("stroke_data", data); // data is a byte array
message.Add("index", index);
var response = await ConnectedService.Instance.SendMessageFromClientAsync(message, SlideshowMessageTypeEnum.UpdateStrokes);
[/code]
The message is sent over using ValueSet objects and the host handles the stroke messages (along with other messages) in the ReceivedMessageFromClient handler:
[code lang=”csharp”]
private void Instance_ReceivedMessageFromClient(object sender, SlideshowMessageReceivedEventArgs e)
{
switch (e.QueryType)
{
case SlideshowMessageTypeEnum.Status:
e.ResponseMessage.Add("index", PhotoTimeline.CurrentItemIndex);
e.ResponseMessage.Add("adventure_id", _adventure.Id.ToString());
break;
case SlideshowMessageTypeEnum.UpdateIndex:
if (e.Message.ContainsKey("index"))
{
var index = (int)e.Message["index"];
PhotoTimeline.CurrentItemIndex = index;
}
break;
case SlideshowMessageTypeEnum.UpdateStrokes:
if (e.Message.ContainsKey("stroke_data"))
{
var data = (byte[])e.Message["stroke_data"];
var index = (int)e.Message["index"];
HandleStrokeData(data, index);
}
break;
default:
break;
}
}
[/code]
As mentioned above, the user should be able to directly jump into an ongoing slideshow. As soon as MainPage is loaded, we try to find out if there are any devices already presenting a slideshow. If we find one, we prompt the user to start controlling the slideshow remotely. The code to search for other devices, below (and on GitHub), returns a list of AdventureRemoteSystem objects.
[code lang=”csharp”]
public async Task<List<AdventureRemoteSystem>> FindAllRemoteSystemsHostingAsync()
{
List<AdventureRemoteSystem> systems = new List<AdventureRemoteSystem>();
var message = new ValueSet();
message.Add("query", ConnectedServiceQuery.CheckStatus.ToString());
foreach (var system in Rome.AvailableRemoteSystems)
{
var reponse = await system.SendMessage(message);
if (reponse != null && reponse.ContainsKey("status"))
{
var status = (ConnectedServiceStatus)Enum.Parse(typeof(ConnectedServiceStatus), (String)reponse["status"]);
if (status == ConnectedServiceStatus.HostingConnected || status == ConnectedServiceStatus.HostingNotConnected)
{
systems.Add(system);
}
}
}
return systems;
}
[/code]
An AdventureRemoteSystem is really just a wrapper around the base RemoteSystem class found in Rome and is used to identify instances of the Adventure Works app running on other devices like Surface tablets, Xbox One and Windows 10 phones.
Make sure to check out the full source code and try it on your own devices. And if you want to learn even more, make sure to check out the Cross-device experiences with Project Rome blog post.
Maps and location
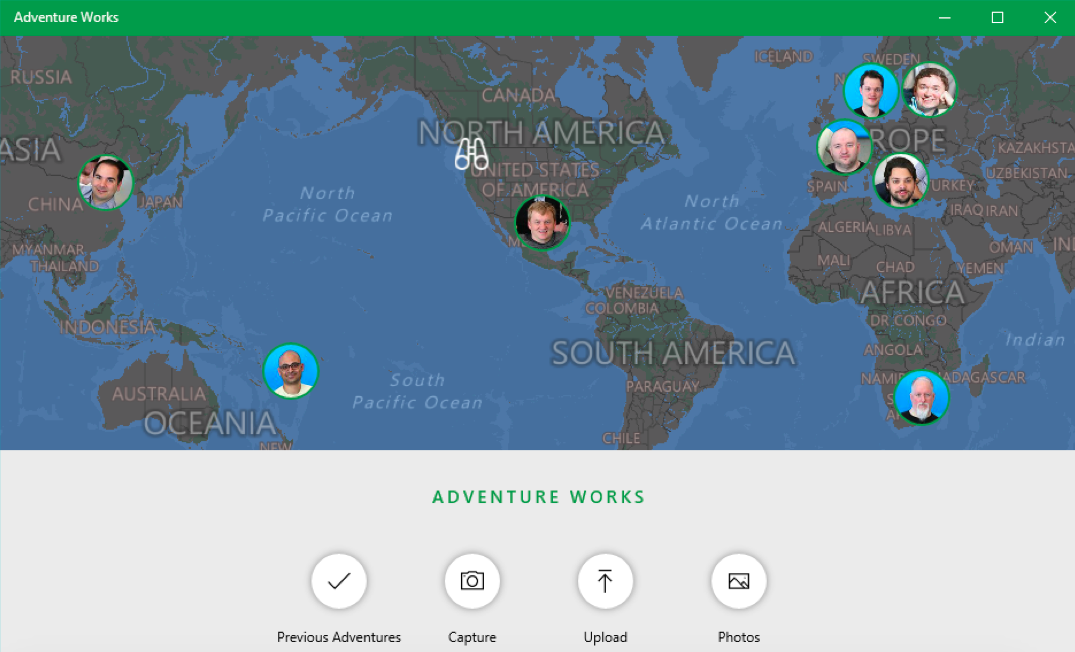
As part of building out Adventure Works, we knew that we wanted to develop an app that showed a more social experience, so we added a way to see the adventures of out fictional friends and the location of those adventures. UWP supports rich map experience by providing controls to display maps with 2D, 3D or Streetside views by using APIs from the Windows.UI.Xaml.Controls.Maps namespace. You can mark points of interest (POI) on the map by using pushpins, images, shapes or XAML UI elements. You can use location services with your map to find notable places and you can even use overlay tiled images or replace the map images altogether.
The UWP Maps APIs provide powerful yet simple tools for working with and customizing location data. For instance, in order to get the user’s current location, you use the Geolocator class to request the current geoposition of the device:
[code lang=”csharp”]
var accessStatus = await Geolocator.RequestAccessAsync();
switch (accessStatus)
{
case GeolocationAccessStatus.Allowed:
// Get the current location.
Geolocator geolocator = new Geolocator();
Geoposition pos = await geolocator.GetGeopositionAsync();
return pos.Coordinate.Point;
default:
// Handle the case if an unspecified error occurs
return null;
}
[/code]
With this location information in hand, you can then create a MapIcon object based on it and add it to your map control.
[code lang=”csharp”]
if (currentLocation != null)
{
var icon = new MapIcon();
icon.Location = currentLocation;
icon.NormalizedAnchorPoint = new Point(0.5, 0.5);
icon.Image = RandomAccessStreamReference.CreateFromUri(new Uri("ms-appx:///Assets/Square44x44Logo.targetsize-30.png"));
Map.MapElements.Add(icon);
}
[/code]
Adding the friends on the map is similar but we used XAML elements instead of a MapIcon, giving us the ability to focus through each one using the controller or remote on the Xbox.
[code]
Map.Children.Add(button);
MapControl.SetLocation(button, point);
MapControl.SetNormalizedAnchorPoint(button, new Point(0.5, 0.5));
[/code]
Directional navigation works best when focusable elements are layed out in a grid layout. Because the friends can be layed out randomly on the map, we wanted to make sure that the focus experience works great with the controller. We used the XYFocus properties of the buttons to specify how the focus should move from one to the other. We used the longitude to specify the order so the user can move through each friend left and right, and down will bring the focus to the main controls. To see the full implementation, take a look at the project on GitHub.
[code lang=”csharp”]
foreach (var button in orderedButtons)
{
button.XYFocusUp = button;
button.XYFocusRight = button;
button.XYFocusLeft = previosBtn != null ? previosBtn : button;
button.XYFocusDown = MainControlsViewOldAdventuresButton;
if (previosBtn != null)
{
previosBtn.XYFocusRight = button;
}
previosBtn = button;
}
if (orderedButtons.Count() > 1)
{
orderedButtons.Last().XYFocusRight = orderedButtons.First();
orderedButtons.First().XYFocusLeft = orderedButtons.Last();
}
[/code]
While the Adventure Works app only uses geolocation for the current device, you can easily extend it to do things like find nearby friends. You should also consider lighting up additional features depending on which device the app is running on. Since it is really more of a mobile experience than a living room experience, you can add a feature like finding great nearby places to take photos but only enable it when the app is installed on a phone.
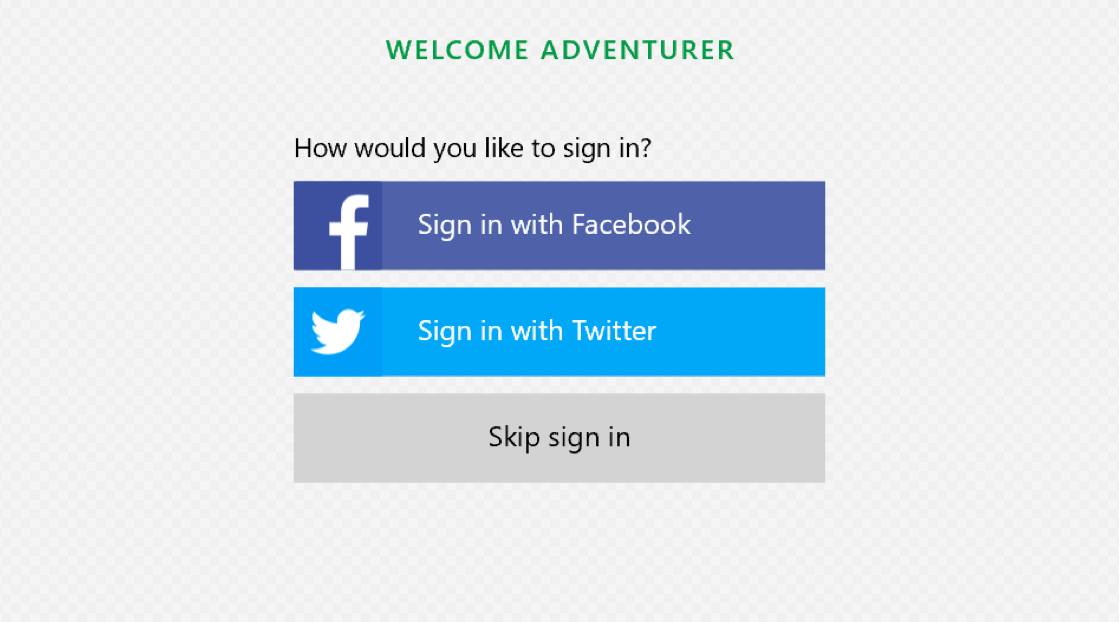
Facebook and Twitter integration (and the UWP Community Toolkit)
What’s more social than being able to share adventures and photos to your favorite social networks, and the UWP Community Toolkit includes service intergration for both Facebook and Twitter, simplifying OAuth authentication along with your most common social tasks.
The opensource toolkit includes new helper functions; animations; tile and toast notifications; custom controls and app services that simplify or demonstrate common developer tasks; and has been used extensively throughout Adventure Works. It can be used with any new or existing UWP app written in C# or VB.NET and the app can be deployed to any Windows 10 device including the Xbox One. Because it is strongly aligned with the Windows SDK for Windows 10, feedback about the toolkit will be incorporated in future SDK releases. And it just makes common tasks easy and simple!
For instance, logging in and posting to Twitter can be accomplished in only three lines of code.
[code]
// Initialize service, login, and tweet
TwitterService.Instance.Initialize("ConsumerKey", "ConsumerSecret", "CallbackUri");
await TwitterService.Instance.LoginAsync();
await TwitterService.Instance.TweetStatusAsync("Hello UWP!", imageStream)
[/code]
The Adventure Works app lets users authenticate with either their Twitter account or Facebook account. The standard UWP Toolkit code for authenticating with Twitter is shown above. Doing the same thing with Facebook is just as easy.
[code]
FacebookService.Instance.Initialize(Keys.FacebookAppId);
success = await FacebookService.Instance.LoginAsync();
await FacebookService.Instance.PostPictureToFeedAsync("Shared from Adventure Works", "my photo", stream);
[/code]
Take a look at the Identity.cs source file on GitHub for the full implementation in Adventure Works, and make sure to visit the UWP Community Toolkit GitHub page to learn more. The toolkit is written for the community and fully welcomes the developer community’s input. It is intended to be a repository of best practices and tools for those of us who love working with XAML platforms. You can also preview the capabilities of the toolkit by downloading the UWP Community Toolkit Sample App in the Windows Store.
That’s all for now
Make sure to check out the app source on our official GitHub repository, read through some of the resources provided, watch the event if you missed it and let us know what you think through the comments below or on Twitter @WindowsDev.
Don’t miss the last blog post of the series next week, where we’ll share the finished Adventure Works sample app and discuss how to take advantage of more personal computing APIs such as speech and inking.
Until then, happy coding!
Resources for Hosted Web Apps
- Announcing the UWP Toolkit 1.1
- Maps and Location Overview
- Getting Started with Map APIs
- Connected Apps and Devices
- Cross-Device Experiences with Project Rome