

The primary developer tool at the time was the Desktop App Converter, a tool that converts your current app installer into a Windows app package (.appx file), which can be submitted to the Windows Store or deployed via your distribution mechanism of choice. With Update 4 for Visual Studio 2017 we now have great support directly in Visual Studio for your Windows desktop application projects (WPF, Winforms, Win32, etc.). With the new tools you can now build, configure, deploy, test and debug your Desktop Bridge application as you develop them in VS by simply hitting F5!
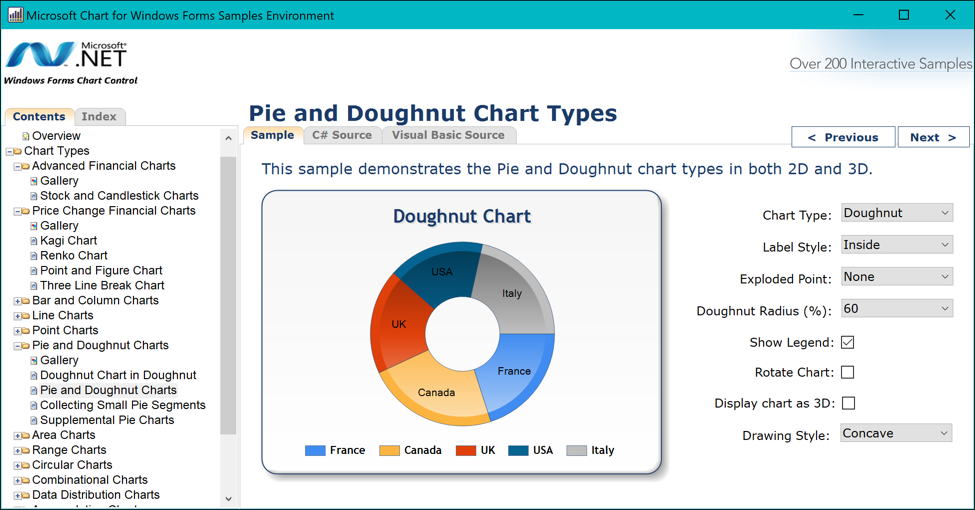
Let me walk you through an example, step-by-step. I am starting out with this Winforms app that showcases various chart controls. It’s been created several years ago in an older version of VS against .NET 4. Now my goal is to release it in the Windows Store and incrementally modernize it. Here is how easy it is now with Update 4 for Visual Studio 2017.
Step 1 – Add Windows App Packaging project to the solution
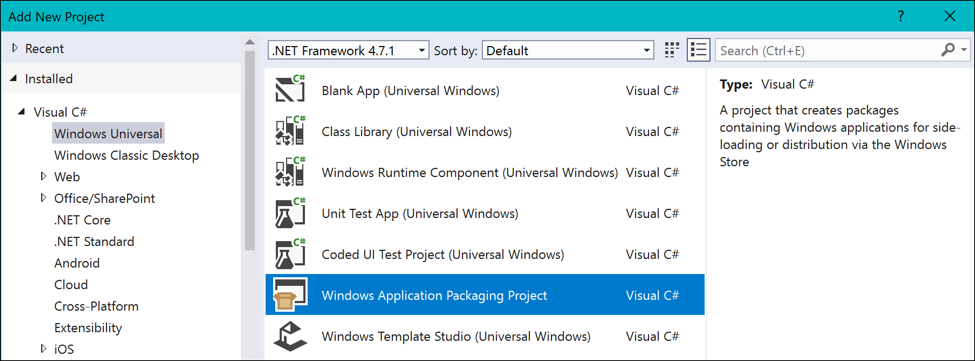
Before we start we need to make sure our desktop application project is loaded in Visual Studio 2017 and builds without error. Then in the next step we want to package our application as a Windows App Package (.appx file) so our Winforms app can take advantage of all the same Windows 10 app deployment features that are available to UWP apps: clean install & uninstall, seamless updates, Store distribution and many more. To do this, we will take advantage of the new tooling features introduced in Update 4 for Visual Studio 2017. We are adding a new project of type “Windows Application Packaging Project” to our solution:
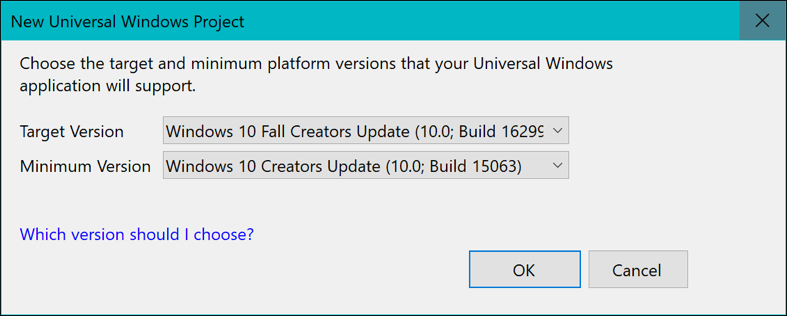
Now we need to specify our min/target versions…
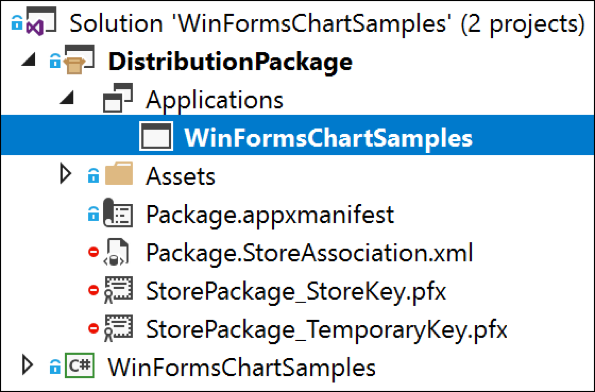
…and let the packaging project know which project output to include in the package. To do so we right-click on the “Applications” node and set a reference to our Winforms project – done!
Important! Select the “DistributionPackage” project as your startup project. Now hit F5 and watch how your app gets packaged, deployed and launched as a Desktop Bridge app. You can start testing and debugging in this new execution context. If you set the Winforms project as startup project and hit F5, you can still test and debug the unpackaged version of your application
Step 2 – Configure app for Windows Store release
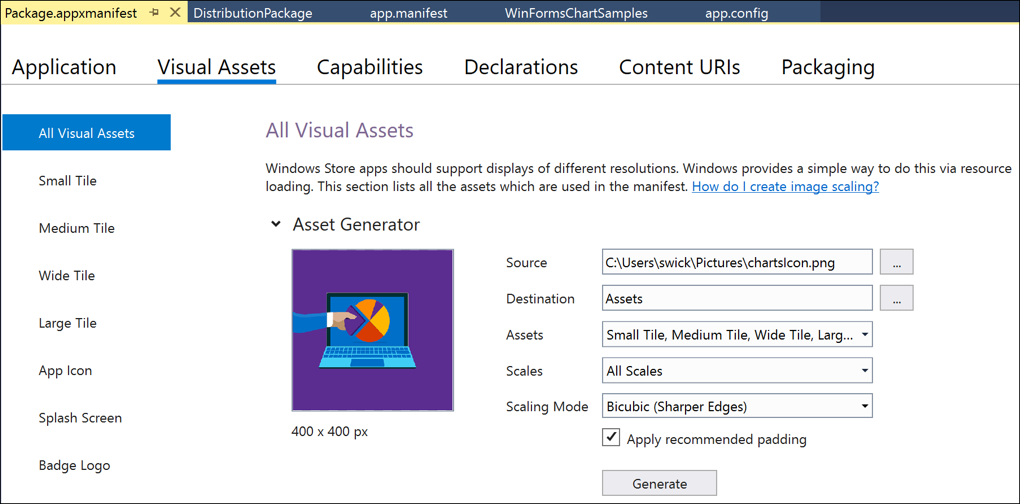
Our app is already running as a Desktop Bridge app now and we have successfully tested and debugged it in this configuration. Next we just need to put some finishing touches on the package so it integrates nicely with the Windows 10 Shell (tiles, badges, etc.) and to make sure it conforms to the Store submission requirements. First thing, we need to replace the default visual assets that come with the project template with our real, application-specific assets. This is very easy now in Visual Studio 2017 with the Visual Assets Manager in the package manifest editor:
To prepare for our Store submission we need to create the application in the Windows Dev Center and reserve our application name, provide screenshots for the store front, set the price, age ratings, etc. If you are not planning to distribute via the Windows Store, you can skip this step.

Last thing we need to do before we can release our app to the public is create a package bundle that is ready to deploy and Store-compliant. This bundle can contain binaries for different architectures, resources for different locales as well as the symbols for our binaries so we can later make sense of any crash reports in the Dev Center or Mobile Center. This can be done for Desktop Bridge apps directly from Visual Studio now, just like you would do for any UWP app:
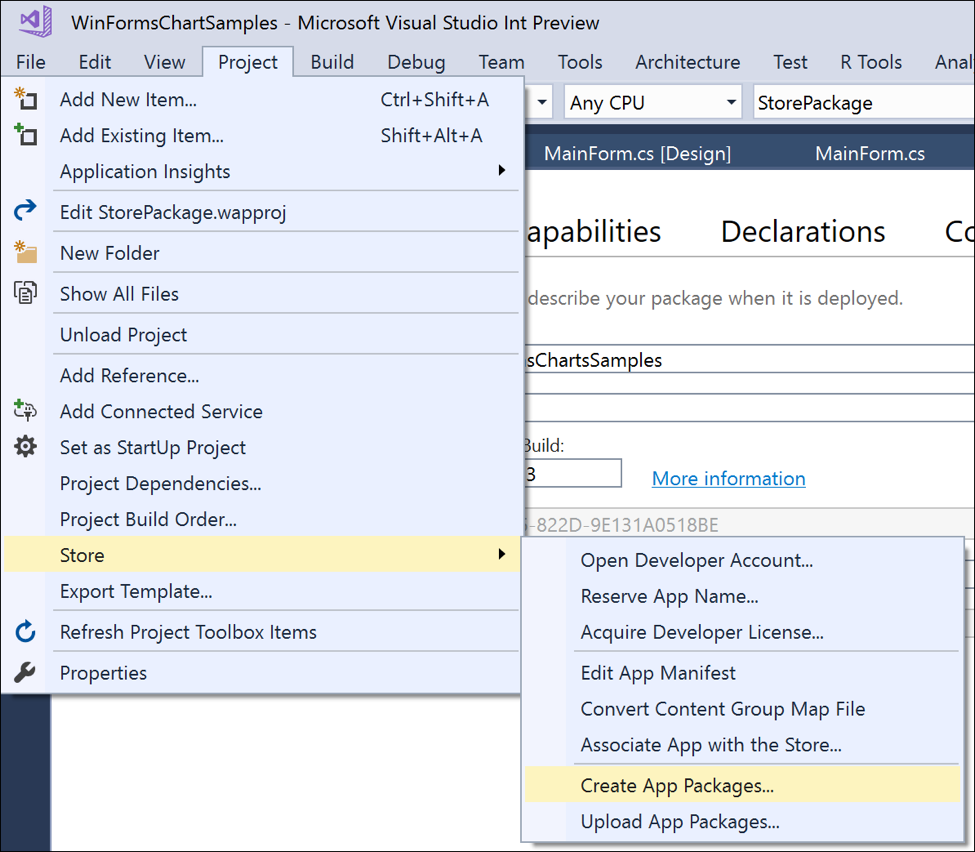
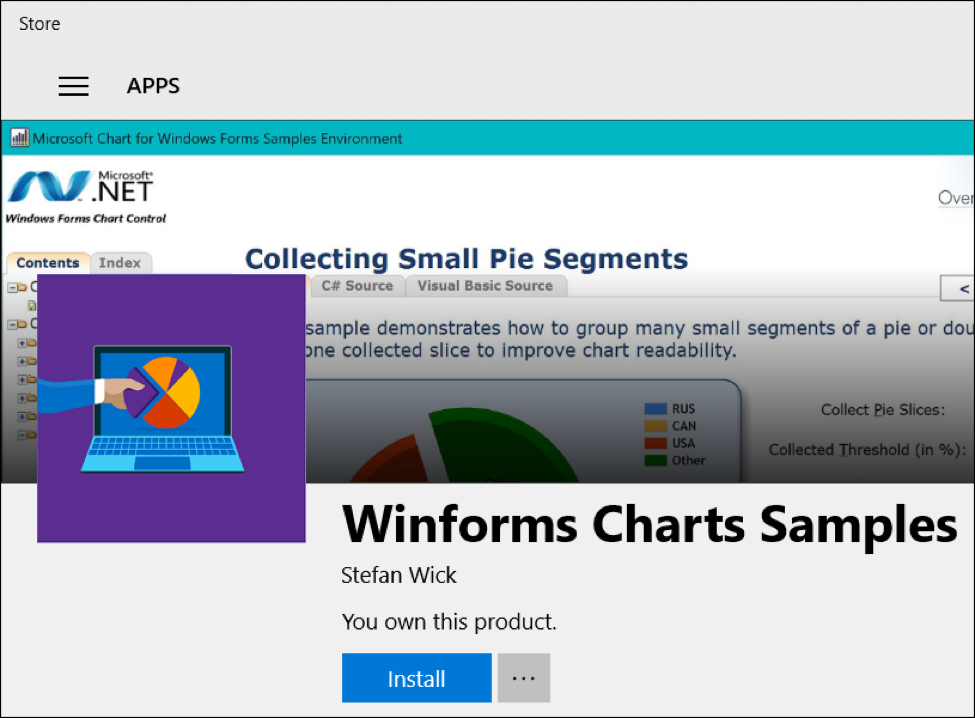
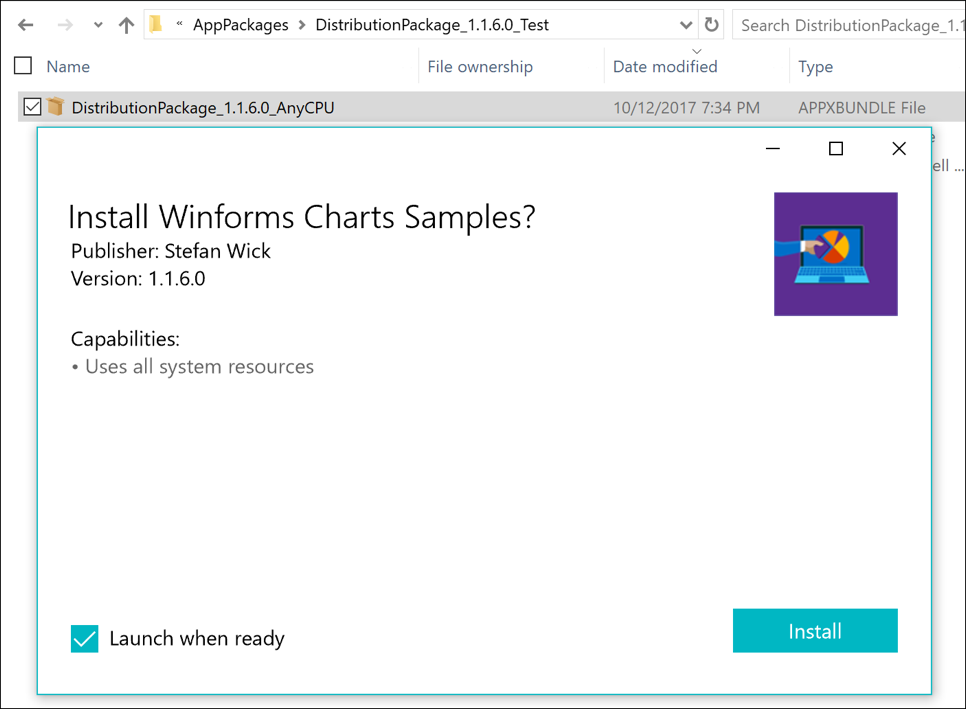
As part of creating the packages we also run the certification tests and then submit the package to the Dev Center for certification and publishing. You can try the result of my submission out now and install the sample app on your machine from the Store by clicking on the badge below – source code for the app is available for your reference here.
What else does this enable for developers?
Aside from distributing and monetizing via Windows Store, your app now enjoys the modern deployment capabilities built into Windows 10. You don’t need to build an installer anymore, updates are automatic and differential. Uninstalls are guaranteed to be clean. Moreover, since your app is now in the Windows 10 App Model, you have access to UWP APIs and features, such as live tiles, Cortana integration, background tasks etc. Another important benefit specifically for Windows Forms apps is the new high DPI support in .NET 4.7, which is included in the Windows Creators Update (1703). Our sample app here is taking advantage of this new support, by following the steps outlined in this article.
And there is more
Talking about installers, did you know that your app package is also your installer on Windows 10? Users can just click to install it, as long as it’s signed with a certificate that is trusted on the target device. This enables you to distribute your modernized desktop application in the way that’s right for your scenario, without having to go through the Store – e.g. for LOB applications in an enterprise. Learn more about it here.
Conclusion
Getting your desktop application development project ready for Windows Store submission is easy now with Visual Studio 2017 Update 4. Once converted to a Windows App Package your app can take advantage of all the Windows 10 platform capabilities and start using new APIs and features on Windows 10. Here are some resources for more details:
Are you ready to submit your desktop application to the Windows Store? Let us know about it here, and we will help you through the process!