A few weeks ago, we looked at the benefits of using HDMI to connect your PC to your HDTV or monitor. Today, we look at a few things you can do to make sure your picture is as sharp and clear as possible, with a full, rich range of colors.
While there are all sorts of recommendations on the PC side to be made for improving your picture – everything from graphics cards to connectors – I’ve found that making adjustments to the display itself often provides the final few tweaks that really bring picture quality to the next level.
In Windows 7, Windows Media Center includes a wizard for just this purpose. Because every display and HDTV is different, you are shown a series of videos, and then you will adjust the display settings on the display hardware itself in order to achieve optimal presentation. The first time I ran this wizard, I was truly surprised at how I improved my overall picture quality because I had assumed I had taken care of everything on the PC side of things.
Getting Started
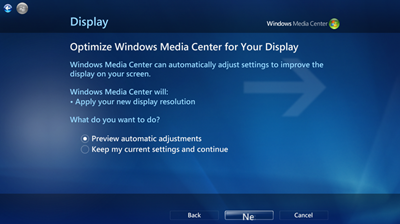
The first part of the wizard is where you tell Windows Media Center about your display – what type it is, its width, and resolution, how it is connected and so on.
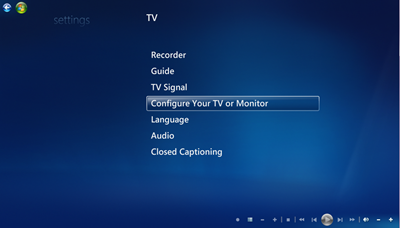
- From Media Center’s main menu, navigate to Tasks | Settings | TV, and select Configure Your TV or Monitor.
Note: The display configuration will be optimal if you are in full screen mode. If Media Center detects that you are not in full screen mode, it will prompt you to go to full screen.
First, you will be asked to tell WMC a few things about your set-up – including the type of display you are connected to, the type of connection you are using, and the appropriate resolution.
Adjust your display settings
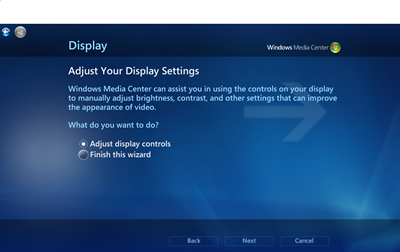
While this information helps Media Center adjust presentation for your display, adjusting the controls on the display itself will allow you to land picture quality right where you want it. While you have the option to opt-out of further adjustments after you have completed the first part of this wizard, selecting Adjust display controls will let you fine tune your presentation.
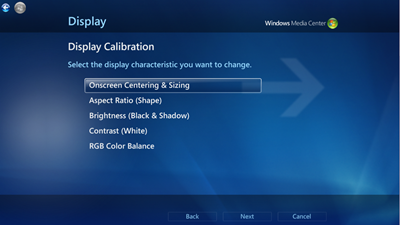
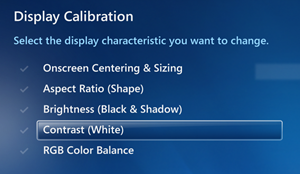
For each display setting, Media Center shows a test video. Prior to viewing it, read the description of the optimal appearance for each test video. Then, while viewing the test video, use the relevant controls on your display to adjust the appearance of the video.
Note: Display manufacturers may be using different terms to label their controls than the terms Windows Media Center uses. We’ve included the most commonly used, below.
Before You Begin
Before you begin, it’s best to try and set the lighting in the room to what it usually is when you watch television. What’s more, if your display or TV has any sort of “automatic filters” that may be applied to your display – things like auto-contrast, or auto-flesh-tone, as well as any pre-set image stretch or sizing settings.
Onscreen Centering and Sizing
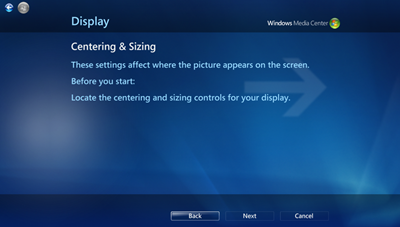
Centering and sizing ensures your display is showing you the full width and height of the image. Locate your sizing controls, and then select Watch Video.
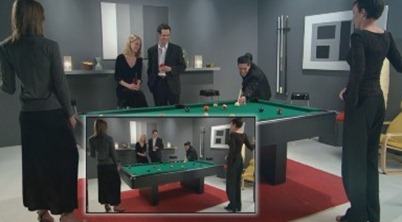
You’ll want to adjust the controls so that the larger image matches the inset image. As you can see below, I needed to adjust my display so that I wasn’t losing image on the top and either side.
The video will play for a while, giving you plenty of time to try different adjustments. If you get the image centered and sized as you wish before the video has run out, simply hit the back button. If you run out of time, you can play the video again.
Aspect Ratio (Shape)
Aspect Ratio, the relationship of an image’s width to its height, is another critical adjustment – one we know mostly when trying to get rid of black bars on either side (or all around) a show. Those cases are often caused when the source video and the display’s aspect ratio don’t match. If that’s the issue you’re troubleshooting, you can’t beat CNET’s guide to Aspect Ratio.
In Windows Media Center, we’re looking at how aspect ratio can affect the shape of images on screen. In this case, you may be looking for controls on your display labeled Size or Geometry.
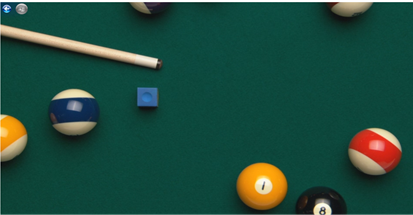
Above: You want the cue chalk to be square and the billiards balls nice and round.
Brightness (Black and Shadow)
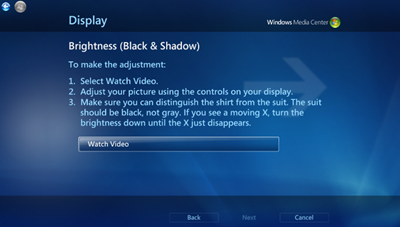
Brightness is sometimes called Black Levels, and can be one of the most important adjustments you will make. It helps you dial in the clarity you see between dark colors – so that rich blacks and dark grays can be distinguished from each other.
In the video below, you can see the X floating next to the shoulder. I had to reduce the brightness until it disappeared. The overall appearance on my TV improved noticeably after this.
Contrast (White)
The contrast adjustment is also critical in determining the clarity of whites on your display. This is often labeled Contrast, Picture or White Level by display manufacturers. In Windows Media Center, you’ll want to tweak this level up to, but not beyond, the point at which you can still see the wrinkles and buttons in the man’s shirt.
Here’s a great, short article I found about why Brightness and Contrast are such critical settings for calibrating your display.
RGB Color Balance
The last setting, RGB Color Balance, can also have a more significant impact on the color quality of your picture, and you’ll find no shortage of more detailed articles about color balance, which is also sometimes labeled White Balance or Color Temperature. It deals with the appearance of grays on your display, and so you’ll be looking at a gray scale as you adjust this.
If your display has a Temperature setting, Windows Media Center recommends you simply set this at 6500k and then make no further adjustments. This is because 6500k is the standard set by National Television Standards Council. Many manufacturers will ship displays with a much higher temperature set so that the displays will appear brighter on a retail show floor; however, the higher settings tend to skew the colors to blues.
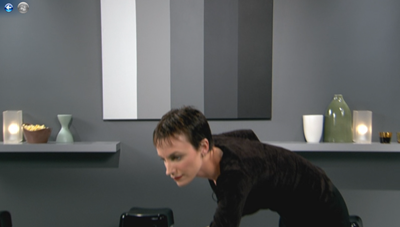
The video Windows Media Center presents zooms in on the gray scale hanging on the wall. Your job is to adjust the color balance so that none of the bars appear to be tinged with red, green or blue – in other words, you’re aiming for a pure range of gray colors.
Windows Media Center also notes that after making adjustments to color balance, if the picture seems “off,” you should recalibrate your brightness and contrast settings. Once you are happy with the results, select Finish to complete the wizard.
That’s it – after completing adjustments to your display, hopefully you’ll notice an improvement in your picture quality. Whether you’ve connected your PC to an HDTV or flat panel display, the display calibration videos in Windows Media Center can help you get your settings right for a picture that is sharp, crisp and clear. Want to go even further? Consider using the services of a professional, ISF (Image Science Foundation)-certified technician to professionally calibrate your display. Pros use a calibration tools like a device called a colorimeter that they suction cup to your display to take readings as they calibrate your display.

