So you just got your kid a Windows Phone. Awesome!
Did you know there are a few basic parental controls that give you some say over things like what apps and games your child can download?
In this brief post, I’ll introduce you to the Windows Phone-related control settings and show you how to set them up. (If you’re feeling really organized, you can even do this before buying your child’s phone.)
Creating a child account
Assuming your child doesn’t already use Hotmail, Zune, or Xbox, the first thing you’ll need to do is create a Windows Live ID account for your son or daughter. Click here to start.
You’ll be asked for info such as your child’s name and birthday. Microsoft uses the date you enter to determine what kind of account to create—child (12 or younger) or teen (13 to 17 years old). Then you’re asked ask to sign in and give your child permission to use the new account (you’ll also need a valid credit card to prove you’re an adult).
Once you’ve created a child account, enter it during Windows Phone set up or the first time your son or daughter uses Marketplace.
Choosing what apps your child can download
Once you’ve created your child’s Windows Live ID account, you now have some control over what apps your child can buy or download. (Parents are always asked to sign in to approve changes to these settings.)
Here’s how to do it:
- Go to Zune.net, click Sign in, and enter your child’s new Windows Live ID. (The first time you’ll be asked to enter your country and child’s date of birth once more, and sign in with your adult account to confirm. This article has more detail about child accounts.)
- Click My Account.
- Under Account Summary, click Update Family Settings. When prompted, enter your Windows Live ID to authorize changes.
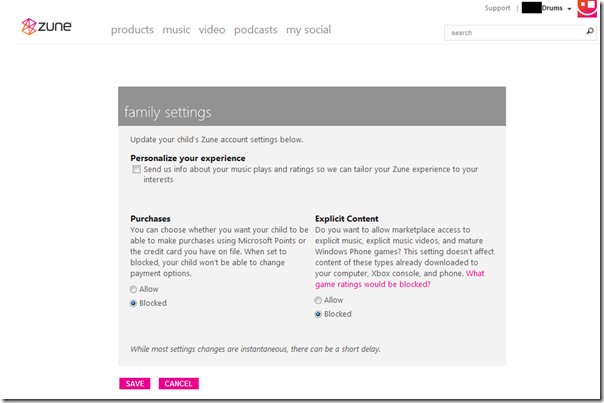
You’ll then see an option to block or allow purchases including apps, music and videos. If you choose Blocked, your child can’t buy any paid apps from Marketplace. But he or she can still download free apps—something worth remembering. (If you want to allow them to buy a specific paid app later, you can always go in and turn this off temporarily.)
The second option applies to explicit music and games with an ESRB rating of Mature or higher. Choose Blocked to prevent your child from downloading or streaming this type of content. A couple caveats: This setting doesn’t affect music acquired outside Zune, or prevent your child from seeing explicit titles while browsing Marketplace. It also won’t prevent your son or daughter from downloading apps and games that haven’t been rated.
Xbox LIVE-related settings
If you have an Xbox 360 at home, you might already know about some of the parental controls and privacy settings for the console.
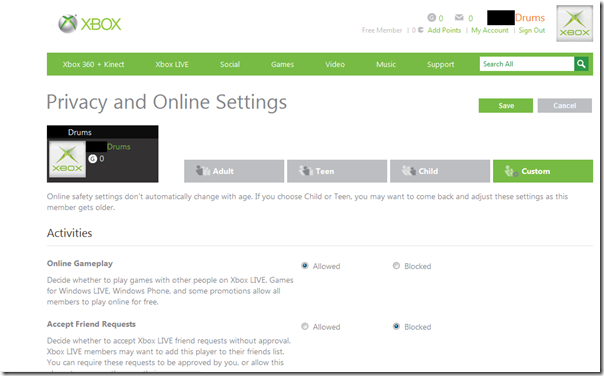
Many of the settings apply only to the Xbox 360. But a few—such as the ability to approve Xbox LIVE friend and game requests—can apply to the Games Hub. You can also decide whether your child can see other people’s Xbox LIVE profiles and friends. Most of these settings are blocked by default for anybody 12 or younger.
To change these settings:
- Go to Xbox.com, click Sign in, and enter your child’s new Windows Live ID.
- Click My Account.
- Under Settings & Preferences, click Privacy and Online Settings, and sign in with your Windows Live ID when prompted.
- Make your choices. More details on all these settings are described here.


