If you’ve been to the movies lately, it’s likely that you’ve seen the amazing images that RED Digital Cinema cameras capture. Many of the big budget blockbusters recently released or about to be released were shot on RED cameras. These movies include The Amazing Spiderman, The Great Gatsby, and The Hobbit.
Being a video enthusiast, I’ve read about RED cameras for years now and have wondered what it’s like to shoot video with a camera that records at 4K/5K, and is capable of the kind of image quality that today’s high-end cinema productions require. During my recent work covering HP’s workstation-class hardware (See my HP Z1 post, and my HP Z820 post) I found out about an interesting collaboration between RED, HP, and Adobe. I decided to contact RED to find out more about their products and workflow, and they invited me to come down and check it out first hand. Before I get into my experiences, I want to give a high-level overview of RED Digital Cinema.
In 2007, RED created a revolution in 4K digital cinema when they released the RED ONE camera system. The RED ONE created a new standard for 4K digital video production and tapeless workflow.
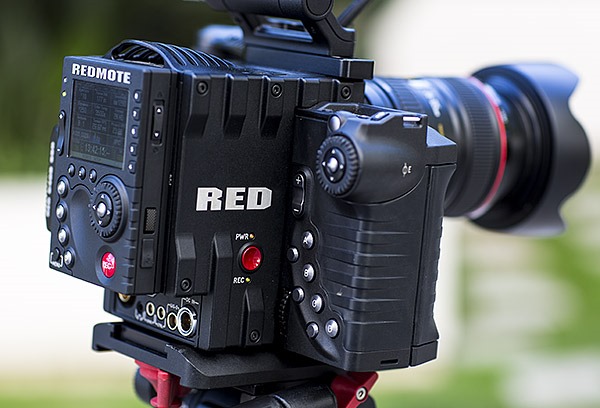
State of the art RED EPIC 5K Digital Cinema Camera
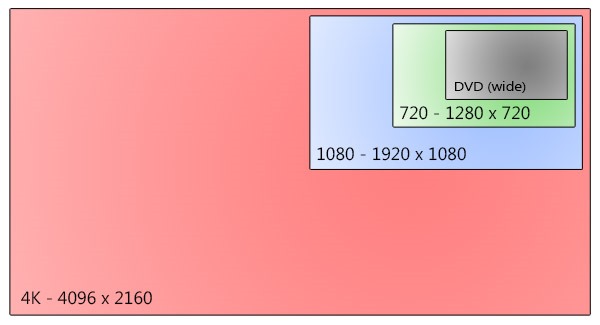
You may be wondering: “so what exactly is 4K”? There are many different 4K formats, but in general terms, you can think of 4K as 1920 x 1080 HD pixel count times four (2x resolution horizontally and vertically). Here’s a to-scale comparison of some common video resolutions:
With four times the pixels, 4K video for cinema is a huge step forward compared to 1080 HD resolution. This dramatic advance in camera/projector resolution is clear when you are watching video on a full size movie screen. How long it will take this technology (4K) to propagate to consumer electronics is a good question, but 4K is quickly gaining adoption in movie theatres, and is an important “future proofing” measure when shooting archive footage. In addition, shooting in 4K/5K provides artistic and technical capabilities even if the target viewing resolution is 1080 HD.
If you are into digital photography, you probably know the benefits of shooting in RAW. RAW images aren’t pre-processed and heavily compressed like most images that come off of cameras (JPEG for instance). When working with RAW files, you have much more latitude for correcting exposure, adjusting white balance, and you also get maximum image quality. Here’s a side by side example of a JPEG straight off my Canon 5D Mark III (left), and one that was corrected from the corresponding RAW image (right):
Under-exposed image (left), corrected image (right)
If you saw the image on the left while shooting, you may not think it was salvageable. On the right, we see the same image processed from the RAW file with exposure and white balance corrected. It’s amazing to realize how much detail there is in this image! The point is, when you shoot in RAW, you have an amazing level of flexibility in post-production. One of the most powerful capabilities of RED cameras is the fact that they shoot video (up to 300fps) in REDCODE RAW, a RAW video file format that RED Digital Cinema created for their video cameras. REDCODE RAW (.R3D file extension) is a variable compression RAW format (from 3:1 up to 18:1) that offers maximum flexibility and quality in post-production. The RED EPIC provides 13 stops of exposure latitude in post-production with standard settings, and up to 19 stops when shooting in high dynamic range mode (RED calls this HDRx). Amazing!
Shooting 4K footage generates a LOT of data, especially when shooting at high frame rates. The RED EPIC shoots up to 120fps in 4K and 300fps in 2K widescreen. In order to keep up with the data being generated, the RED EPIC camera records to REDMAG SSD drives at up to ~150 MB/s. At the extreme, this means you can fill up a 250 GB after only 28 minutes of recording time! This 4K RAW footage also requires tremendous computational horsepower in order to transcode it for viewing or when rendering and output file. 4K digital cinema is not a light-weight computational task by any means.
RED knew that it would take an end-to-end approach to hardware and software in order to gain adoption for their new technology. This end-to-end approach has translated into many custom camera and post-production hardware components, deep software integration, and even the HP Z820 RED Edition PC, a Windows media production powerhouse PC optimized for working with RED footage. Windows offers several advantages for media professionals in this context including 10-bit Display Port support, USB 3.0 connectivity, and the ability to support multiple RED Rocket cards.
On the software side, RED worked closely with Adobe to integrate native support for REDCODE RAW into Adobe CS6, including Premiere Pro CS6. This means you can take R3D files from your RED camera directly into Premiere Pro and edit/preview/render without the need to transcode first: a huge time saver. Gone are the days when you need to perform a full transcode or to create proxy files before you can edit and view footage.
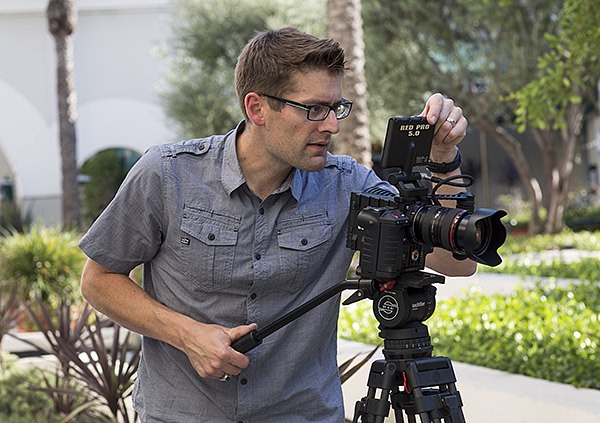
When I was down visiting RED, I was fortunate to have access to a RED EPIC camera with Canon EF lens mount. With this camera, you can use Canon EF lenses to shoot video with full aperture and autofocus functionality. When I got my hands on the camera, I wasted no time in starting to shoot with it. I drove a couple blocks away and set up the camera to get started. My first impression of the camera was: “I can’t believe this cinema camera is easy to use”. With an intuitive touch UI on the screen you can easily dial in settings, preview your footage, and monitor exposure with a live RBG histogram.
Shooting with RED EPIC equipped with Canon EF 24-105mm f/4.0 L lens
Later that evening, I went out on the town at night to capture some 4K footage of neon signs at night. The next morning, it was time to give the camera back to the guys at RED, a sad moment. Shooting with the RED EPIC was awesome, and I was really looking forward to examining my footage on a workstation and working with software tools like REDCINE-X and Adobe Premiere Pro CS6. More on that in future posts!


