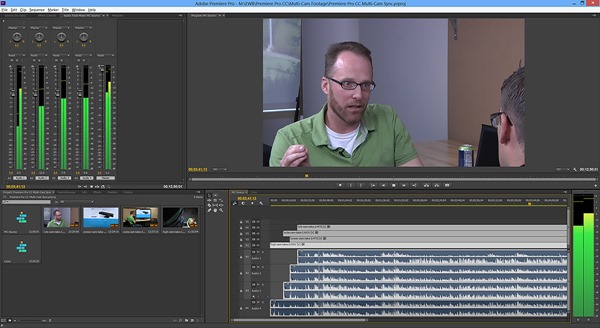
I’ve been using the Adobe CC apps for a while now including a lot of video editing hours in Adobe Premiere Pro CC. In this post I’ll outline some of my favorite updates in Premiere Pro CC that have been useful for me in my daily work.
Enhanced GPU Support
Many creative professionals choose the Windows platform because of the amazing selection of powerful hardware that’s available. One of the most important aspects of a video editing PC is the graphics hardware, and there’s a lot of great graphics options to choose from when you’re running Windows. Premiere Pro has been taking advantage of accelerated graphics support since the CS5 release and Premiere Pro CC takes accelerated video editing to the next level.
Premiere Pro CC GPU support updates include:
- A wider selection of supported GPUs including many AMD GPUs
- Multi-GPU support
- Ability to enable non-certified GPUs from Premiere Pro CC UI
Running Adobe certified GPU hardware on Windows is the best option if you want to have the most stable configuration possible. For Premiere Pro CC, the certified GPU list for Windows (see Adobe Premiere Pro CC Tech Specs) has grown to over 100 different GPU models! This means you can choose from any graphics hardware represented in this list and know that it has been thoroughly tested by Adobe. If you are running GPU hardware that’s not on the certified list you can still easily enable it (in most cases) in the projects settings dialog. If you do so, you’ll receive a warning that you may encounter issues. I’ve run several “unsupported” configurations with various versions of Adobe Premiere Pro in the past and have yet to encounter any serious stability issues on Windows. If you have questions about how well your GPU will work with Premiere Pro CC, you can always download the Premiere Pro CC trial version and install it on your PC so that you can be sure of how it will perform.
Adobe Premiere Pro CC uses GPU offload for effects while previewing footage and also while rendering footage. Since I typically run at least 3 effects on the footage I’m working with, this hardware acceleration is a very useful feature for me. In order to see how Premiere Pro CC takes advantage of single and multi-GPU setups I decided to inspect GPU activity while working with some effects-laden 4K RED footage.
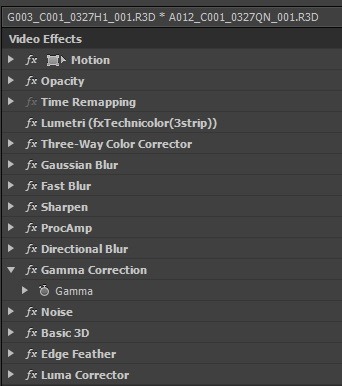
For the following tests, I created a Premiere Pro CC project with a 4K timeline containing a 13 minute long RED 4K clip and the following 14 effects:
Most of these effects are GPU accelerated, and many of them are very compute-intensive. The perfect test to inspect GPU offload with!
Test 1: AMD 7970 Graphics Card
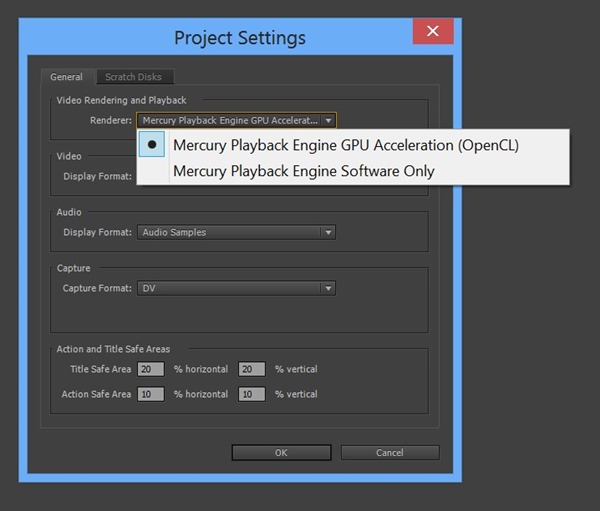
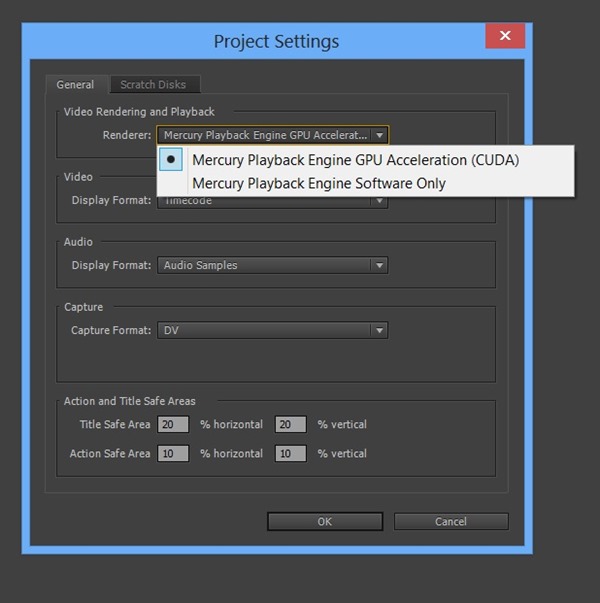
I created this project on a Windows 8 PC with one of the newly certified cards for Adobe Premiere Pro CC: the AMD 7970. Before running any tests, I verified that Mercury Playback was enabled with the 7970:
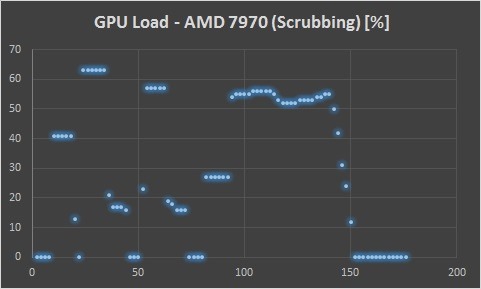
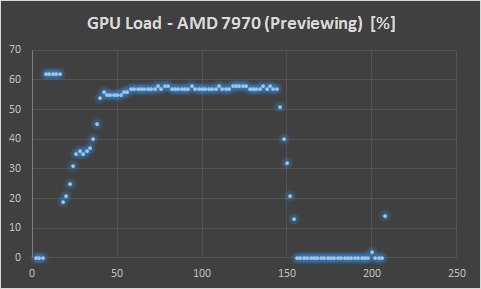
Using GPU-Z, I captured GPU utilization data for three different activities: scrubbing footage, previewing footage, and rendering output files. Here you can see graphs of the resultant GPU utilization:
On the left side of the above graph you can see periodic scrubs with pauses in between. On the right-hand side you can see how the GPU is used when constantly scrubbing footage quickly. Without this GPU acceleration, the user experience would be disrupted and scrubbing would appear choppy.
In the next graph you can see how GPU utilization ramps up when previewing is started, and how it ramps down when previewing is paused:
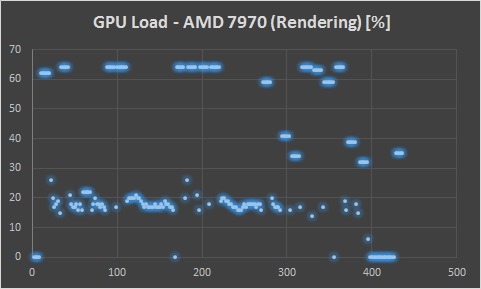
Rendering is a different story. In the graph below you can see that rendering effects is not the “bottleneck” for rendering on my test machine. Periodic bursts of GPU utilization illustrate how effect processing occurs in bursts while disk IO or CPU catches up:
You can see here in these graphs that Premiere Pro CC is making good use of the 2048 cores on the AMD 7970 GPU while working with effects in the timeline and while rendering footage that uses effects.
Test 2: NVIDIA GTX 690 Graphics Card
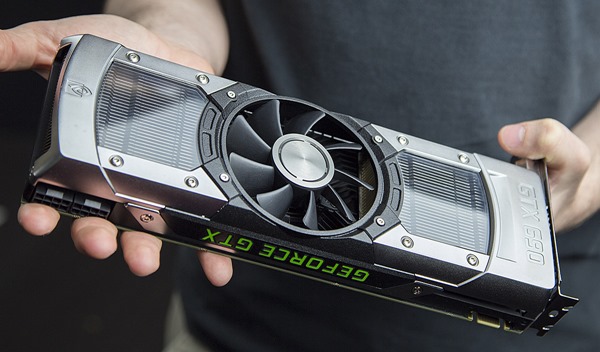
In order to test multi-GPU support in Premiere Pro CC, I loaded up the same RED 4K project on another machine where I’m running an NVIDIA GeForce GTX 690 dual-GPU graphics card (two GTX 680 GPUs on one graphics card).
In addition to the GTX 690, this machine was also equipped with a RED ROCKET card which is fully supported for hardware accelerated REDCODE RAW decode in Premiere Pro CC.
Just like the AMD 7970 card, the NVIDIA GeForce GTX 690 card is on the certified cards list for Premiere Pro CC:
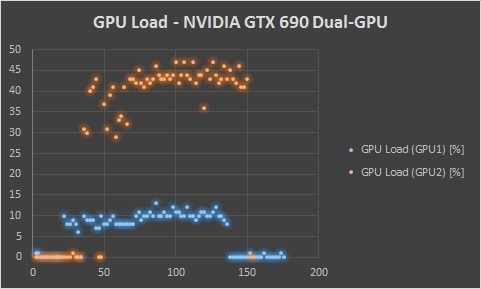
For this test, I captured GPU utilization for each of the two GPUs while previewing the effect-laden footage in Premiere Pro CC on the timeline. The results show that both GPUs are being utilized, and that there’s still plenty of GPU capacity for additional effects:
The enhanced GPU support in Premiere Pro CC is one of the most exciting new features, but there are many other updates that I’m really enjoying as well.
Multi-cam Audio Sync
Since I do a lot of multi-cam shoots, multi-cam editing is something I do a lot. Multi-cam editing typically takes the majority of the time I spend producing each video I work on. Anything that can help multi-cam workflow is something I’m interested in!
For Premiere Pro CC, Adobe added a feature that automatically performs one of the most time consuming tasks in a multi-cam editing session: synchronizing the clips from each camera based on audio. My method for this used to consist of aligning audio peaks from a hand clap, but that’s no longer necessary with Premiere Pro CC!
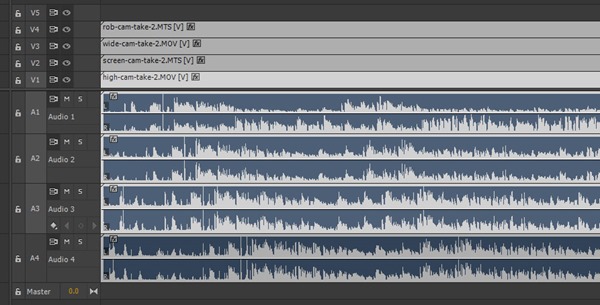
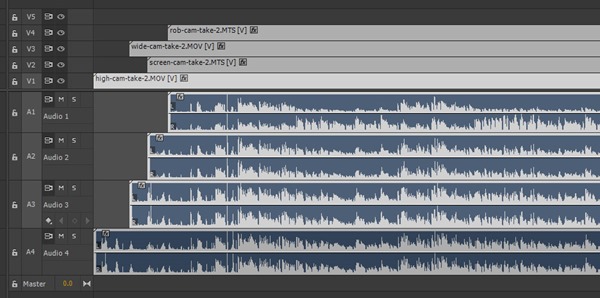
In Premiere Pro CC you start by creating a sequence and adding the corresponding clips from each camera. For a 4-cam shoot, the timeline will look something like this:
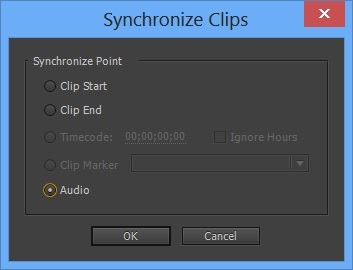
Notice how the audio waveforms at the bottom are not aligned. This is because the cameras were not started at the exact same time. In Premiere Pro CC you can synchronize these clips by selecting them, right clicking, and selecting audio sync as shown here:
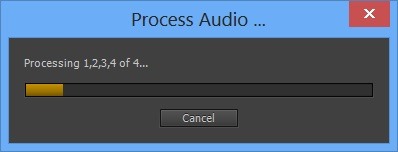
When you click “OK” the clips are analyzed and synchronized.
When this process finishes you end up with a sequence containing clips that are perfectly synchronized based on the audio tracks as shown here:
Now that’s a lot quicker than manual synchronization, and there’s no add-ins or other 3rd party software required. Awesome.
Paste Attributes Options
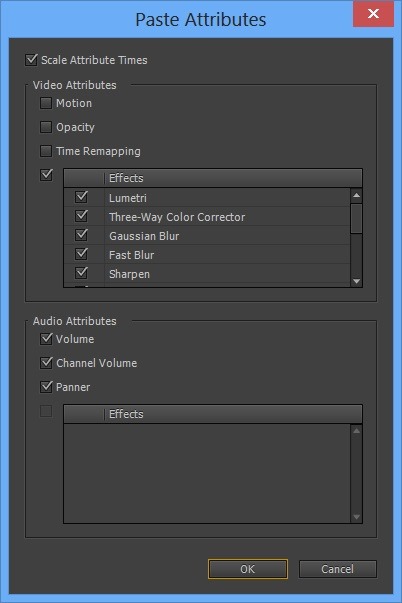
One super quick way to migrate settings from one clip to another in your project is to copy the first clip and to past the attributes to the second clip. I find myself doing this all the time because it saves time and you don’t need to worry about saving or managing templates. But what if you want to paste color correction attributes but not the scale attributes? In Premiere Pro CC there’s an easy way to selectively choose what you want to apply when pasting clip attributes, it’s called the “Paste Attributes Dialog”:
As you can see in this dialog, you have full control over both the video and the audio attributes that will get applied to the target clip. This is another great time saver that you can look forward to in Premiere Pro CC.
Lumetri Deep Color Engine
Color grading is one of the most important activities in video post-production. Premiere Pro CC has some great new color correcting capabilities, including support for the Lumetri deep color engine that is a part of Adobe SpeedGrade. Now you can use presets, custom looks and LUTs (Look-Up Tables) created in SpeedGrade right from Premiere Pro CC.
I’ll show you how this works by showing a clip before and after a Lumetri effect was applied. This effect is using a pre-defined look that’s included with Premiere Pro CC.
Before Lumetri effect:
And after “drop-in” Lumetri Cine-Style effect was applied:
If you use both SpeedGrade and Premiere Pro CC, this capability enables maximum productivity and creative latitude when working with footage in post-production. While this example illustrates how to apply a “look”, there are many other uses for the Lumetri effect like applying LUTs. Another great thing about Lumetri: it’s fully hardware accelerated, so it won’t slow down your editing experience!
There are many other new features I could talk about in Premiere Pro CC, but I don’t have space here. Running Premiere Pro CC on Windows 8 has been great, and if you’d like to know more, check out the following resources:
Find me on twitter here: @GavinGear

