

Enter Spatial Audio, a set of ground breaking technologies originally created by Microsoft for HoloLens and now being exposed to Universal Windows Platform (UWP) and Unity apps.
The underlying “technique” of Spatial Audio is mapping how audio reaches each ear and how headshape, ear contours, the inner ear and the brain make sense of this audio to determine the 3D source of a sound. Audio is then “positioned” for each ear, unique to its physical orientation. This is known as “binaural audio.” In many ways, binaural audio mirrors the various illusions used in the HoloLens to create the impression that digital objects seen through the device have a physical location.
Read on for a bit more on the theories behind spatial audio, as well as a how-to on enabling spatial audio in your app.
Think of this as a lesson in some very technologically advanced ventriloquism!
What you will need
- Stereo headset. To get the most out of Spatial Audio, you will first need a headset. Spatial audio is made to project binaural sound into your ears from an audio headset in order to create the illusion of directional audio.
- Visual Studio 2015 Update 3. Visual Studio 2015 Update 3 (and above) will ensure that you have the latest bits to work with.
- Spatial Audio Samples on GitHub. The Spatial Audio Samples on GitHub will give you tons of information and useful code to walk through.
A little bit of theory: Understanding HRTFs
Understanding how position impacts the sounds that reach our ears is key to spatializing audio within your app.

HRTF stands for head-related transfer function, and is a representation of how sound reaches either ear. A pair of HRTFs provides enough information for the human brain to determine the direction, elevation, and distance of an audio source. As the listener’s head moves, the HRTFs likewise change, providing additional information to help eliminate an audio phenomenon known as front-back confusion while also improving elevation perception.
Next, we’ll run through the steps to position an audio source via audio node emitters.
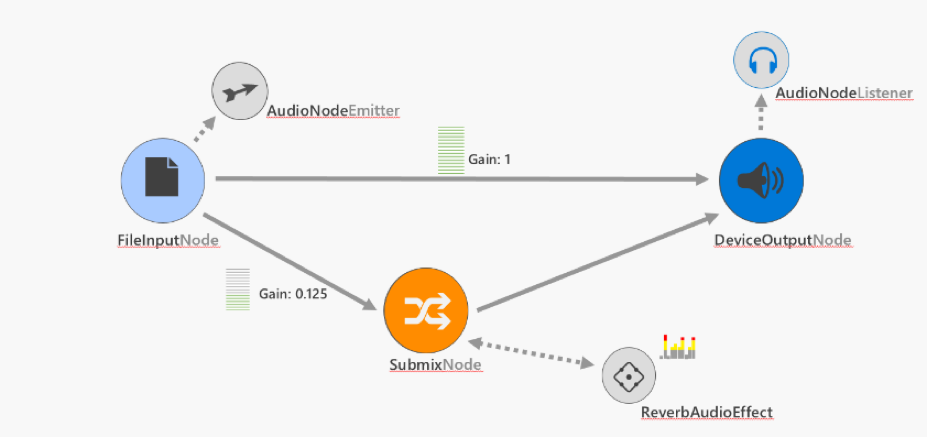
The foundation: Audio Graphs
Spatial Audio is built atop the Windows 10 AudioGraph API and is available in the AudioGraph 1.1 API. The AudioGraph 1.0 API provided a set of classes to combine audio nodes in a workflow for audio routing and mixing.
The AudioGraph 1.1 API adds the AudioNodeEmitter and AudioNodeListener classes. These allow you to position both the audio source as well as the audio listener in 3-dimensional space relative to one another. Interestingly, you can have many audio emitters but only one listener.
By way of illustration, this sample code from the SpatialSphereDemo illustrates the creation of multiple audio sources that can be used as emitters in the same app with the first argument, a Vector3 class establishing the emitter’s location; the second argument, specifying an audio file to play; the third, audio gain.
[code lang=”csharp”]
private SpatialSoundSource[] _spatialSounds = new SpatialSoundSource[] {
//Go around the sphere horizontally
// Left-/Right+,Up+/Down-,Front-/Back+
new SpatialSoundSource (new Vector3( 0f, -1f, -4f), "Files/Audio/FrontPosition.wav", 1f, new Point(298d,208d)),
new SpatialSoundSource (new Vector3( 3f, -1f, -3f), "Files/Audio/FrontRightPosition.wav", 1f, new Point(417d,215d)),
new SpatialSoundSource (new Vector3( 4f, -1f, 0f), "Files/Audio/RightPosition.wav", 1f, new Point(543d,270d)),
new SpatialSoundSource (new Vector3( 3f, -1f, 3f), "Files/Audio/RearRightPosition.wav", 1f, new Point(417d,347d)),
new SpatialSoundSource (new Vector3(-3f, -1f, 3f), "Files/Audio/RearLeftPosition.wav", 1f, new Point(151d,345d)),
new SpatialSoundSource (new Vector3(-4f, -1f, 0f), "Files/Audio/LeftPosition.wav", 1f, new Point(5d,270d)),
new SpatialSoundSource (new Vector3(-3f, -1f, -3f), "Files/Audio/FrontLeftPosition.wav", 1f, new Point(149d,215d)),
new SpatialSoundSource (new Vector3( 0f, -1f, -4f), "Files/Audio/FrontPosition.wav", 1f, new Point(298d,208d)),
};
[/code]
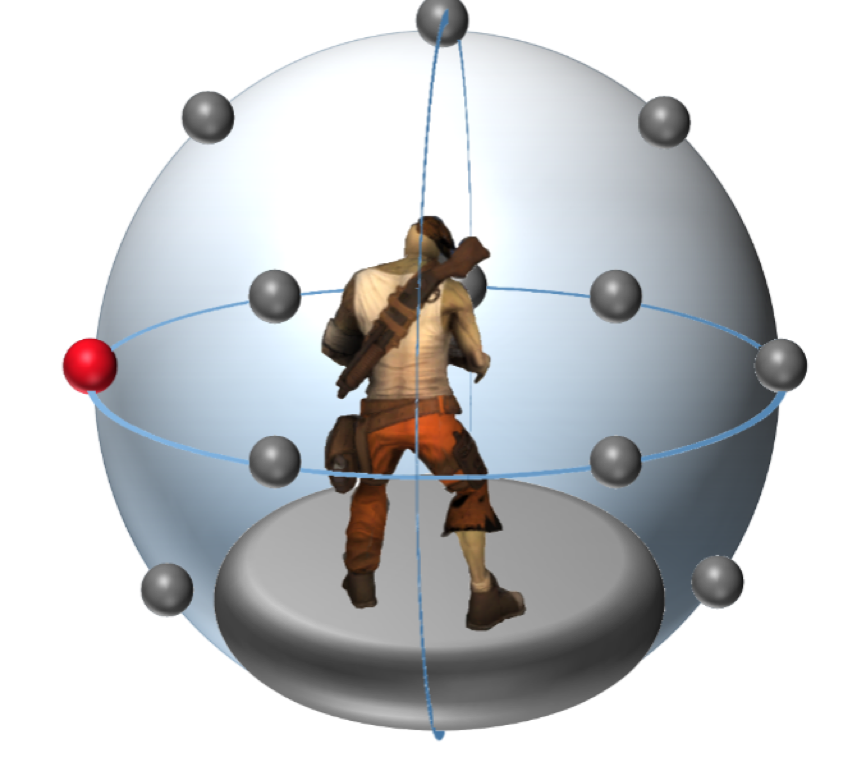
In the full demo, each of those emitters is associated with a ball on the outside of a glass sphere, shown below. As each ball lights up in turn, the audio plays a human voice announcing the location of the red ball while the Spatial Audio technology creates the 3D spatial illusion that the audio is coming from that location with respect to the listener.
A demo: “Hello, World” – in 3D!
The Spatial “Hello, World Demo” provides the clearest example of how to create an audio node emitter. It simply involves creating an audio node, providing it with some characteristics (such as an audio decay model and shape), then providing it with an initial position. Here are the steps to follow:
- Create emitter
- Place emitter in 3D space
- Play an audio file through emitter
[code lang=”csharp”]
// Create the input node
AudioNodeEmitter audioNodeEmitter = new AudioNodeEmitter(AudioNodeEmitterShape.CreateOmnidirectional(),
AudioNodeEmitterDecayModels.CreateOutdoor(),
AudioNodeEmitterSettings.None);
audioNodeEmitter.Position = new Vector3(-220f, 0, -220f);
StorageFile file = await GetAudioFile();
[/code]
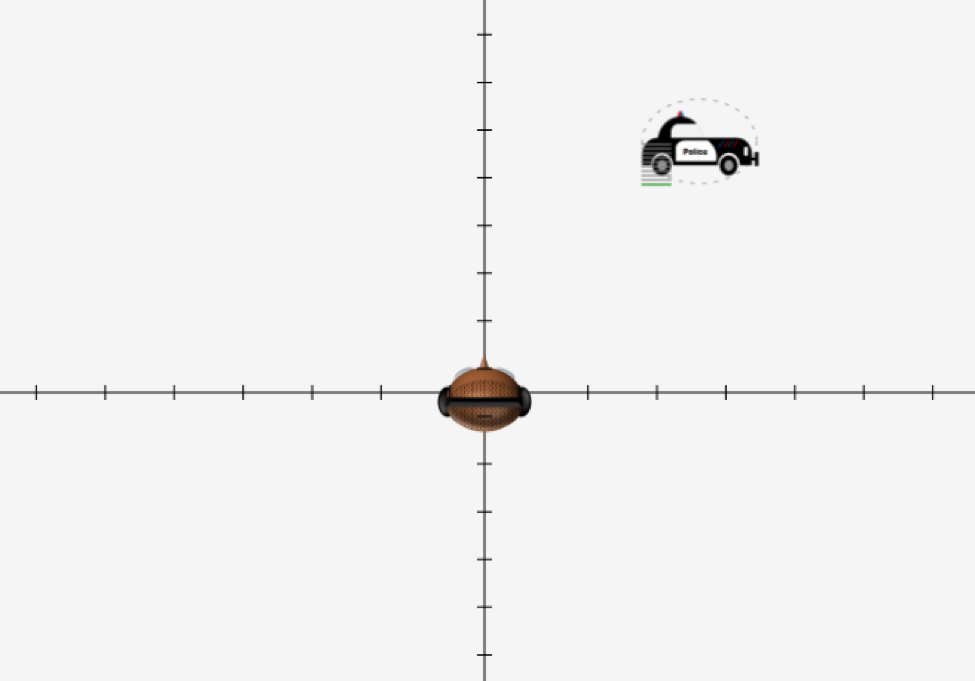
In the full sample, you are able to move the position of the audio node around in order to use the one of the most recognizable directional sound experiences, the Doppler effect (exemplified in the sound variations you hear as a police siren passes by), in order to illustrate how spatial audio works.
Tip: For the best experience, make all spatialized audio files mono and target 48khz audio.
You can test the emitter created above by running the full demo and manually updating the position of the emitter in order to create the Doppler effect as it moves around the listener at X, Y coordinates 0, 0.
Hopefully this demo provides a good overview of audio node positioning, and the impact it has on the user.
Now for an example of implementing this spatialized audio in a game using Unity.
The application: Spatial audio for Unity
Unity3D already supports 3D audio with volume control and panning. However, spatialized audio is a different and more fine-grained technique —it places objects behind you and moving around you.
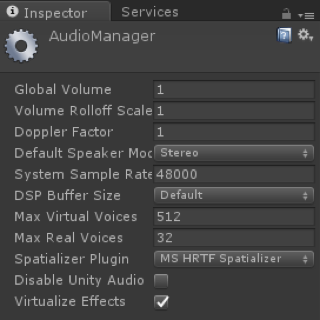
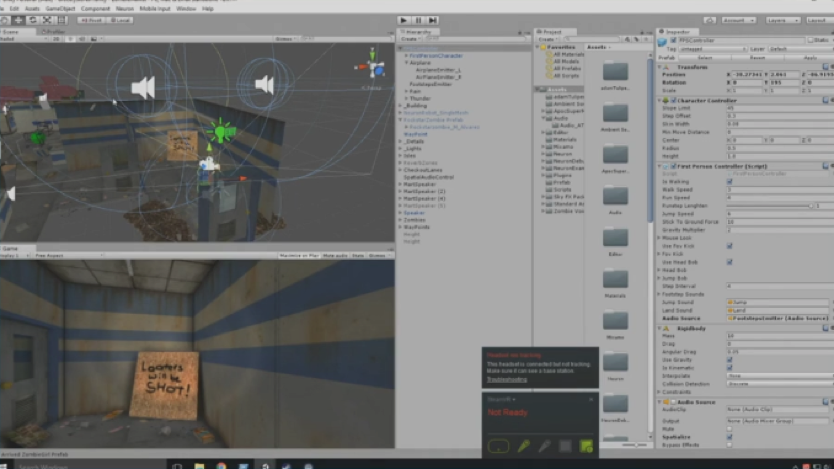
In order to use Spatial Audio in Unity, you will take advantage of the MS HRTF Spatializer plugin. Fortunately, it is already built into certain editions of Unity and all you have to do to enable it is go into Edit > Project Settings > Audio > Spatializer and select MS HRTF Spatializer as your Spatializer, as shown below.
In order to then use Spatial Audio, select your game object with an audio source attached and perform the following three steps:
- Check the Spatialize option.
- Set Spatial Blend to 3D.
- Expand 3D Sound Settings and set Volume Rolloff to Custom Rolloff.
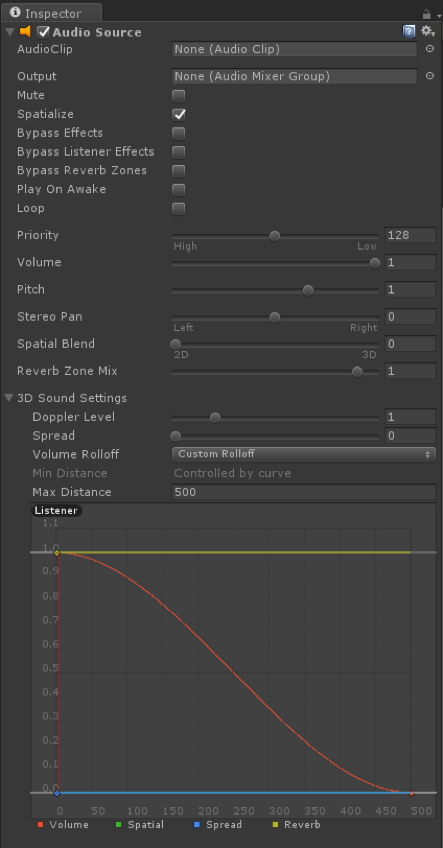
That’s all there is to it! At this point, your audio source is effectively playing from a 3D spatial location.
Wrapping up
You can see a great demo of Spatial Audio in action starting at 20:14 in this Build video, with Microsoft rock stars Adam Tuliper and Steven Wilssens walking you through the feature.
Beyond demos, what are some real-world applications of spatial audio?
As mentioned before, the most immediate and obvious use for Spatial Audio is in mixed reality and virtual reality experiences for devices like the HoloLens. There are also other, subtler ways Spatial Audio can affect our lives. For instance, perhaps one day we will play movies and instead of getting the somewhat makeshift effect of our 5.1 or 7.1 audio system, we’ll be able to get highly accurate positioning of the various sound sources in a film.
Spatial Audio is also the core of music listening. Back in the day, we used to listen to music from large audio speakers that were typically positioned in front of us. Now we listen to music through earbuds, and the audio sources are perpendicular to our heads. Which is “more correct” for enjoying music? If you consider how live performances are set up, the music is actually supposed to be in front of us rather than coming from our flanks. Spatial Audio models can actually alter the sound coming from our headsets so that the direction of the audio emulates stereo speakers positioned in front of us, providing the “correct” sound location even if we prefer not to have physical stereo speakers in our homes.
One of the most stunning applications of Spatial Audio was demonstrated in the keynote at Build this year in the Cities Unlocked project. In this amazing project, Spatial Audio is used to help provide and enhance mobility for the visually impaired.
Finally, Spatial Audio can be used on the Xbox or our desktop computers to improve an extremely common annoyance: muddy audio on audio chat. By separating out different speakers and giving them distinct physical locations with respect to the listener, we are surprisingly able to easily pick out the different voices even when they are speaking at the same time. This could potentially be revolutionary both for online gaming and business.
To learn more about Spatial Audio and related technologies, check out the following links:
- Spatial Audio in UWP Apps and Games
- One dev minute on creating Audio Graphs
- Spatial Audio with AudioGraph in UWP
- Cities Unlocked: tackling mobility challenges with spatial audio
- Microsoft Research’s Spatial Audio project page
- Spatial Audio at HoloLens Academy
- Windows Holographic Spatial Sound Design
- And, for a bit of fun: Nina Conti, world-renowned ventriloquist, performs on “Late Night with Craig Ferguson”
Get started building your own app with spatialized audio via Visual Studio.
The Windows team would love to hear your feedback. Please keep the feedback coming using our Windows Developer UserVoice site. If you have a direct bug, please use the Windows Feedback tool built directly into Windows 10.