

Welcome to the 2nd post of our Xaml Islands deep dive adventure! On the first blog post, we talked a little bit about the history of this amazing feature, how the Xaml Islands infrastructure works and how to use it, and also a little bit of how you can leverage binding in your Island controls.
On this second blog post, we’ll take a quick look on how to use the wrappers NuGet packages and how to host your custom controls inside Win32 Apps.
Wrappers
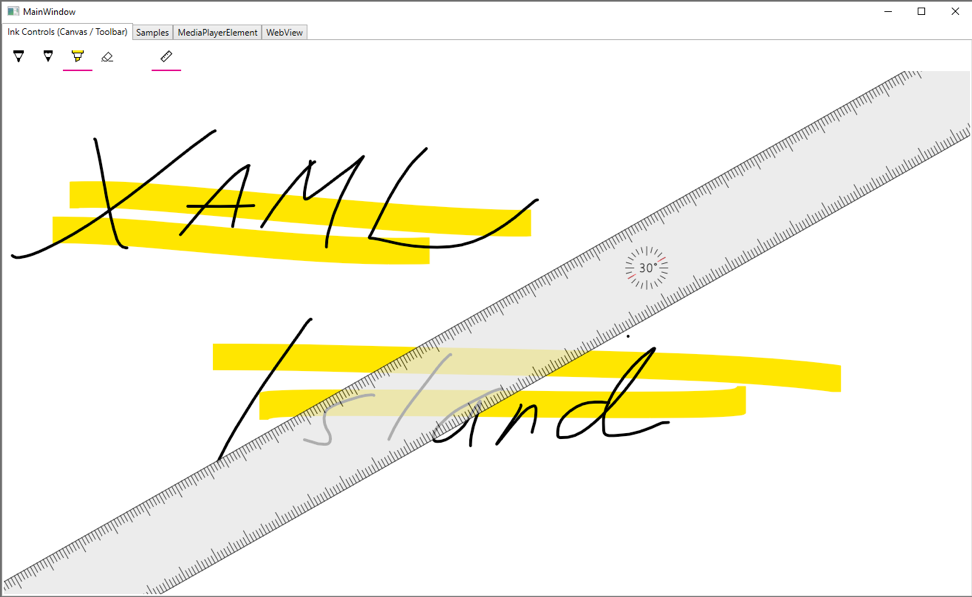
Creating custom wrappers around UWP controls can be a cumbersome task, and you probably don’t want to do that. For simple things such as Buttons, it should be fine, but the moment you want to wrap complex controls, it can take a long time. To make things a little bit less complicated, some of our most requested controls are already wrapped for you! The current iteration brings you the InkCanvas, the InkToolbar, the MapControl and the MediaPlayerElement. So now, if your WPF app is running on a Windows 10 machine, you can have the amazing and easy-to-use UWP InkCanvas with an InkToolbar inside your WPF App (or WinForms)! You could even use the InkRecognizer to detect shapes, letters and numbers based on the strokes of that InkCanvas.
How much code does it take to integrate with the InkCanvas? Not much, at all!
<Window
...
xmlns:uwpControls="clr-namespace:Microsoft.Toolkit.Wpf.UI.Controls;assembly=Microsoft.Toolkit.Wpf.UI.Controls">

<Grid>
<Grid.RowDefinitions>
<RowDefinition Height="Auto"/>
<RowDefinition Height="*"/>
</Grid.RowDefinitions>
<uwpControls:InkToolbar TargetInkCanvas="{x:Reference Name=inkCanvas}"/>
<uwpControls:InkCanvas Grid.Row="1" x:Name="inkCanvas" />
</Grid>
Most of it is just the Grid definition so, in fact, we added very few lines of code (only 2). And that would give your users an amazing experience that is enabled by XAML Islands and the new UWP Controls.
Custom Control – Managed Code
Everything I explained so far is for platform controls, but what if you want to wrap your own custom UWP UserControl and load it using WindowsXamlHost? Would it work? Yes! XAML controls, when instantiated in the context of an Island, handle resources in a very smart way, meaning that the ms-appx protocol just works, even if you are not running you Win32 process inside a packaged APPX. The root of the ms-appx protocol will map its path to your executable path.
As of right now, you can’t just create a UWP Library and reference it on your WPF or WinForms project, so the whole process of using a custom control is manual. When you develop a UWP App (C#, for example) you are compiling using a UWP flavor of the .NET Core Framework, not the .NET Full Framework. In order for your custom control to work on a WPF or WinForms App that is based on the .NET Full Framework, you must recompile the artifacts of the UWP Library using the .NET Full Framework toolset, by coping them to your WPF/WinForms project. There is a very good documentation about this right here that describes all the necessary steps. Remember that your WPF/WinForms project does not target, by default, any specific Windows 10 version, so you need to manually add references to some WinMD and DLLs files. Again, this is all covered in Enhance your desktop application for Windows 10, which describes how to use Windows 10 APIs on your Desktop Bridge Win32 App. By referencing the WinMDs and DLLs, you will also be able to build this compilation artifacts from the UWP Library on the WPF/WinForms project (.NET Full Framework).
NOTE: There is a whole different process for native code (C++/WinRT), which I’m not going to get into the details in this blog post.
You also can’t build these artifacts as-is. You need to inform the build system to disable type information reflection and x:Bind diagnostics. That’s because the generated code won’t be compatible with the .NET Framework. You can make it work by adding these properties to your UWP Library project:
<PropertyGroup>
<EnableTypeInfoReflection>false</EnableTypeInfoReflection>
<EnableXBindDiagnostics>false</EnableXBindDiagnostics>
</PropertyGroup>
Now, you could just manually copy the required files to the WPF/WinForms project, but then you would have multiple copies of it. You can automate that process with a post-build step, just like the documentation does it. If you do it that way though, it will not work if you try to pack your app inside an APPX, because the files will not get copied. To improve that, I created a custom MSBuild snippet that does that for you. The advantage of the Microsoft Build snippet is that is adds the CSharp files as well as the compilation outputs from the library all in the right place. All you must do is copy this script and it will just work.
NOTE: Keep in mind that this will be handled by the Visual Studio in the future, so you’ll have to remove either solution whenever that happens.
This is the snippet:
<PropertyGroup>
<IslandPath Condition="$(IslandPath) == ''">..\$(IslandLibrary)</IslandPath>
<IslandDirectoryName>$([System.IO.Path]::GetFileName($(IslandPath.TrimEnd('\'))))</IslandDirectoryName>
</PropertyGroup>
<ItemGroup>
<IslandLibraryCompile Include="$(IslandPath)\**\*.xaml.cs;$(IslandPath)\obj\$(Configuration)\**\*.g.cs;$(IslandPath)\obj\$(Configuration)\**\*.g.i.cs"/>
</ItemGroup>
<ItemGroup>
<Compile Include="@(IslandLibraryCompile)">
<LinkBase>$(IslandDirectoryName)\%(RecursiveDir)</LinkBase>
</Compile>
</ItemGroup>
<ItemGroup>
<IslandLibraryContent Include="$(IslandPath)\**\*.*" Exclude="$(IslandPath)\**\*.user;$(IslandPath)\**\*.csproj;$(IslandPath)\**\*.cs;$(IslandPath)\**\*.xaml;$(IslandPath)\**\obj\**;$(IslandPath)\**\bin\**"/>
<IslandLibraryContent Include="$(IslandPath)\obj\$(Configuration)\**\*.xbf"/>
</ItemGroup>
<ItemGroup>
<None Include="@(IslandLibraryContent)">
<Link>$(IslandDirectoryName)\%(RecursiveDir)\%(Filename)%(Extension)</Link>
<CopyToOutputDirectory>PreserveNewest</CopyToOutputDirectory>
</None>
</ItemGroup>
This Microsoft Build snippet is copying files, based on the IslandLibrary Property path, to the project where it resides. The IslandLibraryCompile includes:
- All the .xaml.cs files. That will enable you to reuse the code behind of your custom controls.
- All the generated .g.i.cs and .g.cs files. These files are generated files. All that you do under the “x:” prefix, is actually generated code, and this is where this generated code is going after all. So this files are the partial classes that actually hold the fields of all the x:Names inside their corresponding XAML files, and they also hold the code for connecting this fields with their actual instances. They also reference the .XAML file that will be loaded whenever the InitializeComponentmethod is called, usually at the beginning of the control’s constructor. You can look at this as a black box, but it is interesting to understand what is inside these files, but not necessarily how it works. The IslandLibraryContent includes:
- All the content files of your project. That basically will copy all the files required for your project to run, like PNGs, JPGs, etc. It already copies them to the right folders so ms-appx:///will “just work”™. There are better ways of doing this, but this will cover the basic needs of the most common scenarios.
- All the generated .xbf files. XBF stands for XAML Binary Format and it is a compiled version of your .xaml files, they load much faster than the XAML files (no XML parsing, for example). Even though the .g.i.cs files might look like they are trying to load the .xaml files, the XAML infrastructure itself always tries to load the .XBF files first, for performance. Only if it can’t find them they will try to load the .xaml files. This MSBuild script is not copying the .xaml files since they bring no advantage compared to the .XBFs.
To make sure that your developer experience is optimal, you also have to add a solution level project dependency, from the WPF/WinForms project to the UWPLibrary project. This means that whenever you change any of the UWP Library’s files, you can just build the WPF/WinForms project and the newest artifacts are already in place, in the correct order of project compilation. All these steps are going away in a future version of Visual Studio, when the tooling gets updated. There steps are described here at the documentation.
With these files included into the project’s build infrastructure and with the build dependency added, your WindowsXamlHost should work just fine if you set it’s InitialTypeName to your custom control’s fully qualified name. You can checkout the sample project here.
With this MSBuild snippet, even your apps packaged with the “Windows Application Packaging Project” template should work. If you want to know more, checkout this blog post.
October 2018 Limitations
Again, this release is in preview, so nothing you see here is production ready code. Just to name a few:
- Wrapped Controls properly responding to changes in DPI and scale.
- Accessibility tools that work seamlessly across the application and hosted controls.
- Inline inking, @Places, and @People for input controls.
For a complete list, check the docs.
What’s next?
The version just released is not the final stable version, meaning that it is a preview. We’re still actively working on improving Xaml Islands. We would love for you to test out the product and provide feedback on the User Voice or at [email protected], but we currently are not recommending this for production use.