

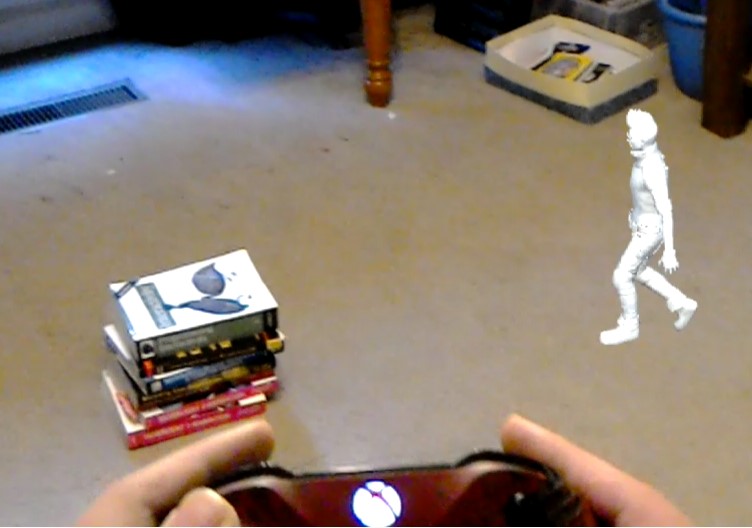
Standard video game conventions undergo a profound change when you put a platformer in a mixed reality environment. First of all, instead of sitting in a chair and moving your character inside your display screen, you physically follow your character as he moves around the real world. Second, the obstacles your protagonist encounters aren’t just digital ones but also physical objects in the real world, like tables and chairs and stacks of books. Third, because every room you play in effectively becomes a new level, the mixed reality platform game never runs out of levels and every level presents unique challenges. Instead of comparing scores for a certain game stage, you will need to compare how well you did in the living room—or in Jane’s kitchen or in Shigeru’s basement.
In this post, you will learn how to get started building a platform game for HoloLens using all free assets. In doing so, you will learn the basics of using Spatial Mapping to scan a room so your player character can interact with it. You will also use the slightly more advanced features of Spatial Understanding to determine characteristics of the game environment. Finally, all of this will be done in the Unity IDE (currently 5.5.0f3) with the open source HoloToolkit.
Creating your game world with Spatial Mapping
How does HoloLens make it possible for virtual objects and physical objects to interact? The HoloLens is equipped with a depth camera, similar to the Kinect v2’s depth camera, that progressively scans a room in order to create a spatial map through a technique known as spatial mapping. It uses this data about the real world to create 3D surfaces in the virtual world. Then, using its four environment-aware cameras, it positions and orients the 3D reconstruction of the room in correct relation to the player. This map is often visualized at the start of HoloLens applications as a web of lines blanketing the room the player is in. You can also sometimes trigger this visualization by simply tapping in the air in front of you while wearing the HoloLens.
To play with spatial mapping, create a new 3D project in Unity. You can call the project “3D Platform Game.” Create a new scene for this game called “main.”
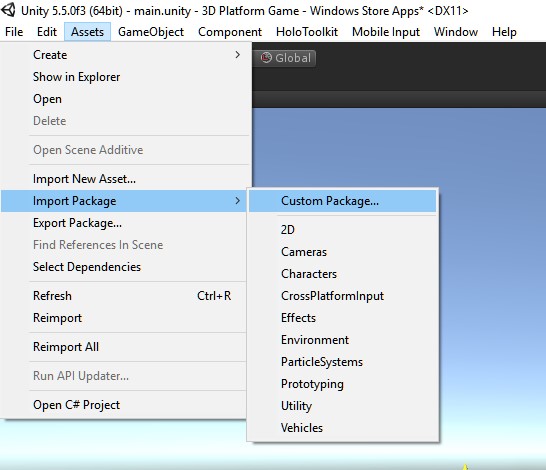
Next, add the HoloToolkit unity package to your app. You can download the package from the HoloToolkit project’s GitHub repository. This guide uses HoloToolkit-Unity-v1.5.5.0.unitypackage. In the Unity IDE, select the Assets tab. Then click on Import Package -> Custom Package and find the download location of the HoloTookit to import it into the scene.
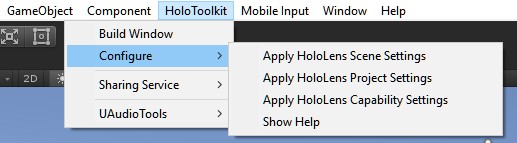
The HoloToolkit provides lots of useful helpers and shortcuts for developing a HoloLens app. Under the HoloToolkit menu, there is a Configure option that lets you correctly rig your game for HoloLens. After being sure to save your scene and project, click on each of these options to configure your scene, your project and your capability settings. Under capabilities, you must make sure to check off SpatialPerception—otherwise spatial mapping will not work. Also, be sure to save your project after each change. If for some reason you would prefer to do this step manually, there is documentation available to walk you through it.
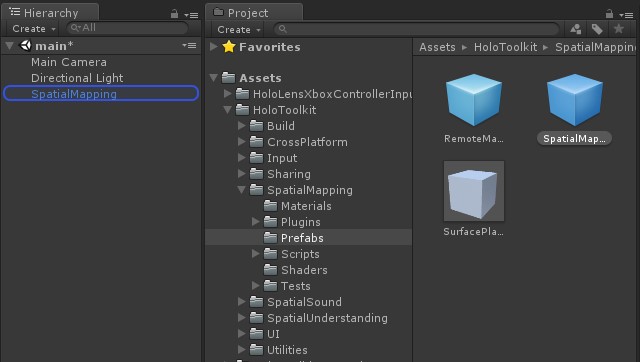
To add spatial mapping functionality to your game, all you need to do is drag the SpatialMapping prefab into your scene from HoloToolkit -> SpatialMapping -> Prefabs. If you build and deploy the game to your HoloLens or HoloLens Emulator now, you will be able to see the web mesh of surface reconstruction occurring.
Congratulations! You’ve created your first level.
Adding a protagonist and an Xbox Controller
The next step is to create your protagonist. If you are lucky enough to have a Mario or a Luigi rigged model, you should definitely use that. In keeping with the earlier promise to use only free assets, however, this guide will use the complimentary Ethan asset.
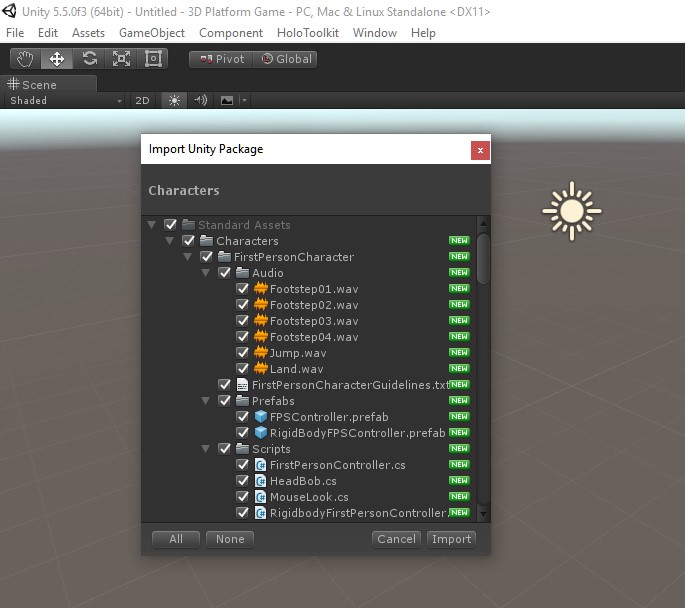
Go to the Unity menu and select Assets -> Import Package -> Characters. Copy the whole package into your game by clicking Import. Finally, drag the ThirdPersonController prefab from Assets -> Standard Assets -> Characters -> ThirdPersonCharacter -> Prefabs into your scene.
Next, you’ll want a Bluetooth controller to steer your character. Newer Xbox One controllers support Bluetooth. To get one to work with HoloLens, you’ll need to closely follow these directions in order to update the firmware on your controller. Then pair the controller to your HoloLens through the Settings -> Devices menu.
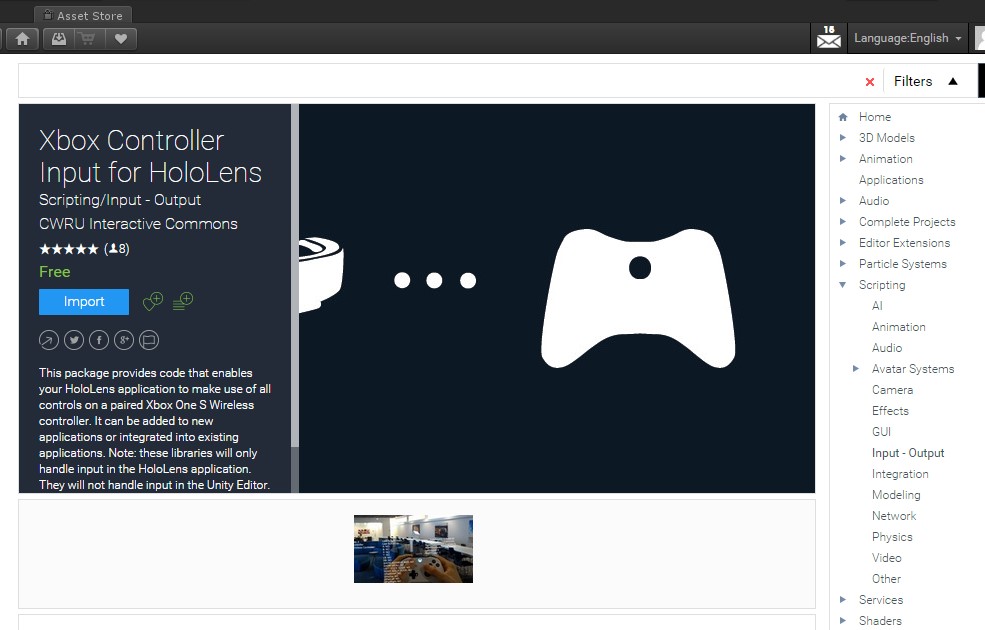
To support the Xbox One controller in your game, you should add another free asset. Open the Asset Store by clicking on Window -> Asset Store and search for Xbox Controller Input for HoloLens. Import this package into your project.
You can this up to your character with a bit of custom script. In your scene, select the ThirdPersonController prefab. Find the Third Person User Control script in the Inspector window and delete it. You’re going to write your own custom Control that depends on the Xbox Controller package you just imported.
In the Inspector window again, go to the bottom and click on Add Component -> New Script. Name your script ThirdPersonHoloLensControl and copy/paste the following code into it:
[code lang=”csharp”]
using UnityEngine;
using HoloLensXboxController;
using UnityStandardAssets.Characters.ThirdPerson;
public class ThirdPersonHoloLensControl : MonoBehaviour
{
private ControllerInput controllerInput;
private ThirdPersonCharacter m_Character;
private Transform m_Cam;
private Vector3 m_CamForward;
private Vector3 m_Move;
private bool m_Jump;
public float RotateAroundYSpeed = 2.0f;
public float RotateAroundXSpeed = 2.0f;
public float RotateAroundZSpeed = 2.0f;
public float MoveHorizontalSpeed = 1f;
public float MoveVerticalSpeed = 1f;
public float ScaleSpeed = 1f;
void Start()
{
controllerInput = new ControllerInput(0, 0.19f);
// get the transform of the main camera
if (Camera.main != null)
{
m_Cam = Camera.main.transform;
}
m_Character = GetComponent<ThirdPersonCharacter>();
}
// Update is called once per frame
void Update()
{
controllerInput.Update();
if (!m_Jump)
{
m_Jump = controllerInput.GetButton(ControllerButton.A);
}
}
private void FixedUpdate()
{
// read inputs
float h = MoveHorizontalSpeed * controllerInput.GetAxisLeftThumbstickX();
float v = MoveVerticalSpeed * controllerInput.GetAxisLeftThumbstickY();
bool crouch = controllerInput.GetButton(ControllerButton.B);
// calculate move direction to pass to character
if (m_Cam != null)
{
// calculate camera relative direction to move:
m_CamForward = Vector3.Scale(m_Cam.forward, new Vector3(1, 0, 1)).normalized;
m_Move = v * m_CamForward + h * m_Cam.right;
}
// pass all parameters to the character control script
m_Character.Move(m_Move, crouch, m_Jump);
m_Jump = false;
}
}
[/code]
This code is a variation on the standard controller code. Now that it is attached, it will let you use a Bluetooth enabled Xbox One controller to move your character. Use the A button to jump. Use the B button to crouch.
You now have a first level and a player character you can move with a controller: pretty much all the necessary components for a platform game. If you deploy the project as is, however, you will find that there is a small problem. Your character falls through the floor.

This happens because, while the character appears as soon as the scene starts, it actually takes a bit of time to scan the room and create meshes for the floor. If the character shows up before those meshes are placed in the scene, he will simply fall through the floor and keep falling indefinitely because there are no meshes to catch him.
How ‘bout some spatial understanding
In order to avoid this, the app needs a bit of spatial smarts. It needs to wait until the spatial meshes are mostly completed before adding the character to the scene. It should also scan the room and find the floor so the character can be added gently rather than dropped into the room. The spatial understand prefab will help you to accomplish both of these requirements.
Add the Spatial Understanding prefab to your scene. It can be found in Assets -> HoloToolkit -> SpatialUnderstanding -> Prefabs.
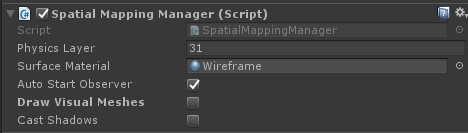
Because the SpatialUnderstanding game object also draws a wireframe during scanning, you should disable the visual mesh used by the SpatialMapping game object by deselecting Draw Visual Mesh in its Spatial Mapping Manager script. To do this, select the SpatialMapping game object, find the Spatial Mapping Manager in the Inspector window and uncheck Draw Visual Mesh.
You now need to add some orchestration to the game to prevent the third person character from being added too soon. Select ThirdPersonController in your scene. Then go to the Inspector panel and click on Add Component -> New Script. Call your script OrchestrateGame. While this script could really be placed anywhere, attaching it to the ThirdPersonController will make it easier to manipulate your character’s properties.
Start by adding HideCharacter and ShowCharacter methods to the OrchestrateGame class. This allows you to make the character invisible until you are ready to add him to the game level (the room).
[code lang=”csharp”]
private void ShowCharacter(Vector3 placement)
{
var ethanBody = GameObject.Find("EthanBody");
ethanBody.GetComponent<SkinnedMeshRenderer>().enabled = true;
m_Character.transform.position = placement;
var rigidBody = GetComponent<Rigidbody>();
rigidBody.angularVelocity = Vector3.zero;
rigidBody.velocity = Vector3.zero;
}
private void HideCharacter()
{
var ethanBody = GameObject.Find("EthanBody");
ethanBody.GetComponent<SkinnedMeshRenderer>().enabled = false;
}
[/code]
When the game starts, you will initially hide the character from view. More importantly, you will hook into the SpatialUnderstanding singleton and handle it’s ScanStateChanged event. Once the scan is done, you will use spatial understanding to correctly place the character.
[code lang=”csharp”]
private ThirdPersonCharacter m_Character;
void Start()
{
m_Character = GetComponent<ThirdPersonCharacter>();
SpatialUnderstanding.Instance.ScanStateChanged += Instance_ScanStateChanged;
HideCharacter();
}
private void Instance_ScanStateChanged()
{
if ((SpatialUnderstanding.Instance.ScanState == SpatialUnderstanding.ScanStates.Done) &&
SpatialUnderstanding.Instance.AllowSpatialUnderstanding)
{
PlaceCharacterInGame();
}
}
[/code]
How do you decide when the scan is completed? You could set up a timer and wait for a predetermined length of time to pass. But this might provide inconsistent results. A better way is to take advantage of the spatial understanding functionality in the HoloToolkit.
Spatial understanding is constantly evaluating surfaces picked up by the spatial mapping component. You will set a threshold to decide when you have retrieved enough spatial information. Every time the Update method is called, you will evaluate whether the threshold has been met, as determined by the spatial understanding module. If it is, you call the RequestFinishScan method on SpatialUnderstanding to get it to finish scanning and set its ScanState to Done.
[code lang=”csharp”]
private bool m_isInitialized;
public float kMinAreaForComplete = 50.0f;
public float kMinHorizAreaForComplete = 25.0f;
public float kMinWallAreaForComplete = 10.0f;
// Update is called once per frame
void Update()
{
// check if enough of the room is scanned
if (!m_isInitialized && DoesScanMeetMinBarForCompletion)
{
// let service know we’re done scanning
SpatialUnderstanding.Instance.RequestFinishScan();
m_isInitialized = true;
}
}
public bool DoesScanMeetMinBarForCompletion
{
get
{
// Only allow this when we are actually scanning
if ((SpatialUnderstanding.Instance.ScanState != SpatialUnderstanding.ScanStates.Scanning) ||
(!SpatialUnderstanding.Instance.AllowSpatialUnderstanding))
{
return false;
}
// Query the current playspace stats
IntPtr statsPtr = SpatialUnderstanding.Instance.UnderstandingDLL.GetStaticPlayspaceStatsPtr();
if (SpatialUnderstandingDll.Imports.QueryPlayspaceStats(statsPtr) == 0)
{
return false;
}
SpatialUnderstandingDll.Imports.PlayspaceStats stats = SpatialUnderstanding.Instance.UnderstandingDLL.GetStaticPlayspaceStats();
// Check our preset requirements
if ((stats.TotalSurfaceArea > kMinAreaForComplete) ||
(stats.HorizSurfaceArea > kMinHorizAreaForComplete) ||
(stats.WallSurfaceArea > kMinWallAreaForComplete))
{
return true;
}
return false;
}
}
[/code]
Once spatial understanding has determined that enough of the room has been scanned to start the level, you can use spatial understanding one more time to determine where to place your protagonist. First, the PlaceCharacterInGame method, show below, tries to determine the Y coordinate of the room floor. Next, the main camera object is used to determine the direction the HoloLens is facing in order to find a coordinate position two meters in front of the HoloLens. This position is combined with the Y coordinate of the floor in order to place the character gently on the ground in front of the player.
[code lang=”csharp”]
private void PlaceCharacterInGame()
{
// use spatial understanding to find floor
SpatialUnderstandingDll.Imports.QueryPlayspaceAlignment(SpatialUnderstanding.Instance.UnderstandingDLL.GetStaticPlayspaceAlignmentPtr());
SpatialUnderstandingDll.Imports.PlayspaceAlignment alignment = SpatialUnderstanding.Instance.UnderstandingDLL.GetStaticPlayspaceAlignment();
// find 2 meters in front of camera position
var inFrontOfCamera = Camera.main.transform.position + Camera.main.transform.forward * 2.0f;
// place character on floor 2 meters ahead
ShowCharacter(new Vector3(inFrontOfCamera.x, alignment.FloorYValue, 2.69f));
// hide mesh
var customMesh = SpatialUnderstanding.Instance.GetComponent<SpatialUnderstandingCustomMesh>();
customMesh.DrawProcessedMesh = false;
}
[/code]
You complete the PlaceCharacterInGame method by making the meshes invisible to the player. This reinforces the illusion that your protagonist is running into and jumping over objects in the real world. The last thing needed to finish this game, level design, is something that is unfortunately too complex to cover in this platform.
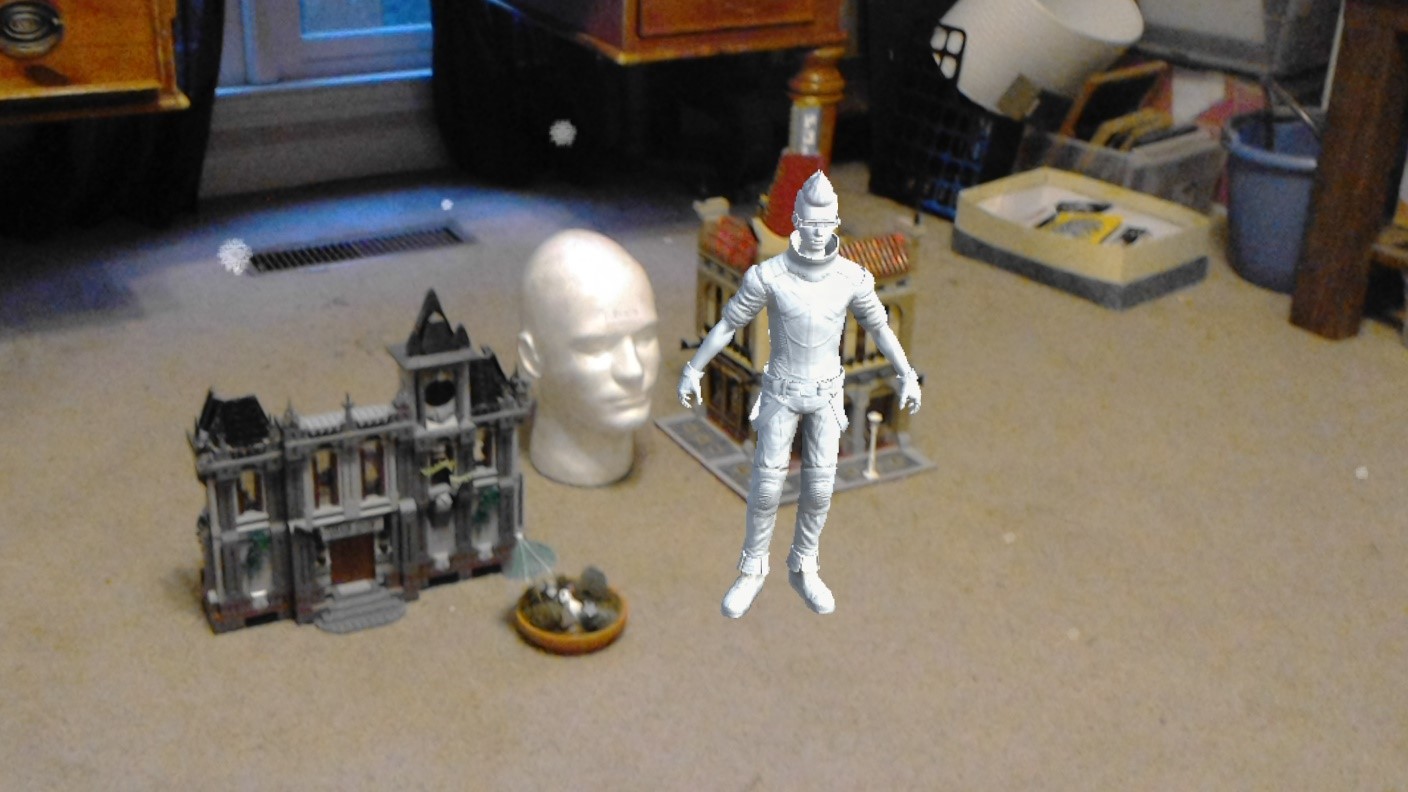
Because this platform game has been developed in mixed reality, you have an interesting choice to make, however, as you design your level. You can do level design the traditional way using 3D models. Alternatively, you can also do it using real world objects which the character must run between and jump over. Finally, the best approach may involve even mixing the two.
Conclusion
To paraphrase Shakespeare, all the world’s a stage and every room in it is a level. Mixed reality has the power to create new worlds for us—but it also has the power to make us look at the cultural artifacts and conventions we already have, like the traditional platform game, in entirely new ways. Where virtual reality is largely about escapism, the secret of mixed reality may simply be that it makes us appreciate what we already have by giving us fresh eyes with which to look at them.